How to Use the 2D & 3D Dental Chart in Invent Medical
Learn how to open a patient's dental chart, navigate the interactive 3D tooth model, log procedures, review them by tooth, document tooth presence and dentition, add supernumerary teeth, reposition teeth, and annotate the 2D chart.
Overview & Layout
The Dental Chart gives dentists and dental clinic staff an interactive 2D and 3D view of a patient's teeth. Staff can switch freely between 2D and 3D views, assign procedures directly onto the chart, and see every procedure color-coded by status so a patient's treatment history is easy to review at a glance.
The chart is organized around a few key areas:
- 3D Teeth Chart viewer — the interactive model, with controls for rotation, mouth opening, and view angle.
- Selection Mode & Display Options toolbar — controls how teeth are selected and what's visible on the chart.
- Add Procedures panel — where procedures are logged against a selected tooth.
- Tooth Procedures tab — a filtered list of procedures for the whole chart or a single tooth.
- Presence & Dentition tab — where a tooth's presence, dentition stage, and size/position are documented.
- Supernumerary Tooth tab — for logging extra teeth.
- Teeth Movements tab — for fine-tuning a tooth's position.
- 2D Chart Annotation toolbar — for free-form notes and markers on a flat chart view.
Together, these give clinical staff a fast, visual way to document and track dental treatment for every patient.
Step-by-Step Process
Opening a Patient's Dental Chart
Step 1: Open the Chart Library
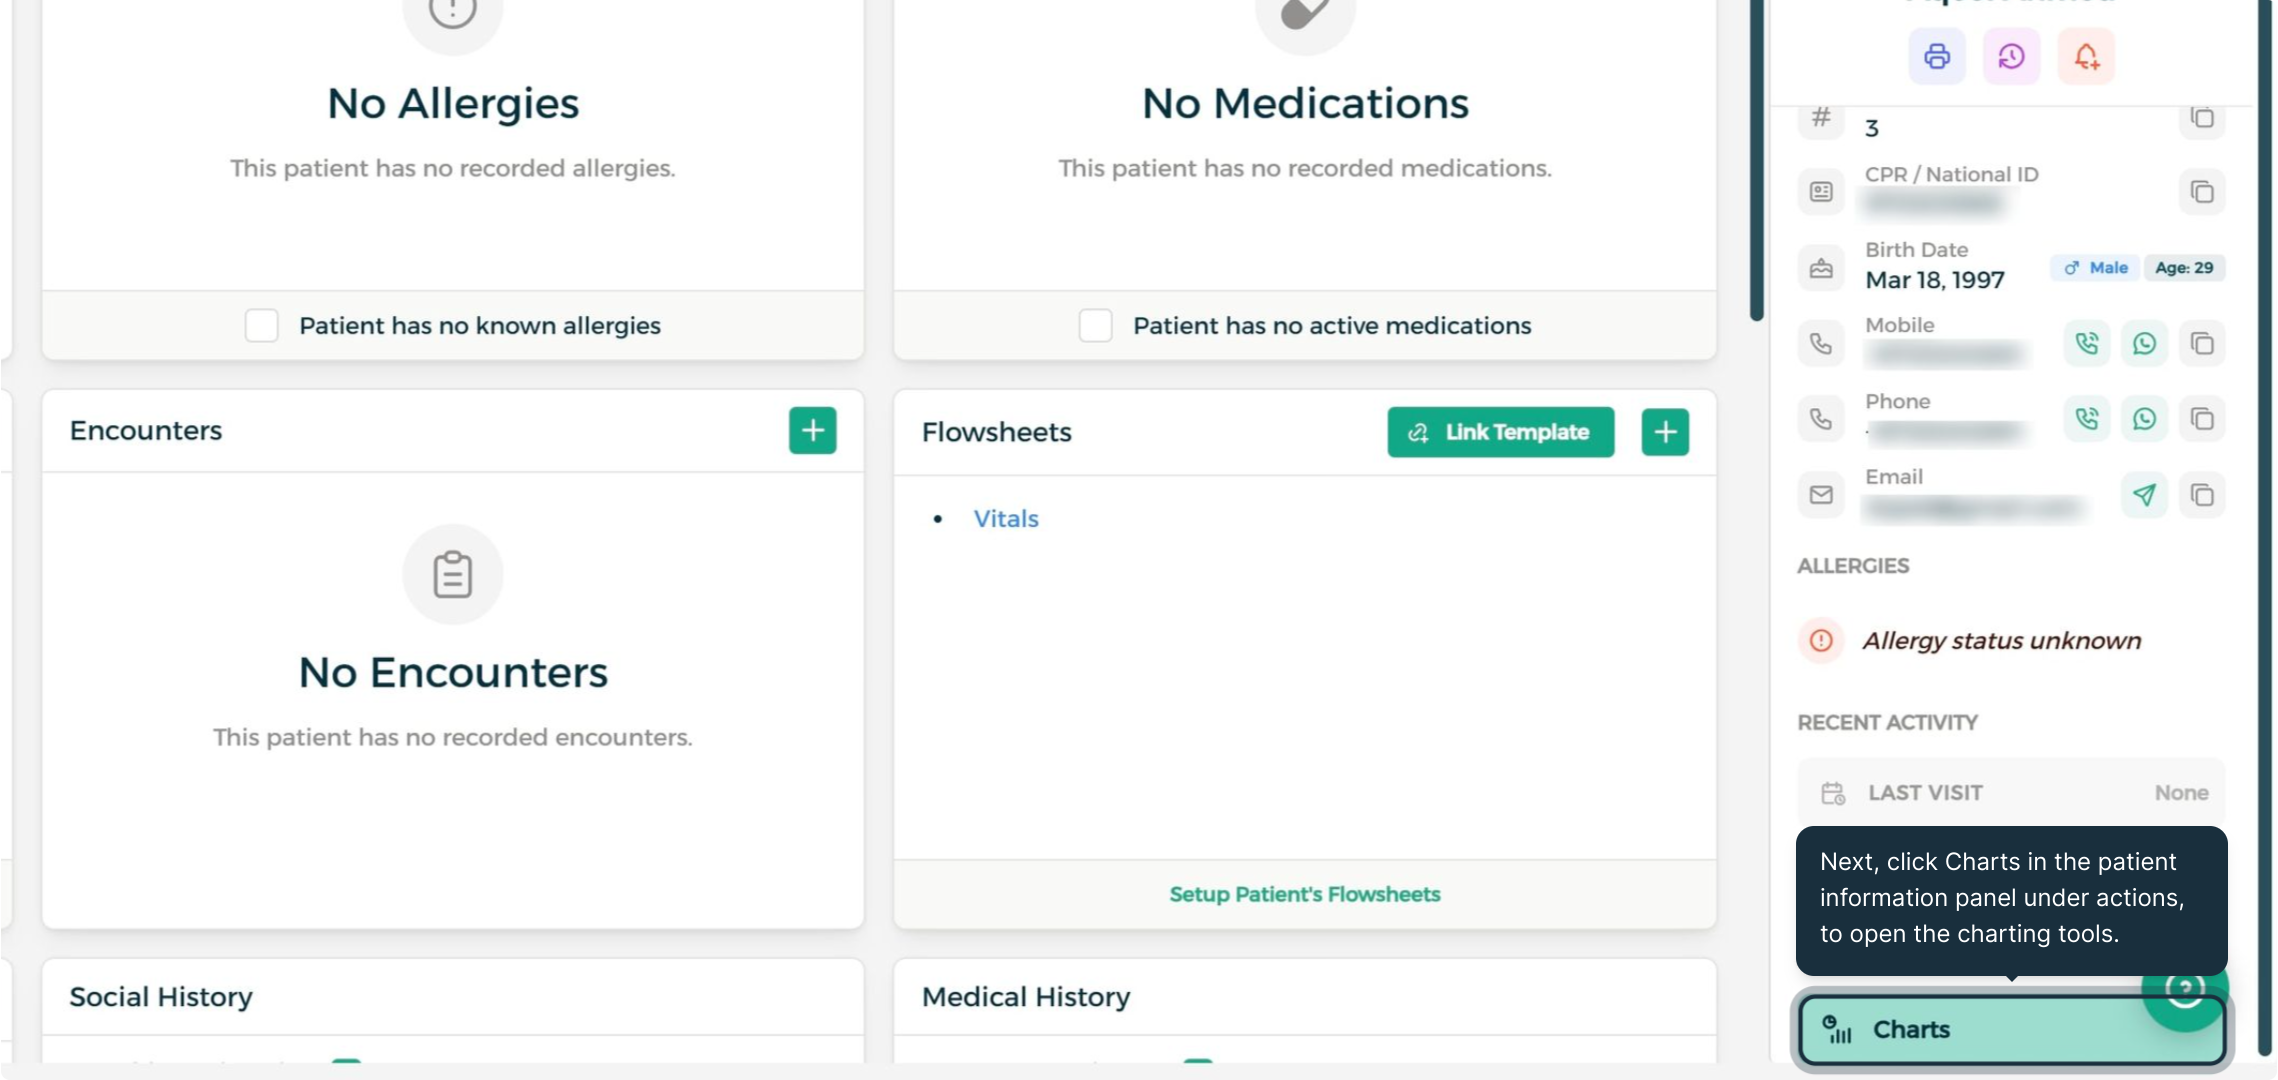
From the Patient Profile, open the Actions panel and click Charts to bring up the charting tools for this patient, then click Select a Chart to view the available charts.
Step 2: Select the Teeth Chart
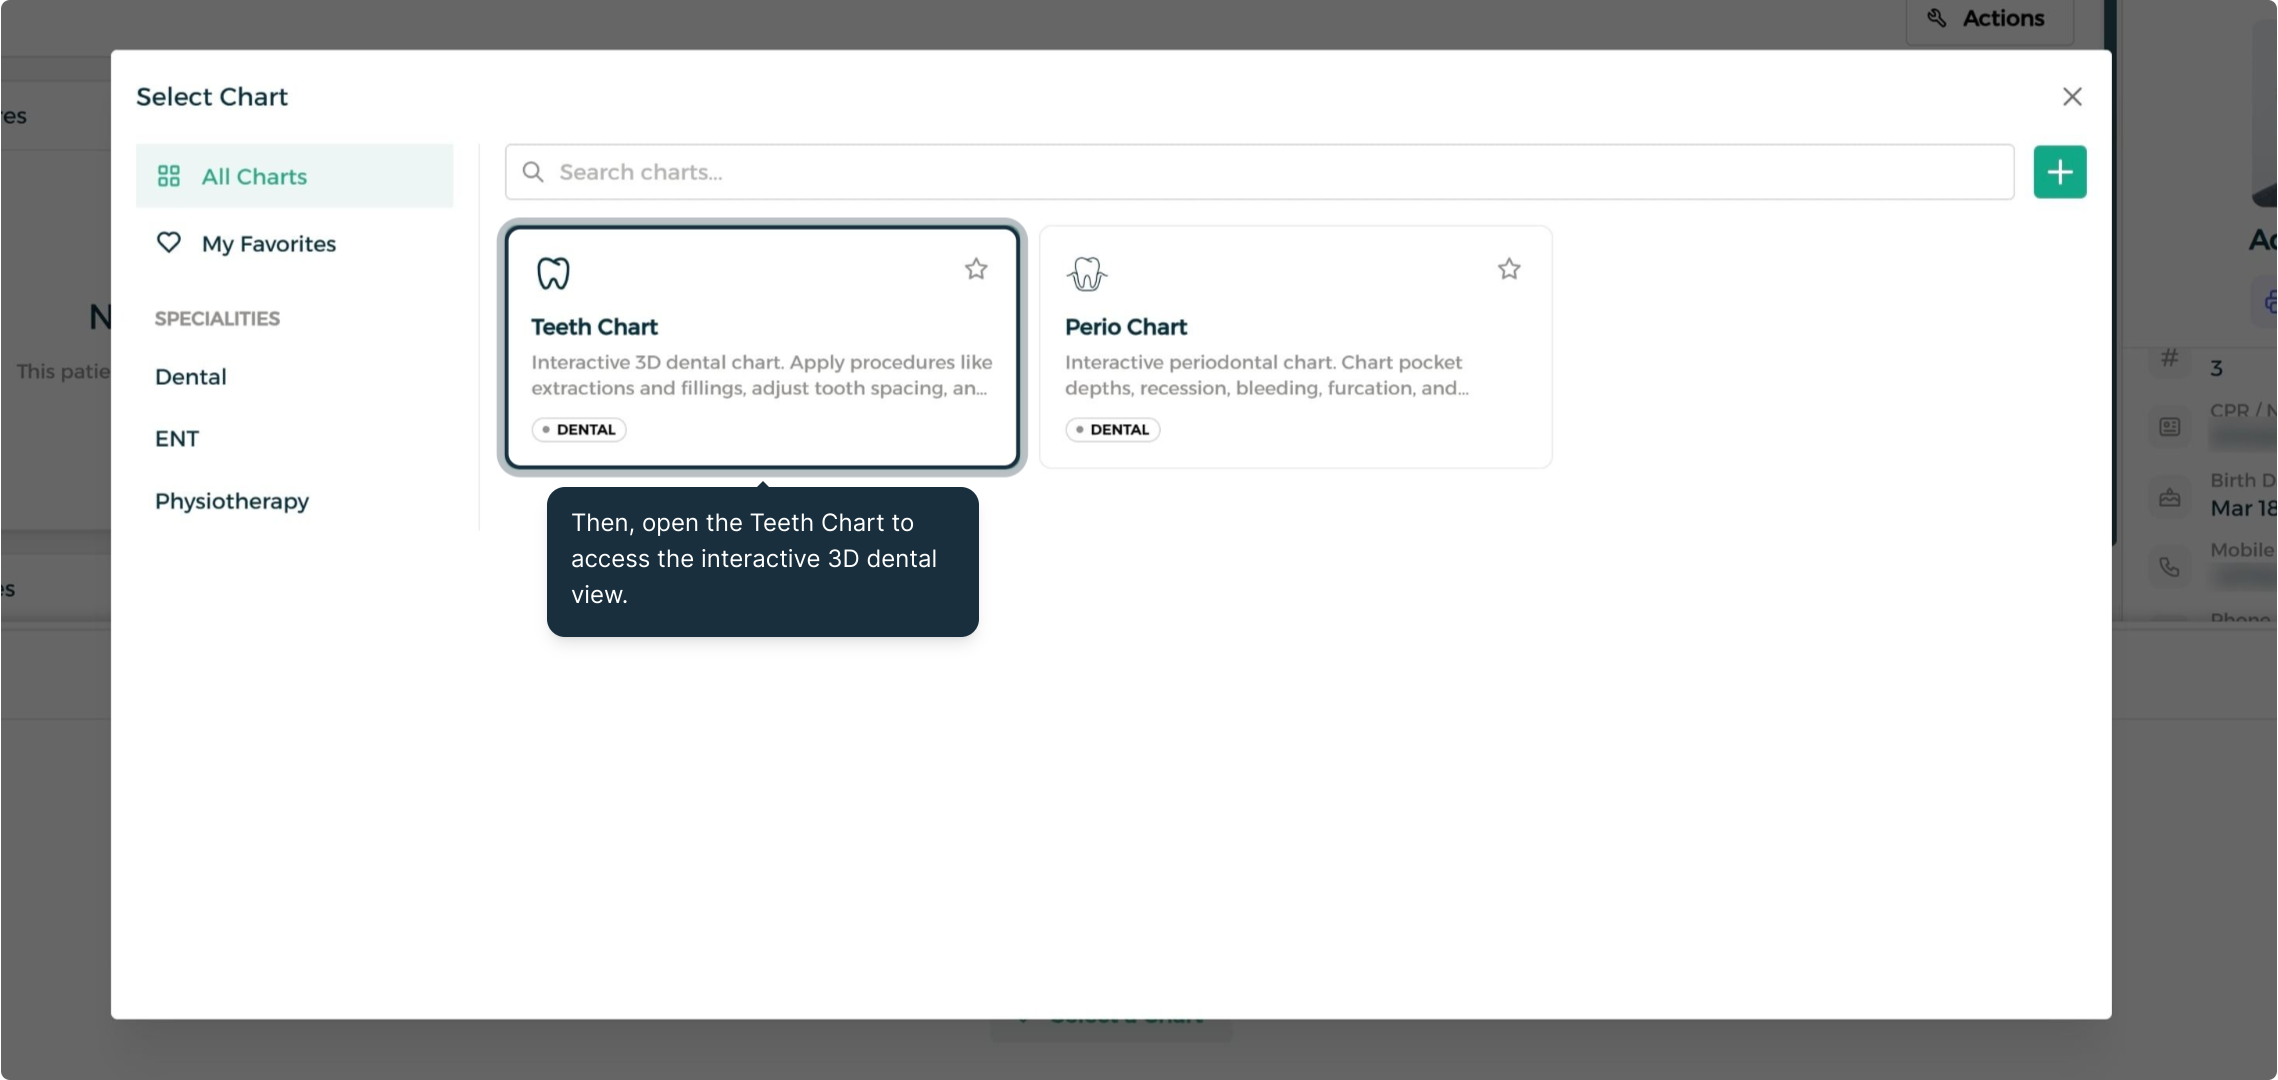
Choose the Teeth Chart from the chart library to open the interactive 3D dental view.
Navigating the 3D Dental Model
Once the Teeth Chart is open, click and drag anywhere on the model to rotate it and view the teeth from any angle.
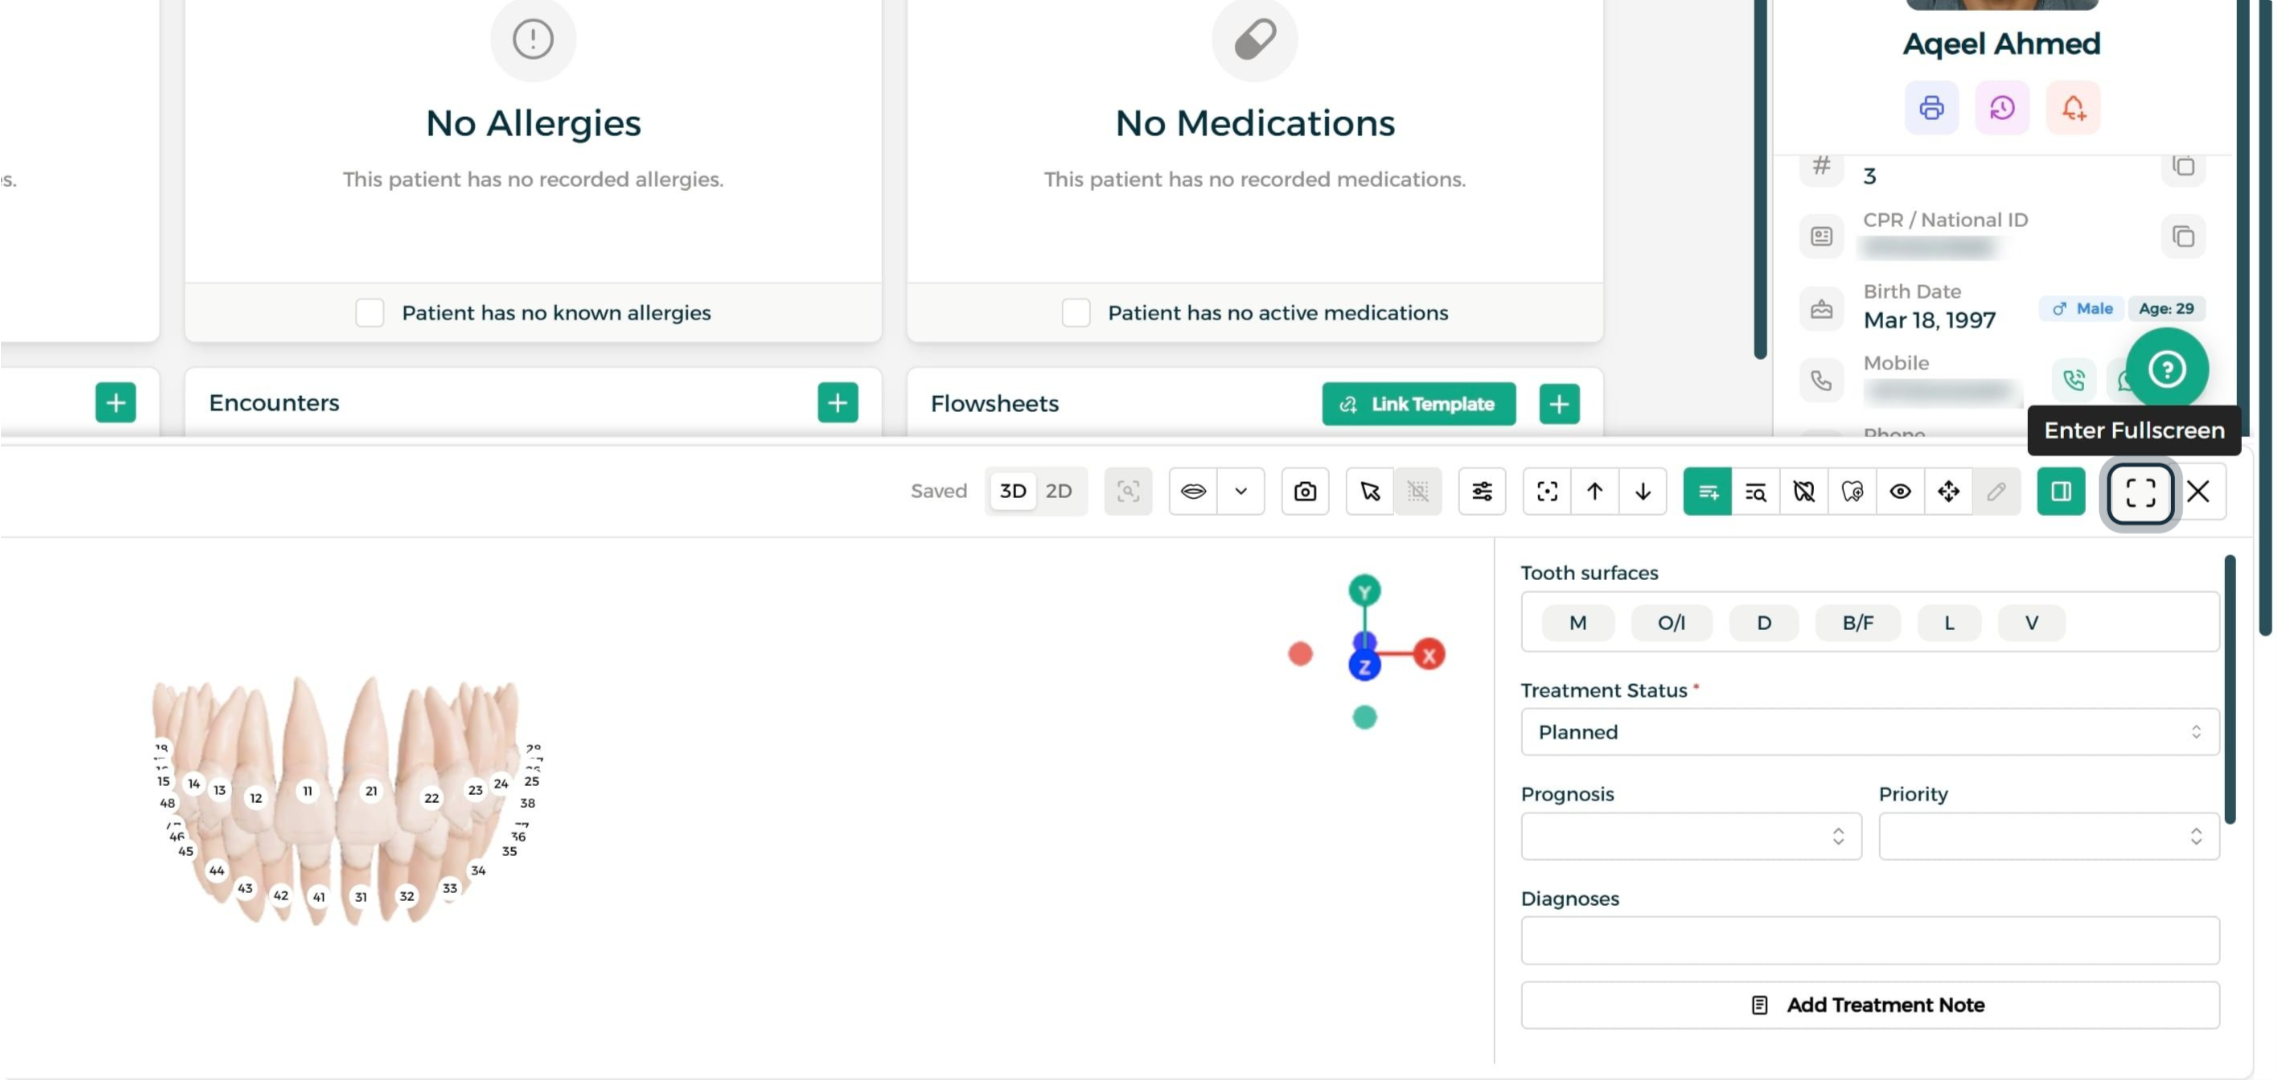
Step 1: Expand to Fullscreen
Use the expand control to open the chart in fullscreen for easier viewing.
Step 2: Open the Mouth for a Clearer View
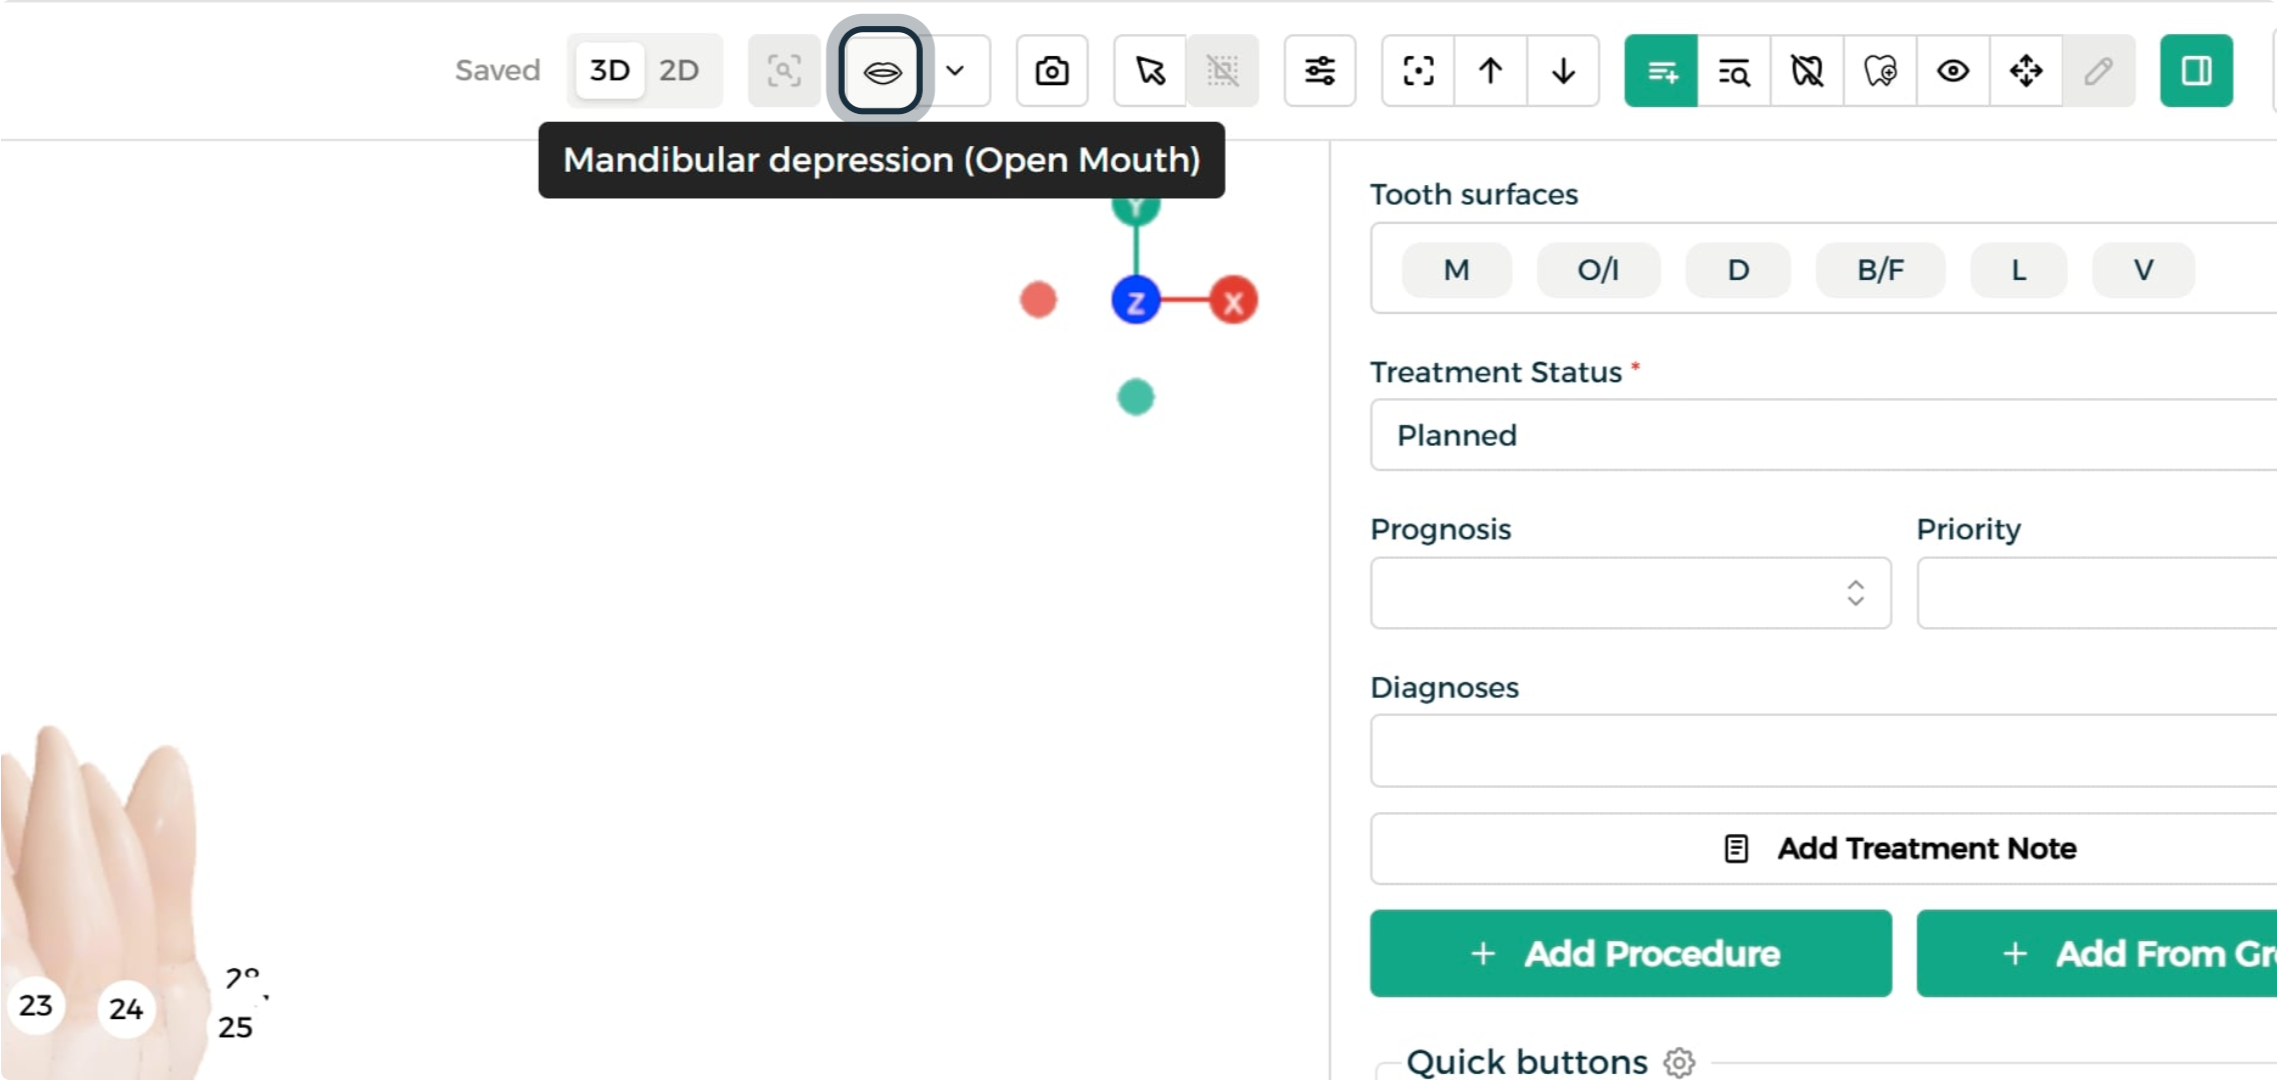
Use the mandibular depression control to simulate opening the mouth, for a clearer view of the bite and back teeth.
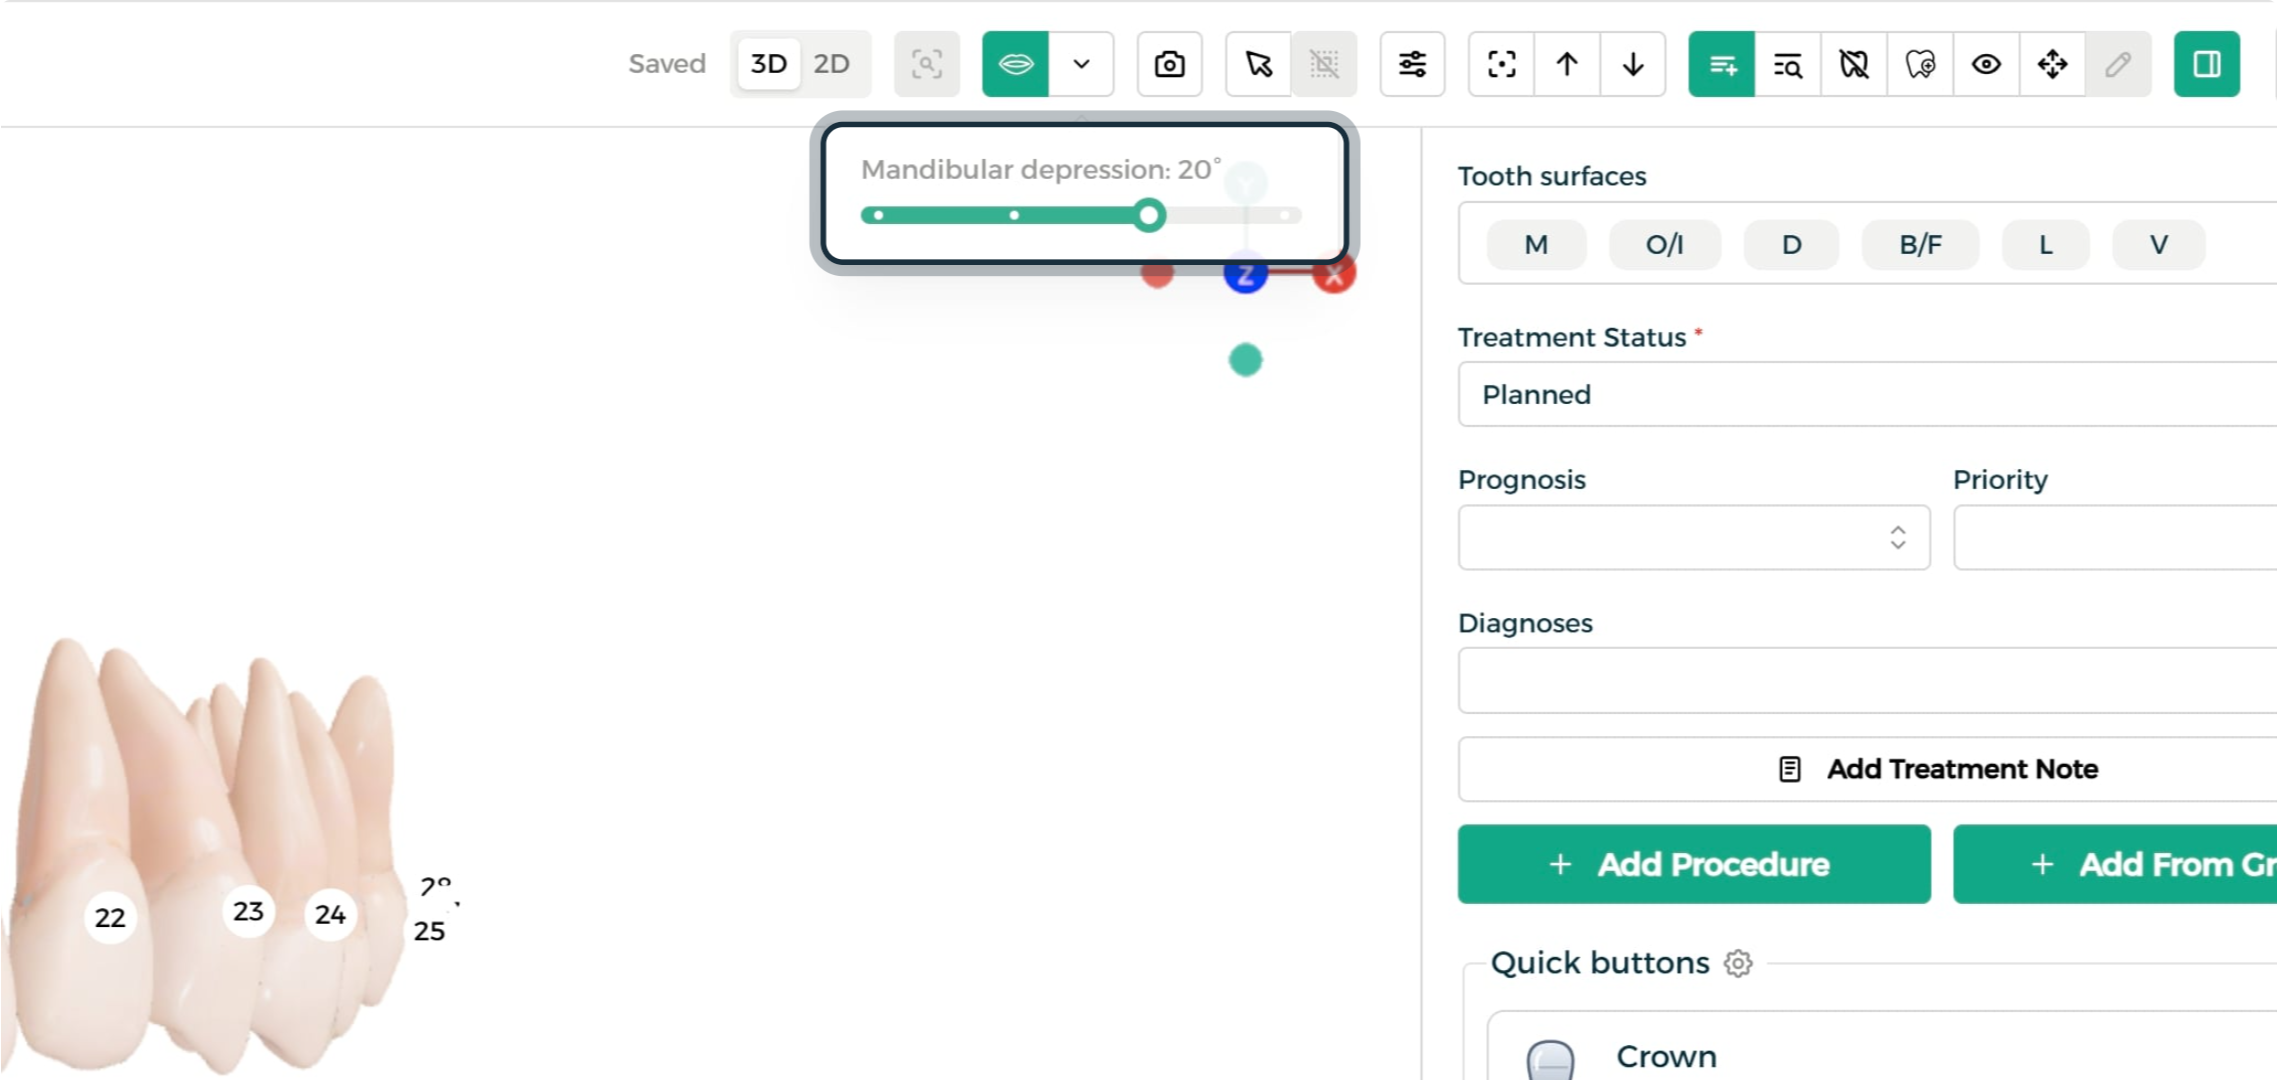
Step 3: Fine-Tune the Bite Opening Angle
Drag the depression angle slider to fine-tune exactly how far the mouth opens.
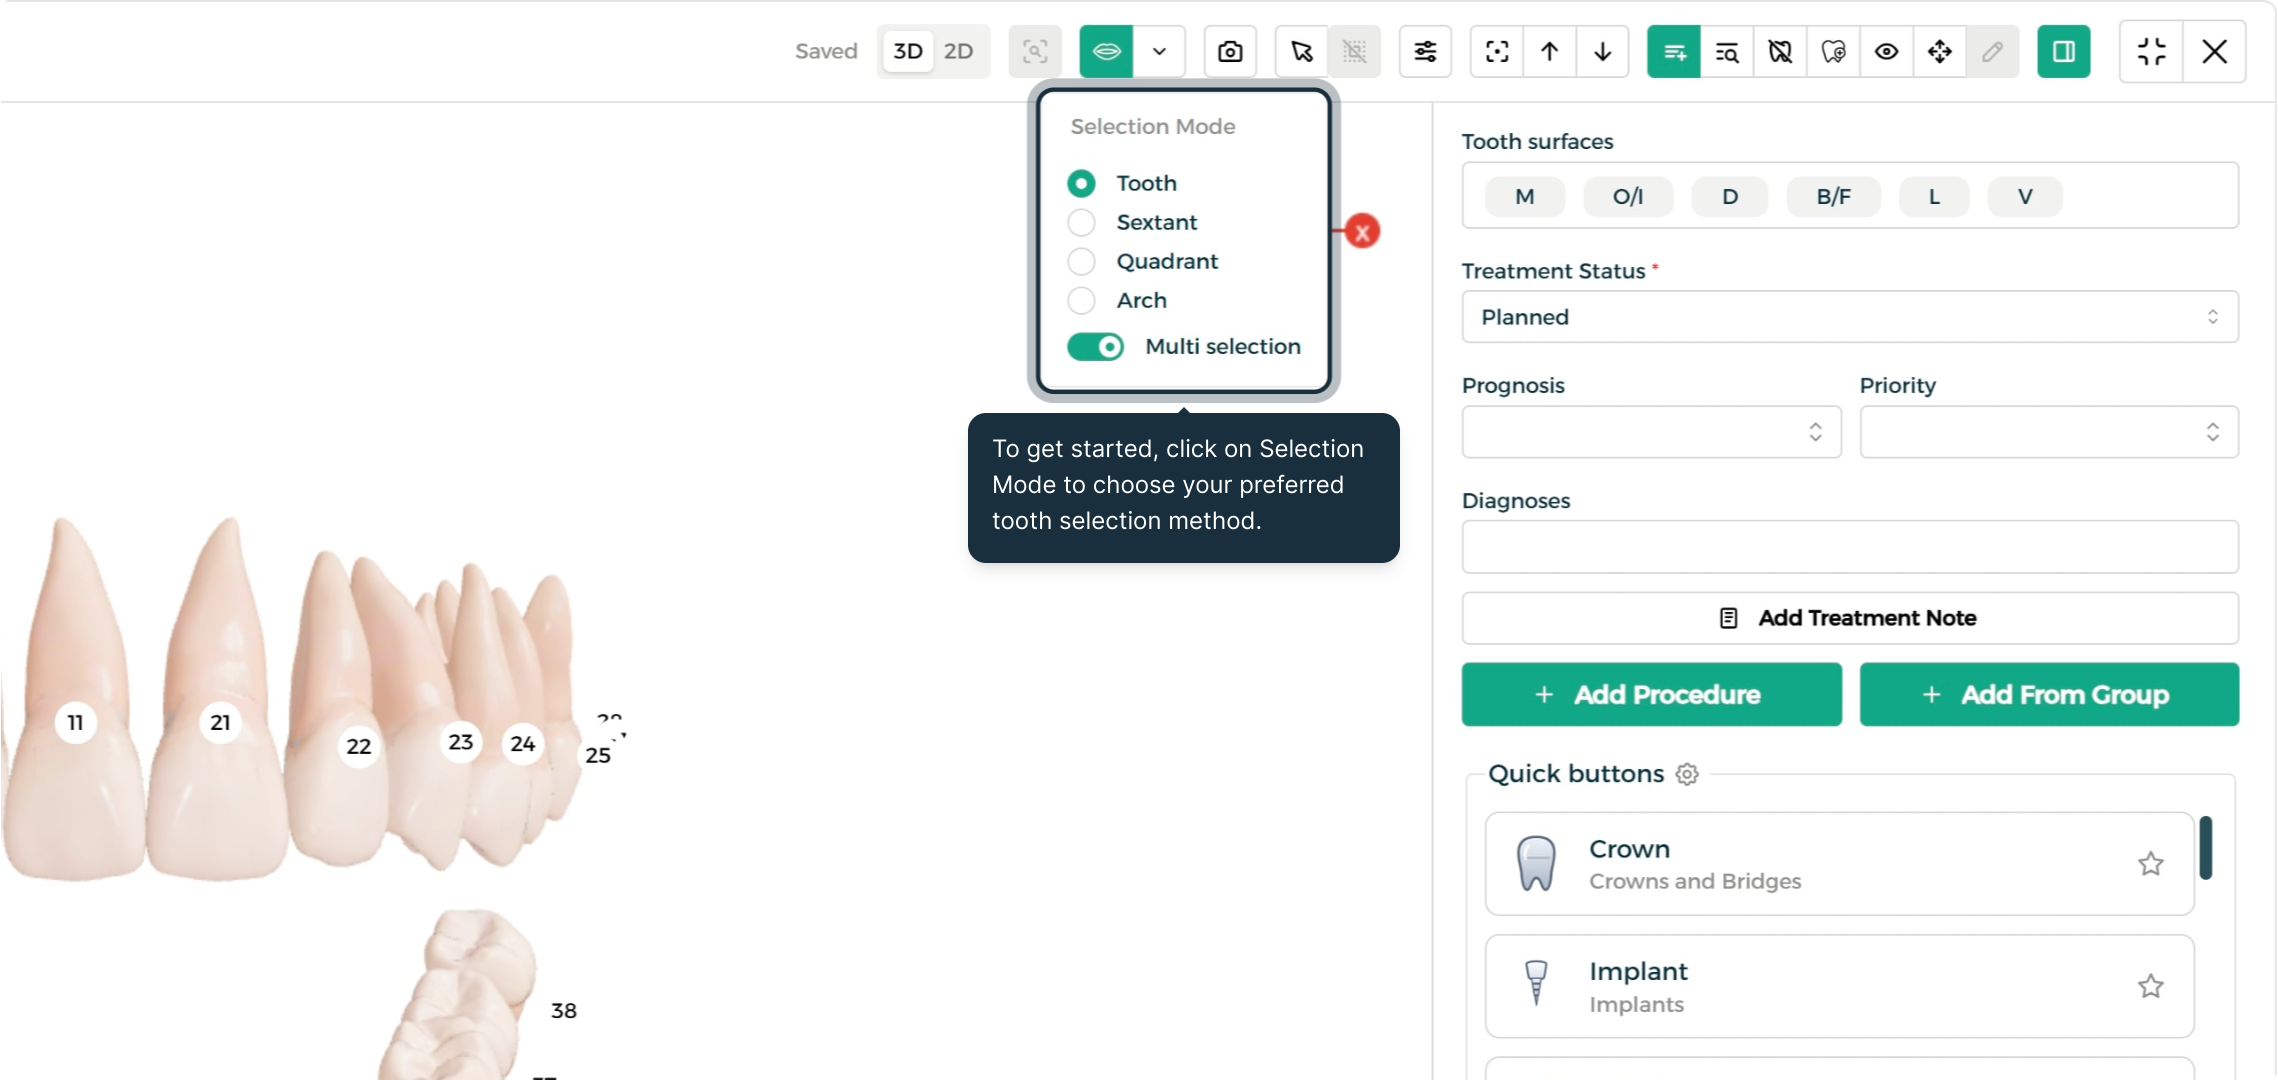
Step 4: Choose a Selection Mode
Click Selection Mode to choose how you select teeth — by individual tooth, sextant, quadrant, or arch — and toggle multiple selection on or off.
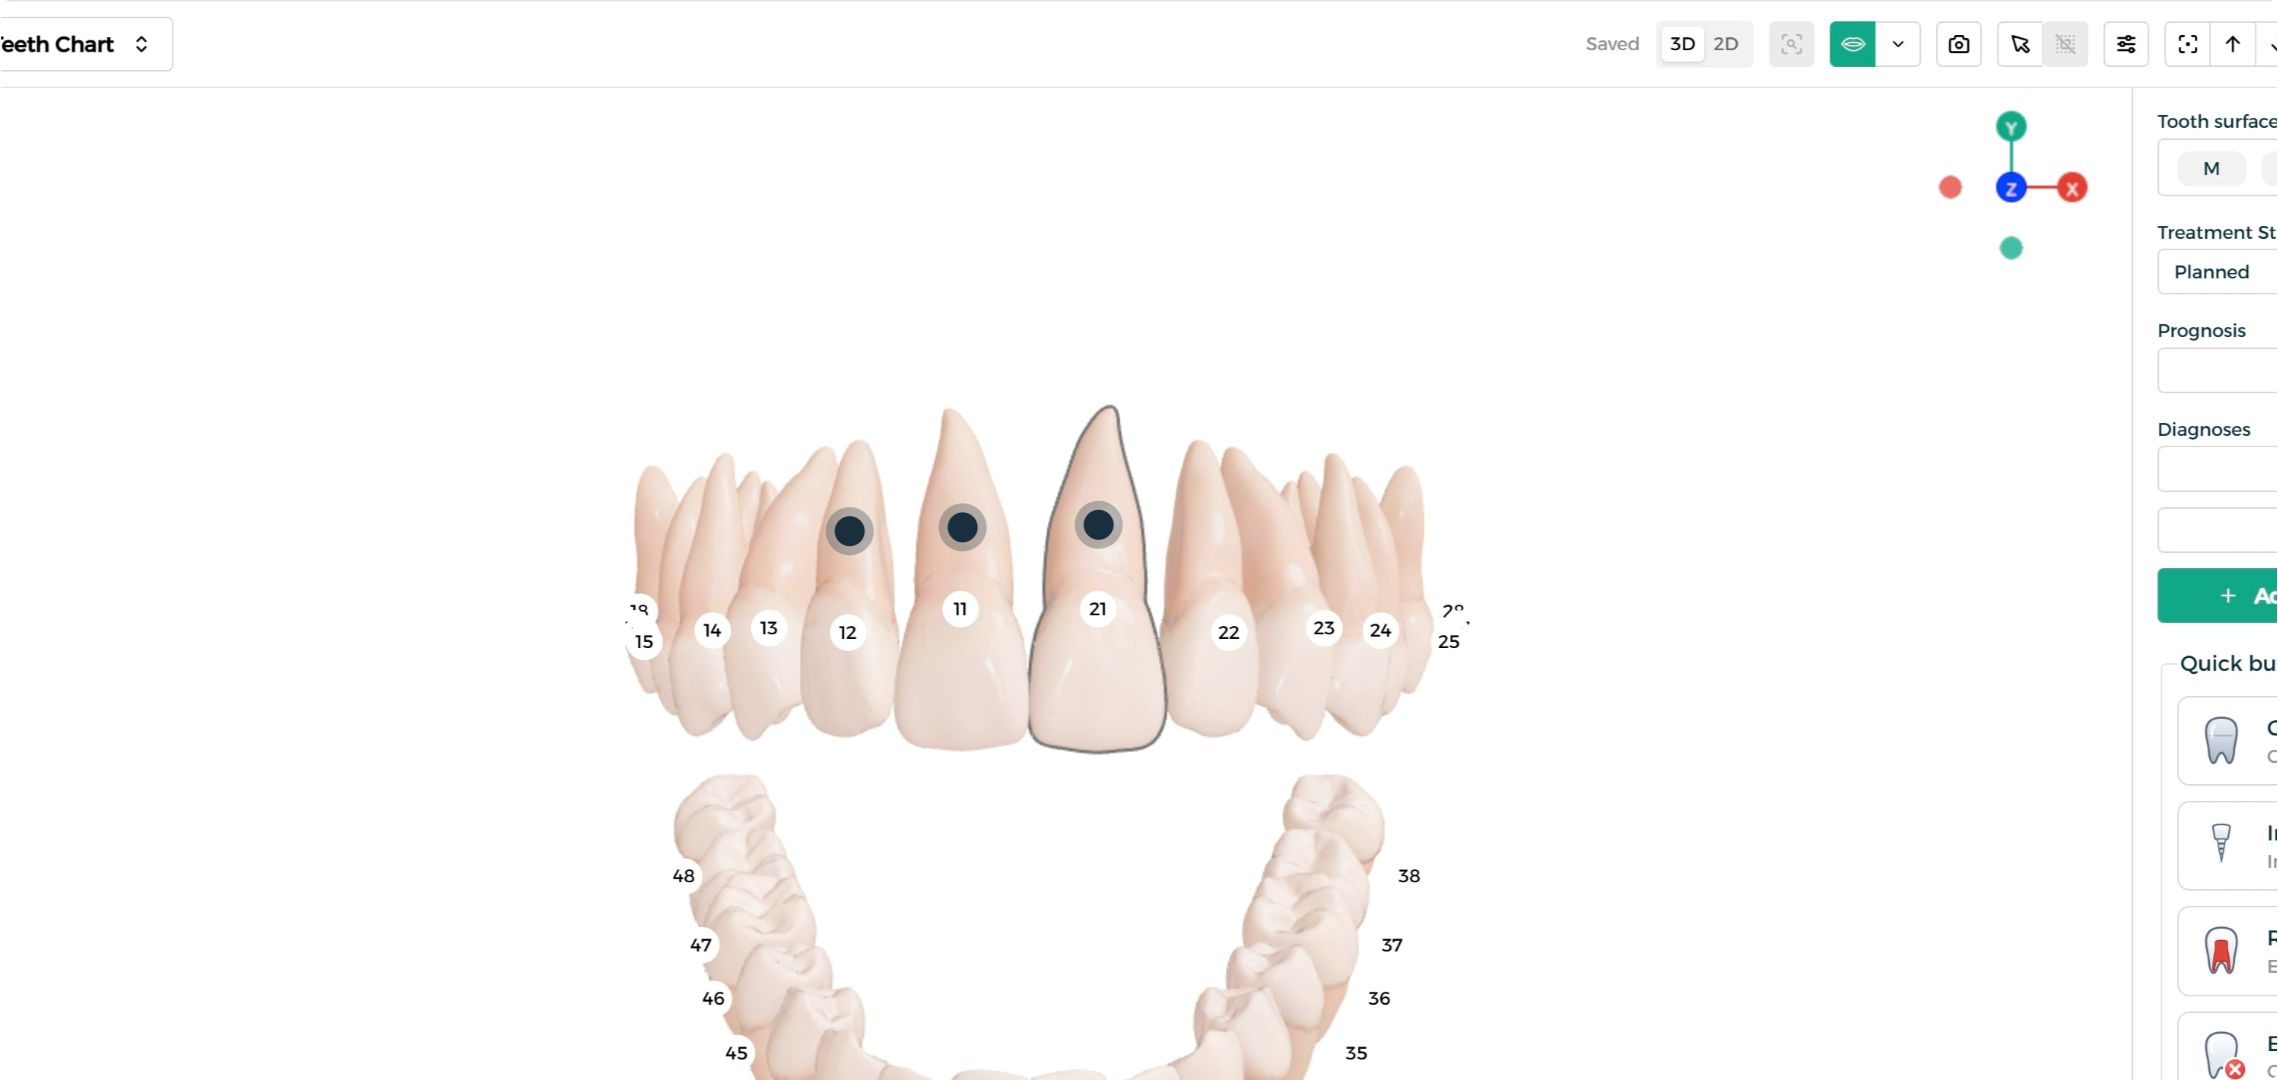
Step 5: Select Multiple Teeth at Once
With multiple selection enabled, click several teeth to select them together — here, three teeth are selected at once.
Adding Procedures to a Tooth
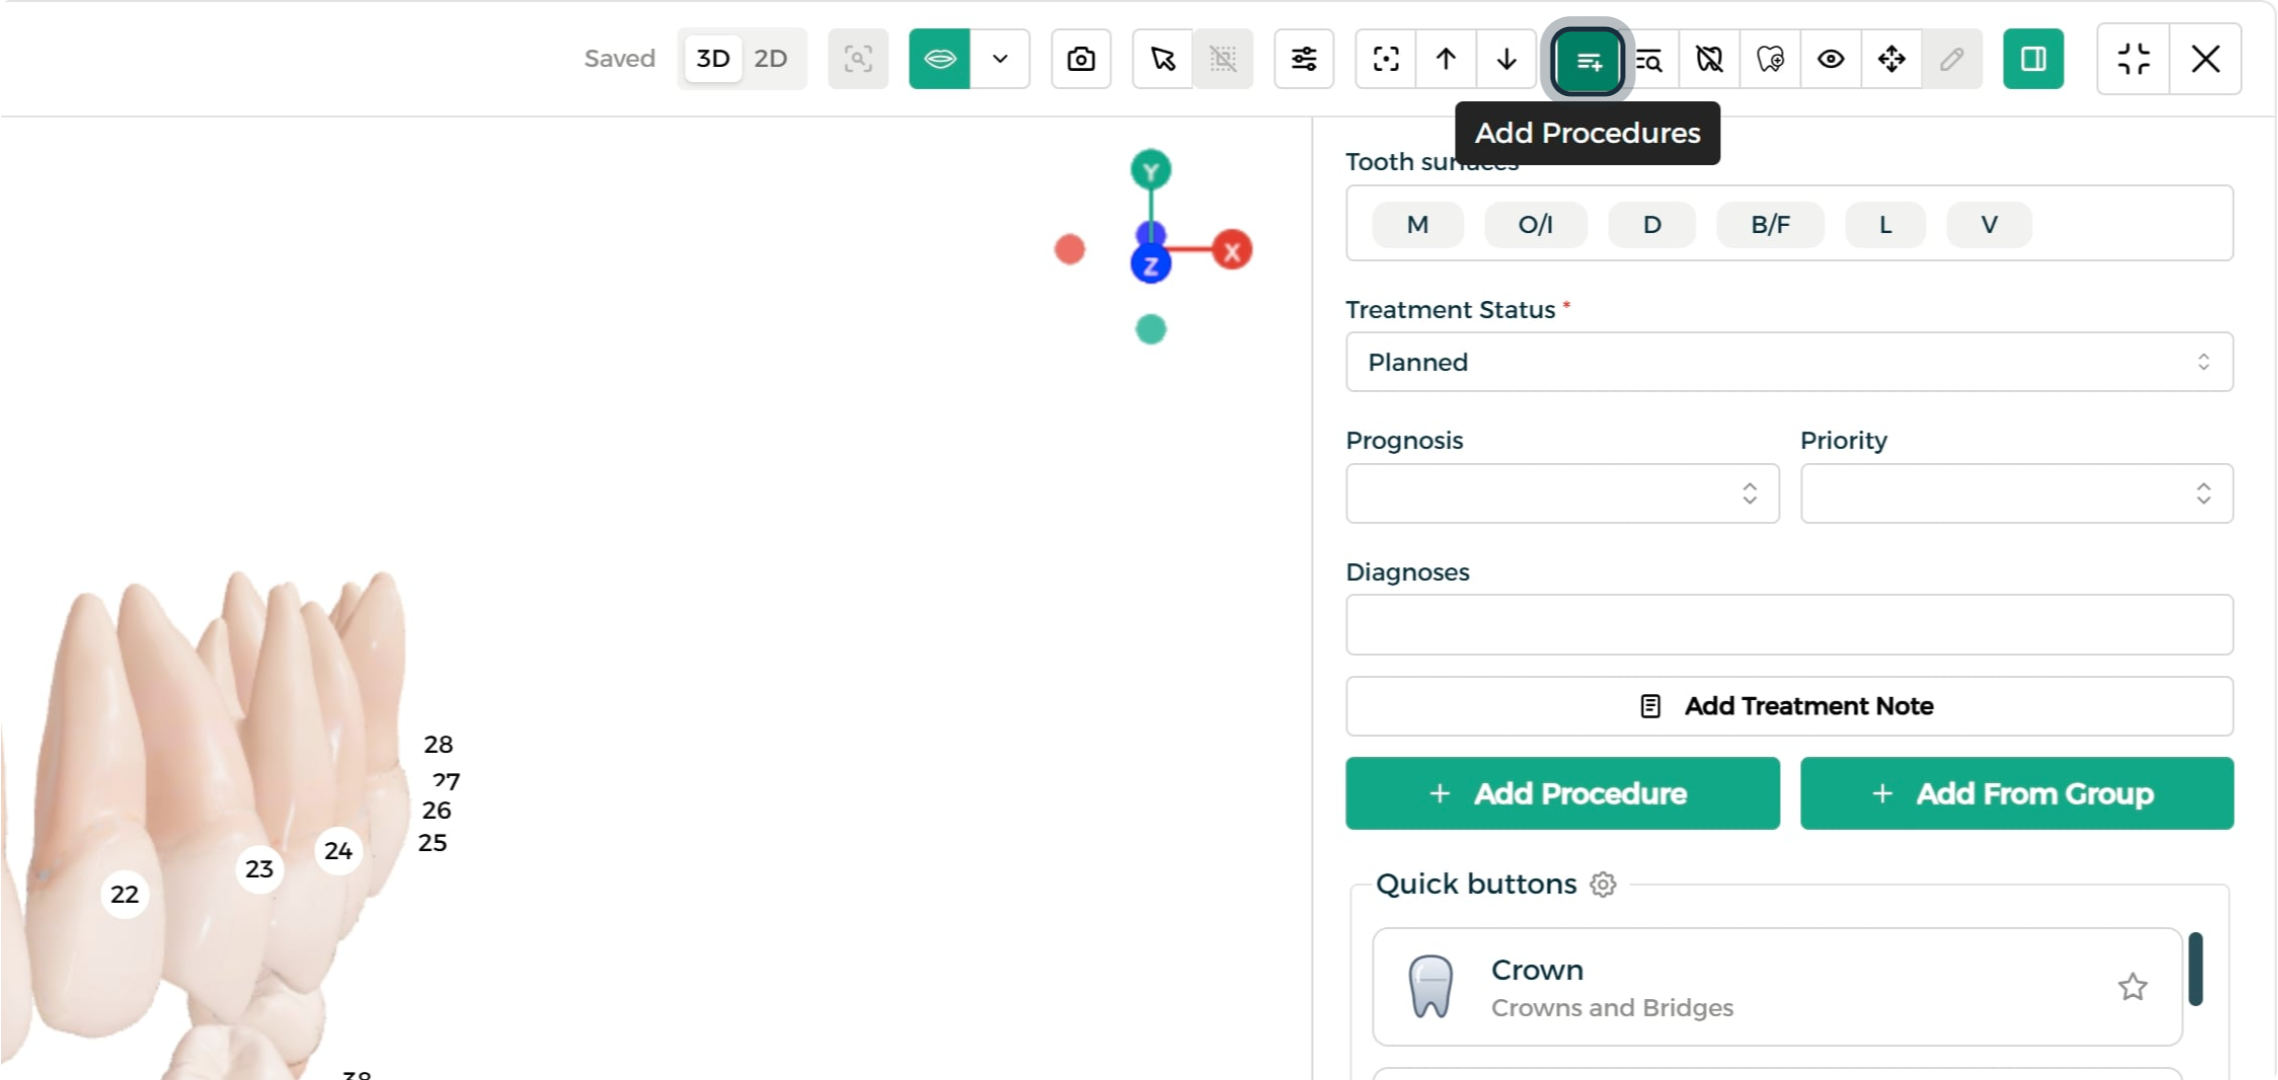
Step 1: Open Add Procedures
Click the add-procedures control to start logging a procedure.
Step 2: Select a Tooth
Click a tooth (or multiple teeth) on the chart to apply procedures to it.
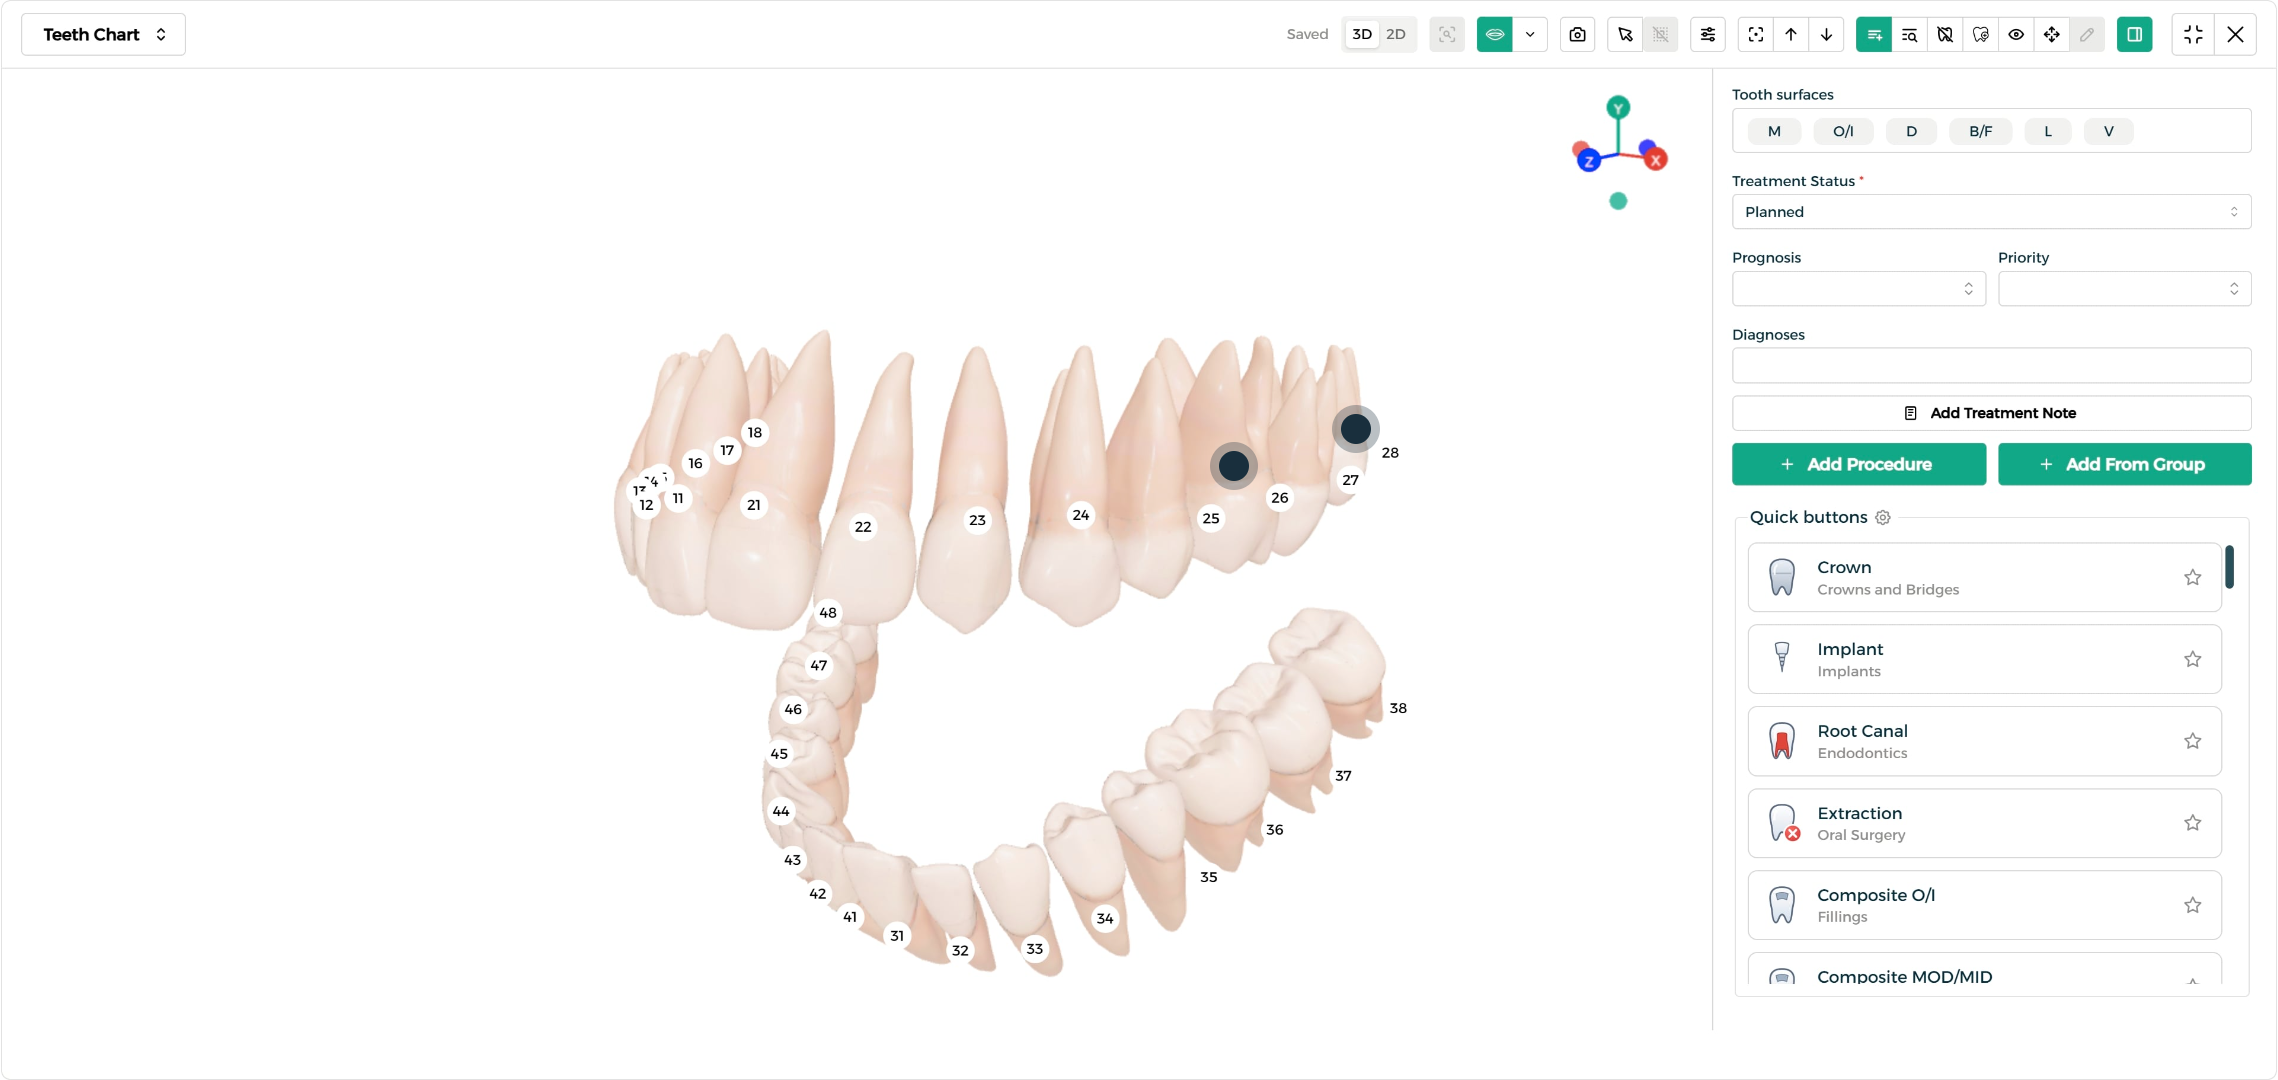
Step 3: Choose a Procedure
Fill in the procedure details manually, or pick a predefined procedure from the quick-select list — each with a distinct icon so treatments are instant to spot. This list can be customized to match your clinic's day-to-day workflow.
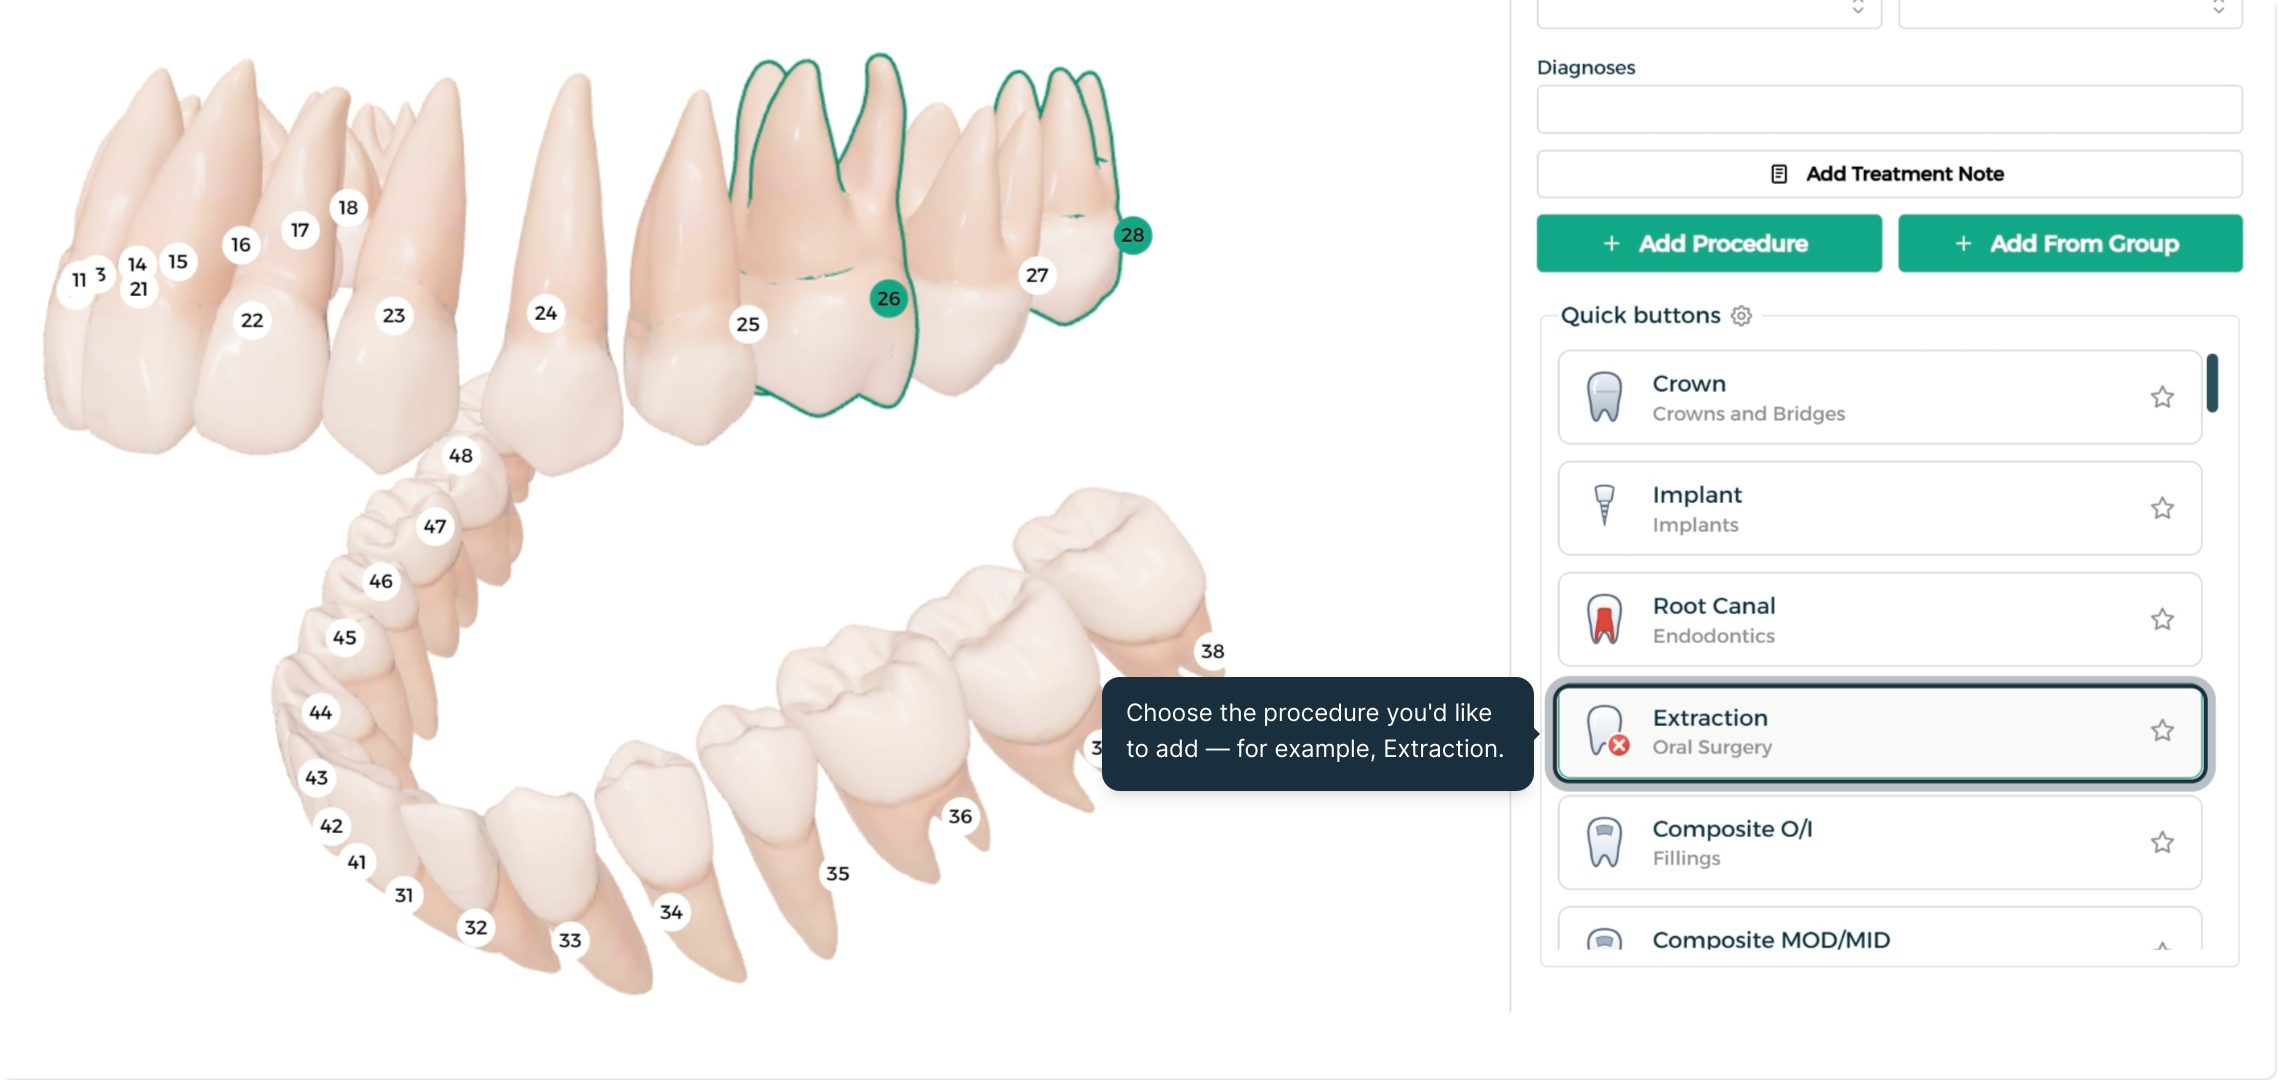
Step 4: Repeat for Additional Teeth
The dental chart automatically refreshes to show each new procedure directly on the selected tooth, so you can keep adding procedures the same way for as many teeth as the treatment plan needs.
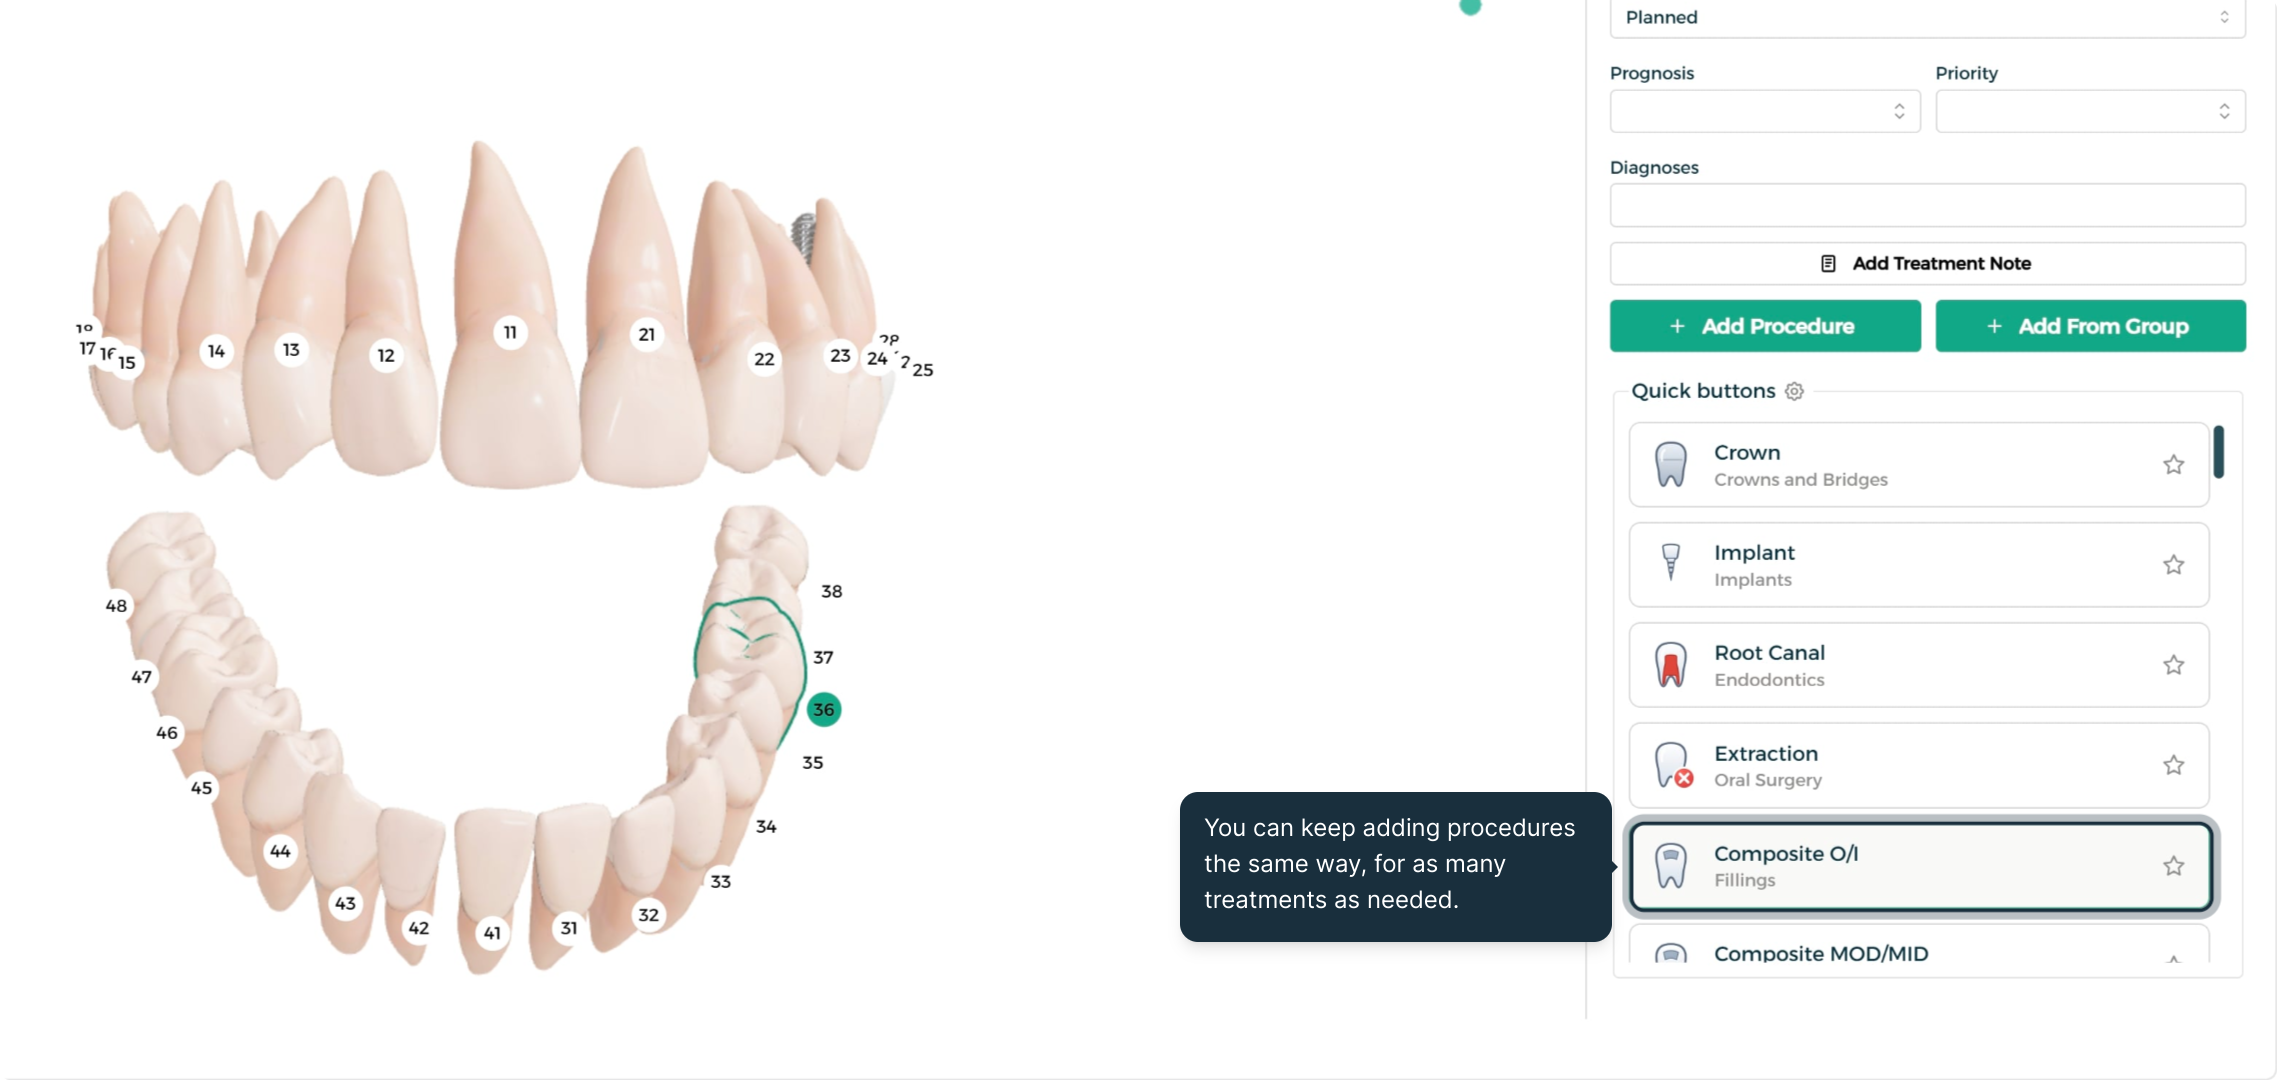
Reviewing Procedures by Tooth
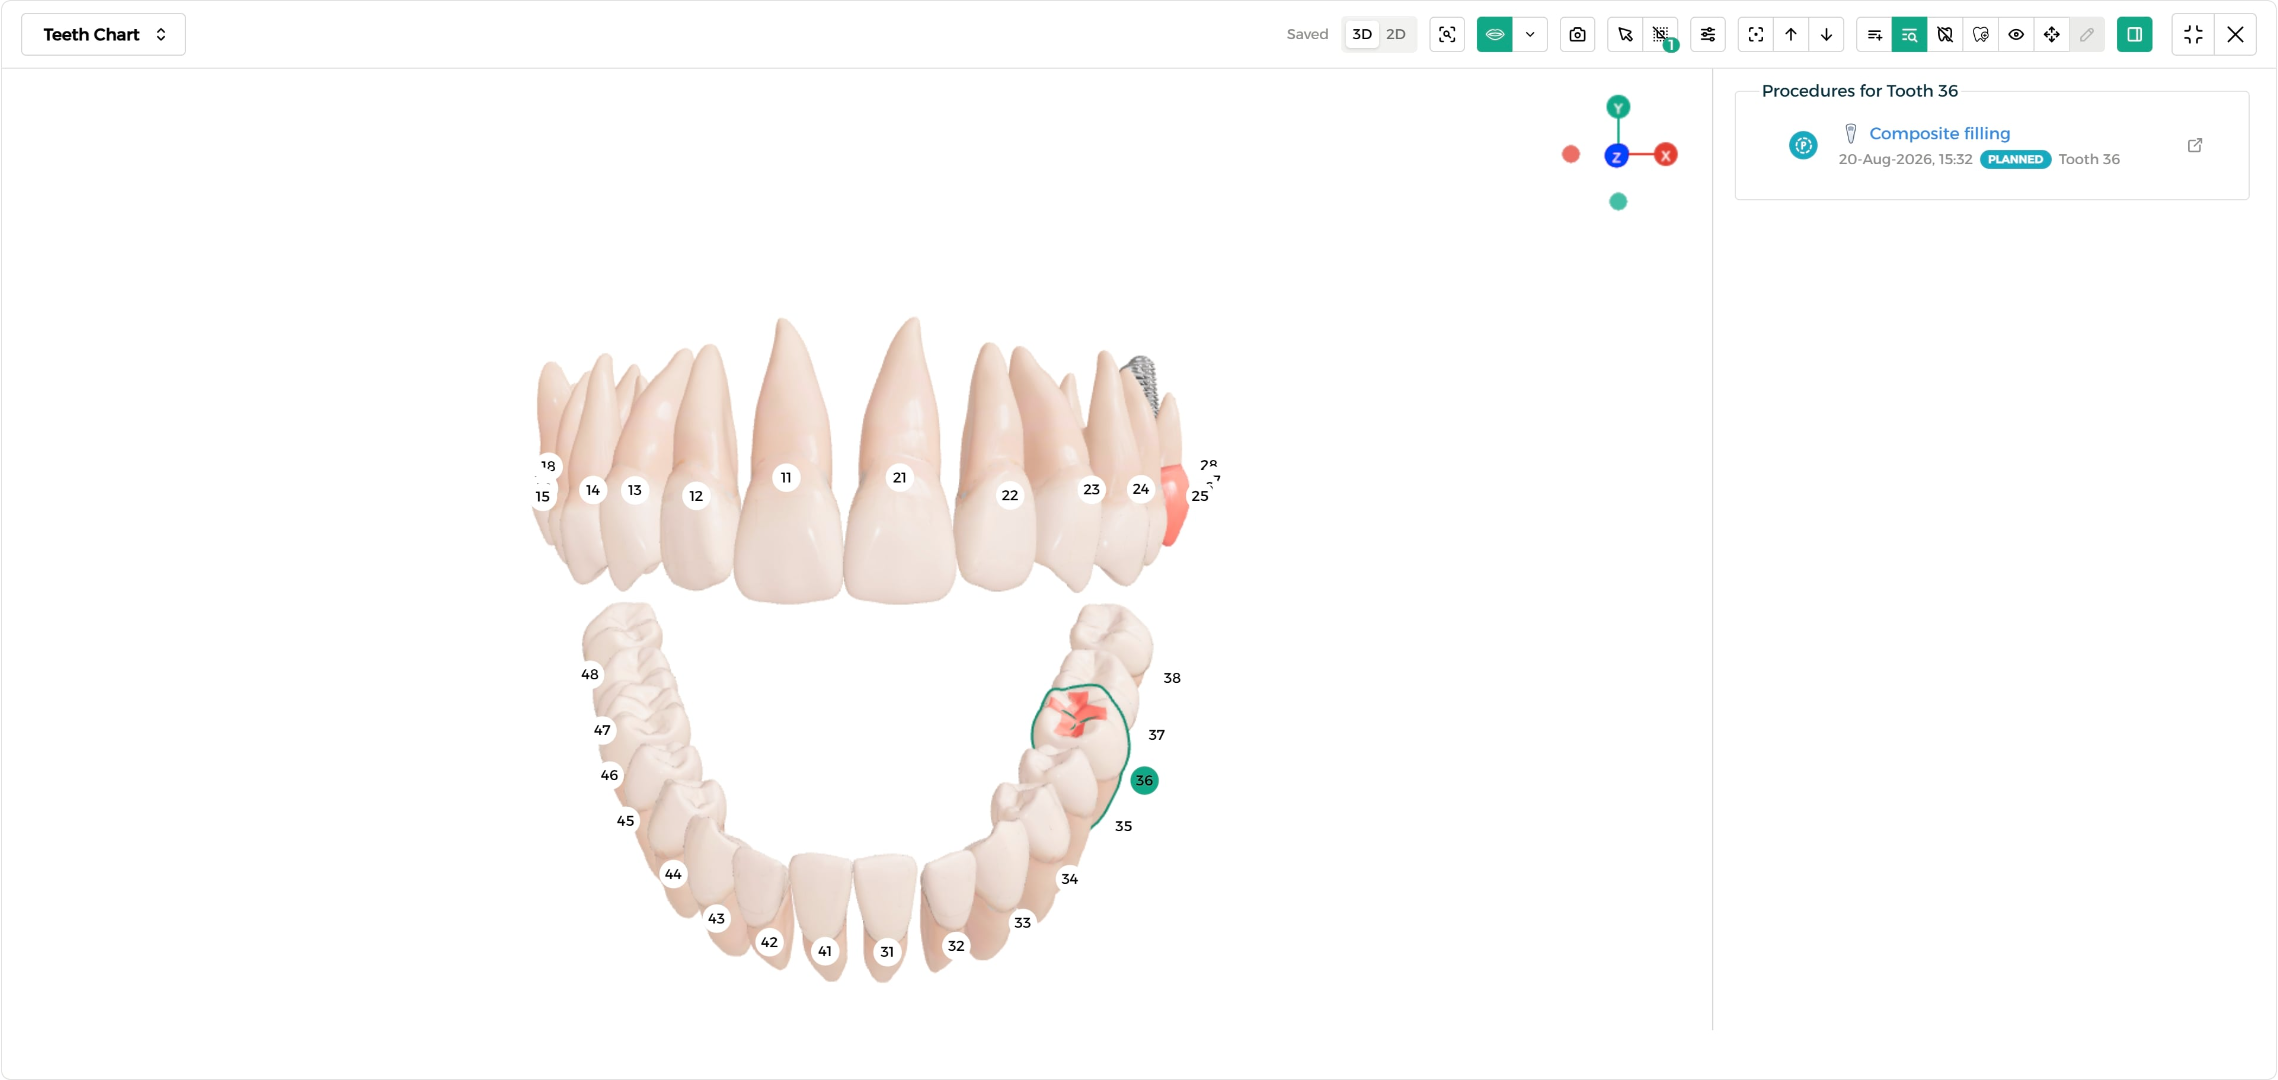
Step 1: Open the Tooth Procedures Tab
This tab lists every procedure planned across the whole chart when nothing is selected.
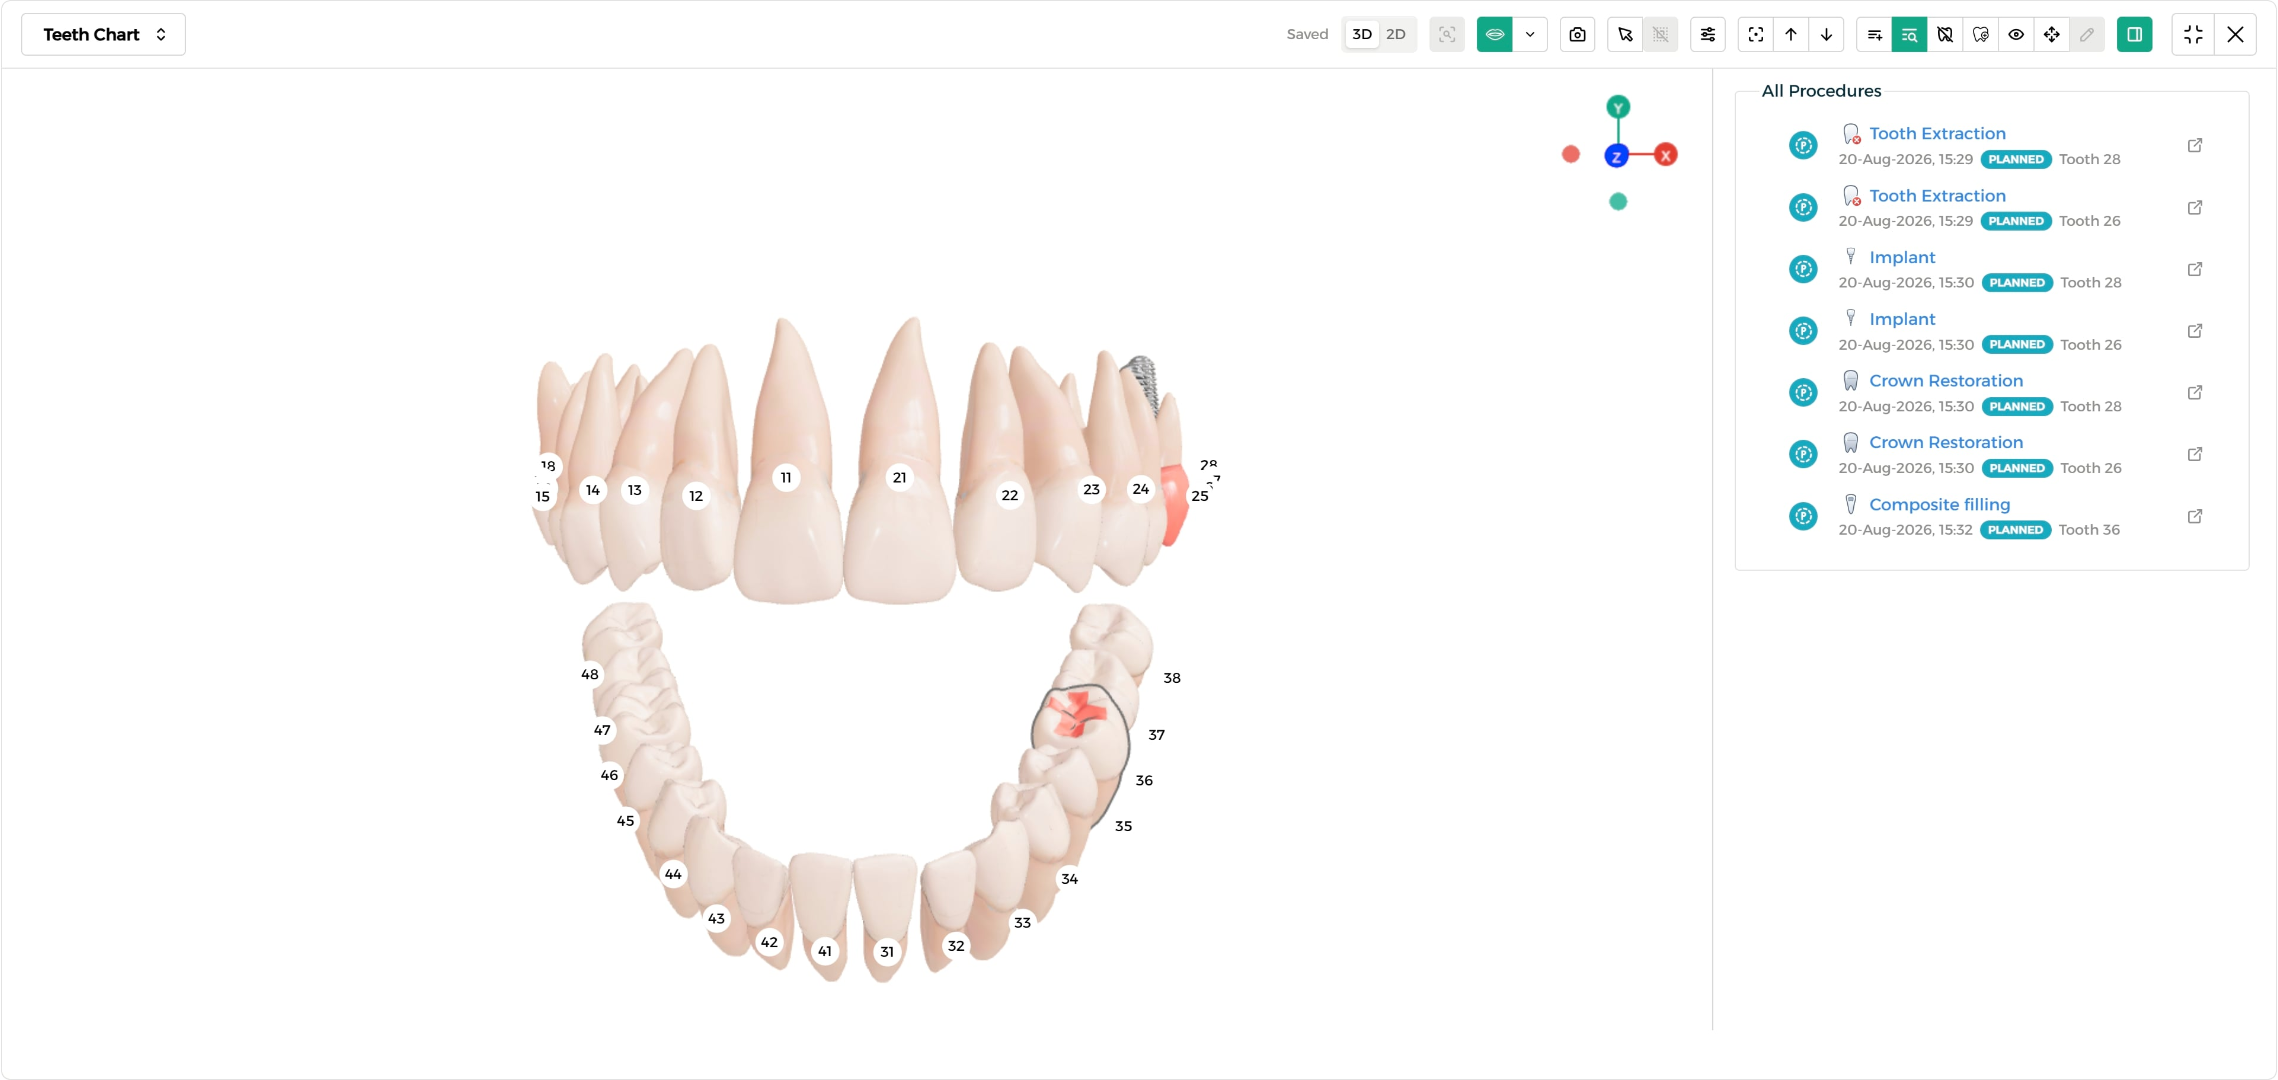
Step 2: Filter by a Specific Tooth
Select an individual tooth on the chart and the list narrows down to show only that tooth's procedures.
Documenting Tooth Presence & Dentition
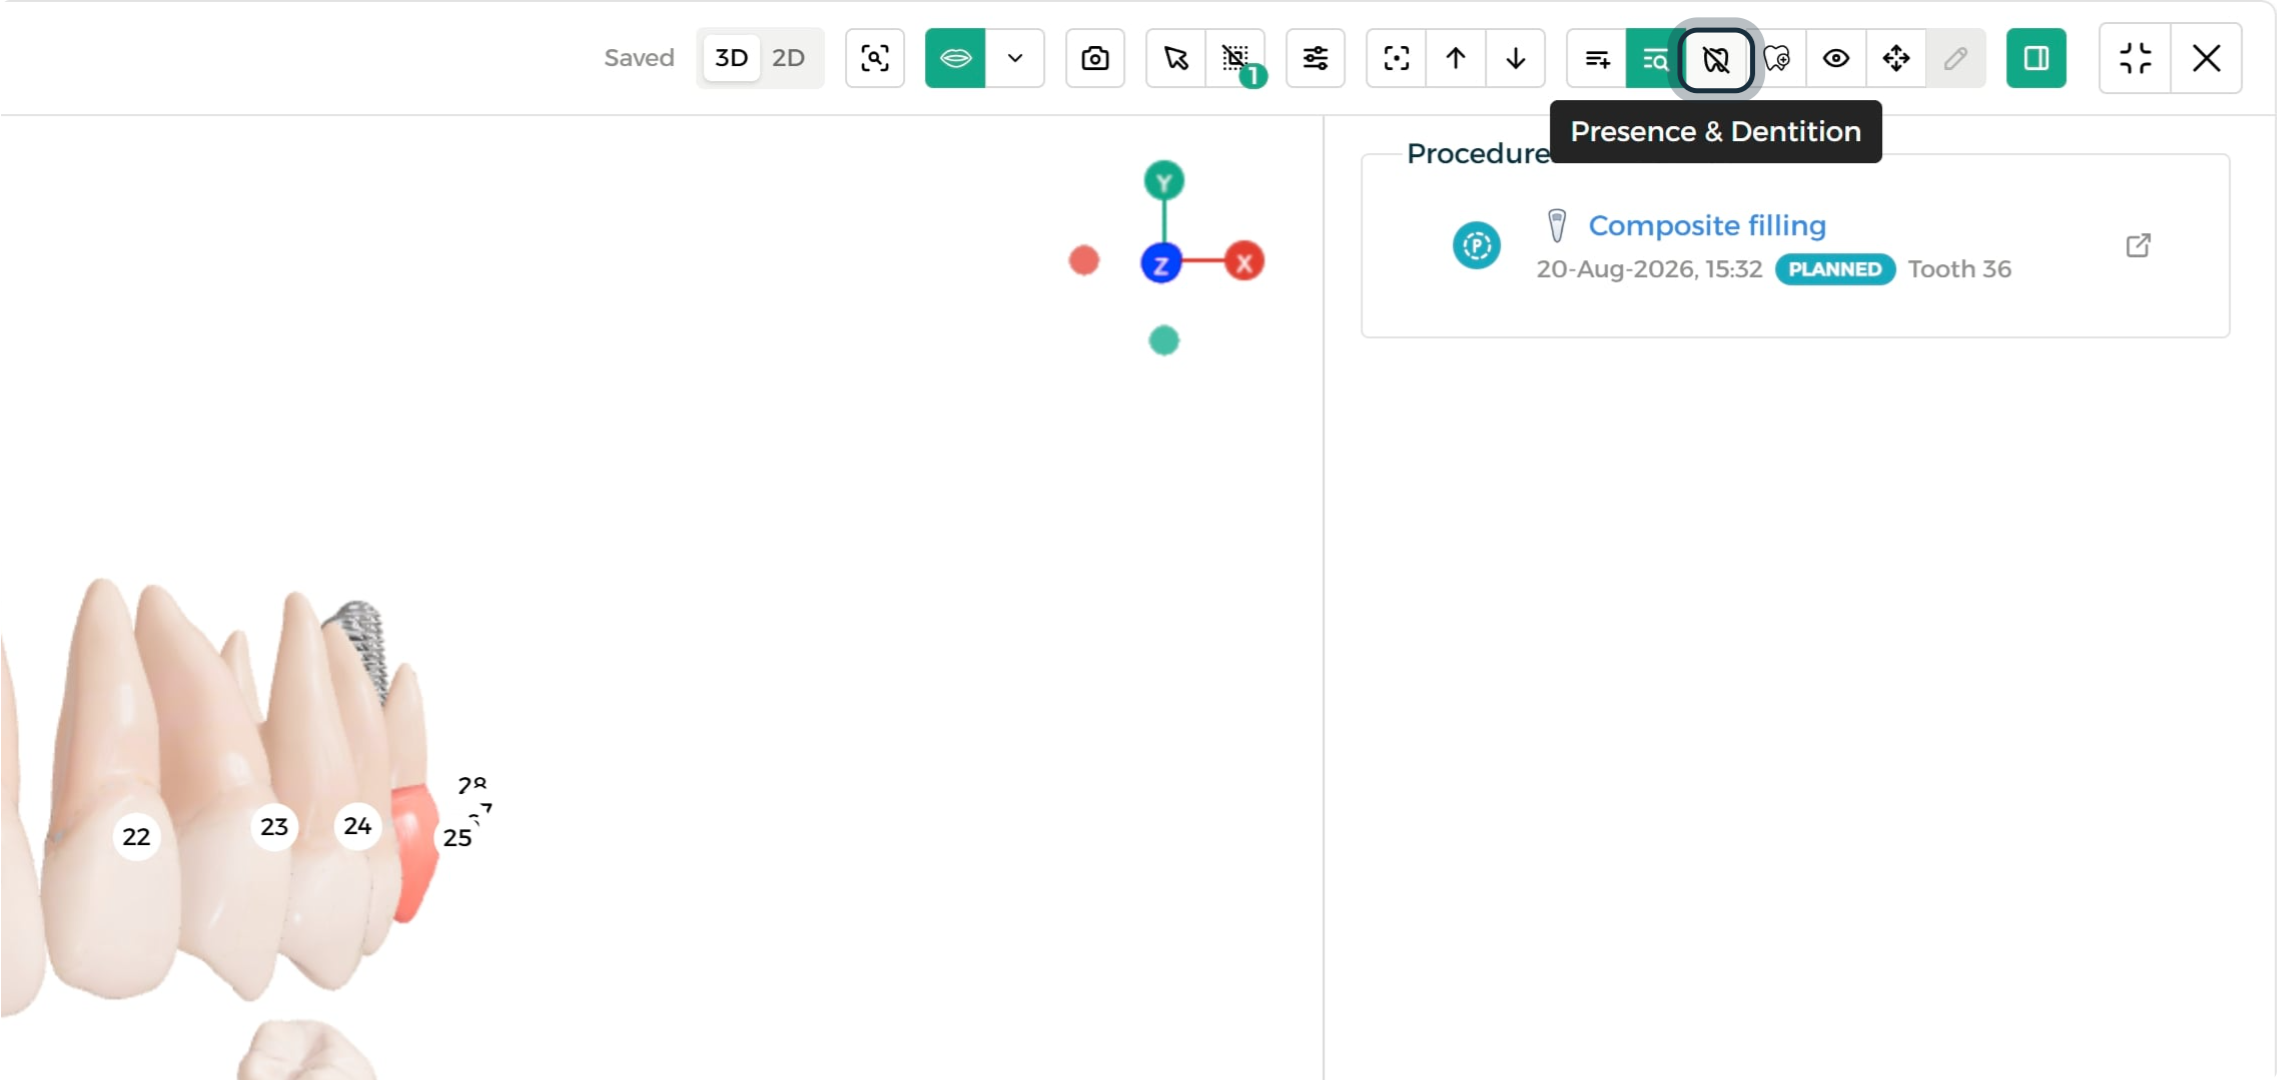
Step 1: Open Presence & Dentition
This panel lets you document a tooth's status in more detail — whether it's present at all, and its dentition state and stage.
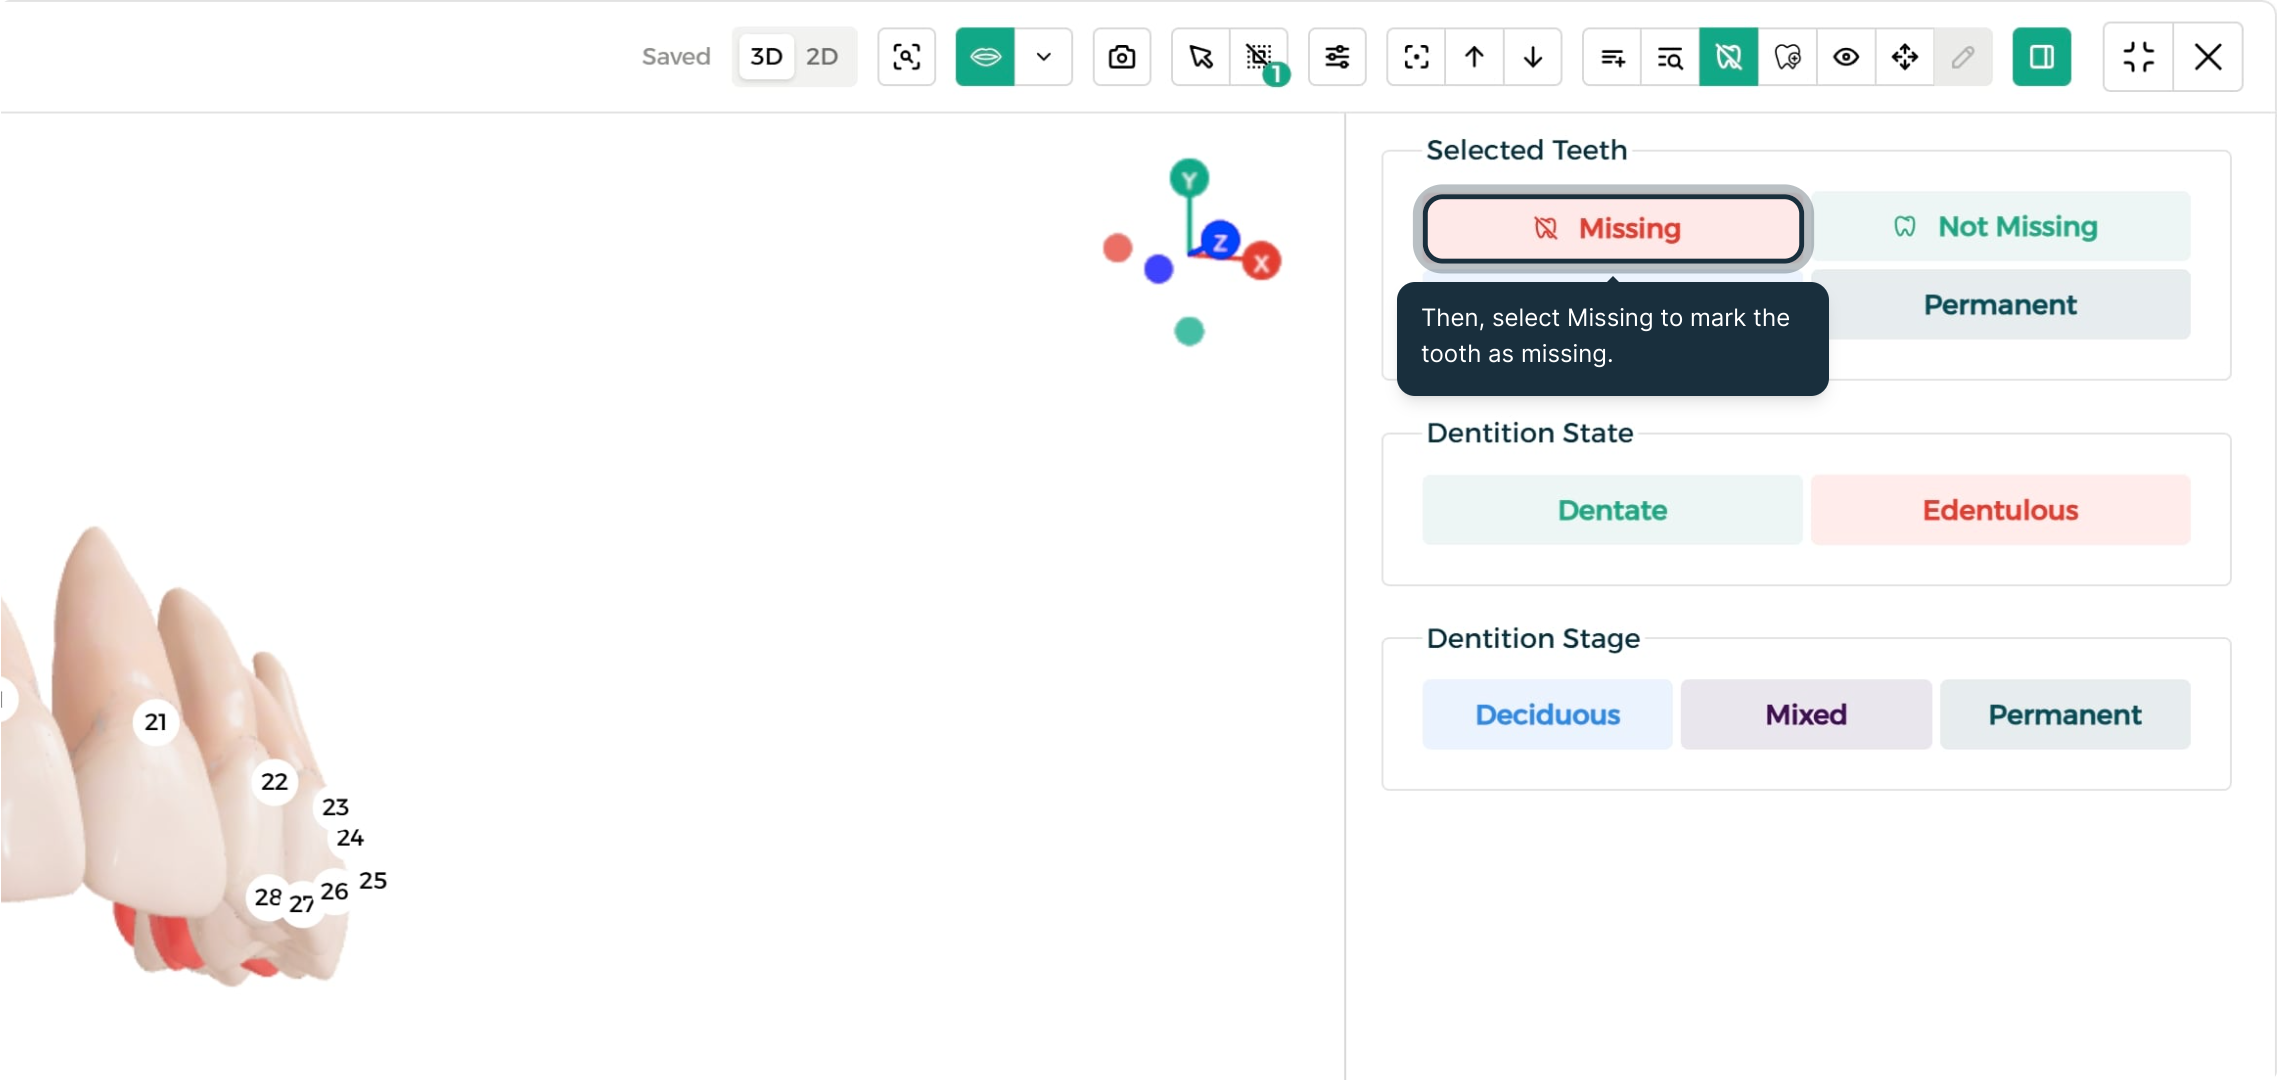
Step 2: Mark a Tooth as Missing
Select Missing to mark the selected tooth as absent from the chart.
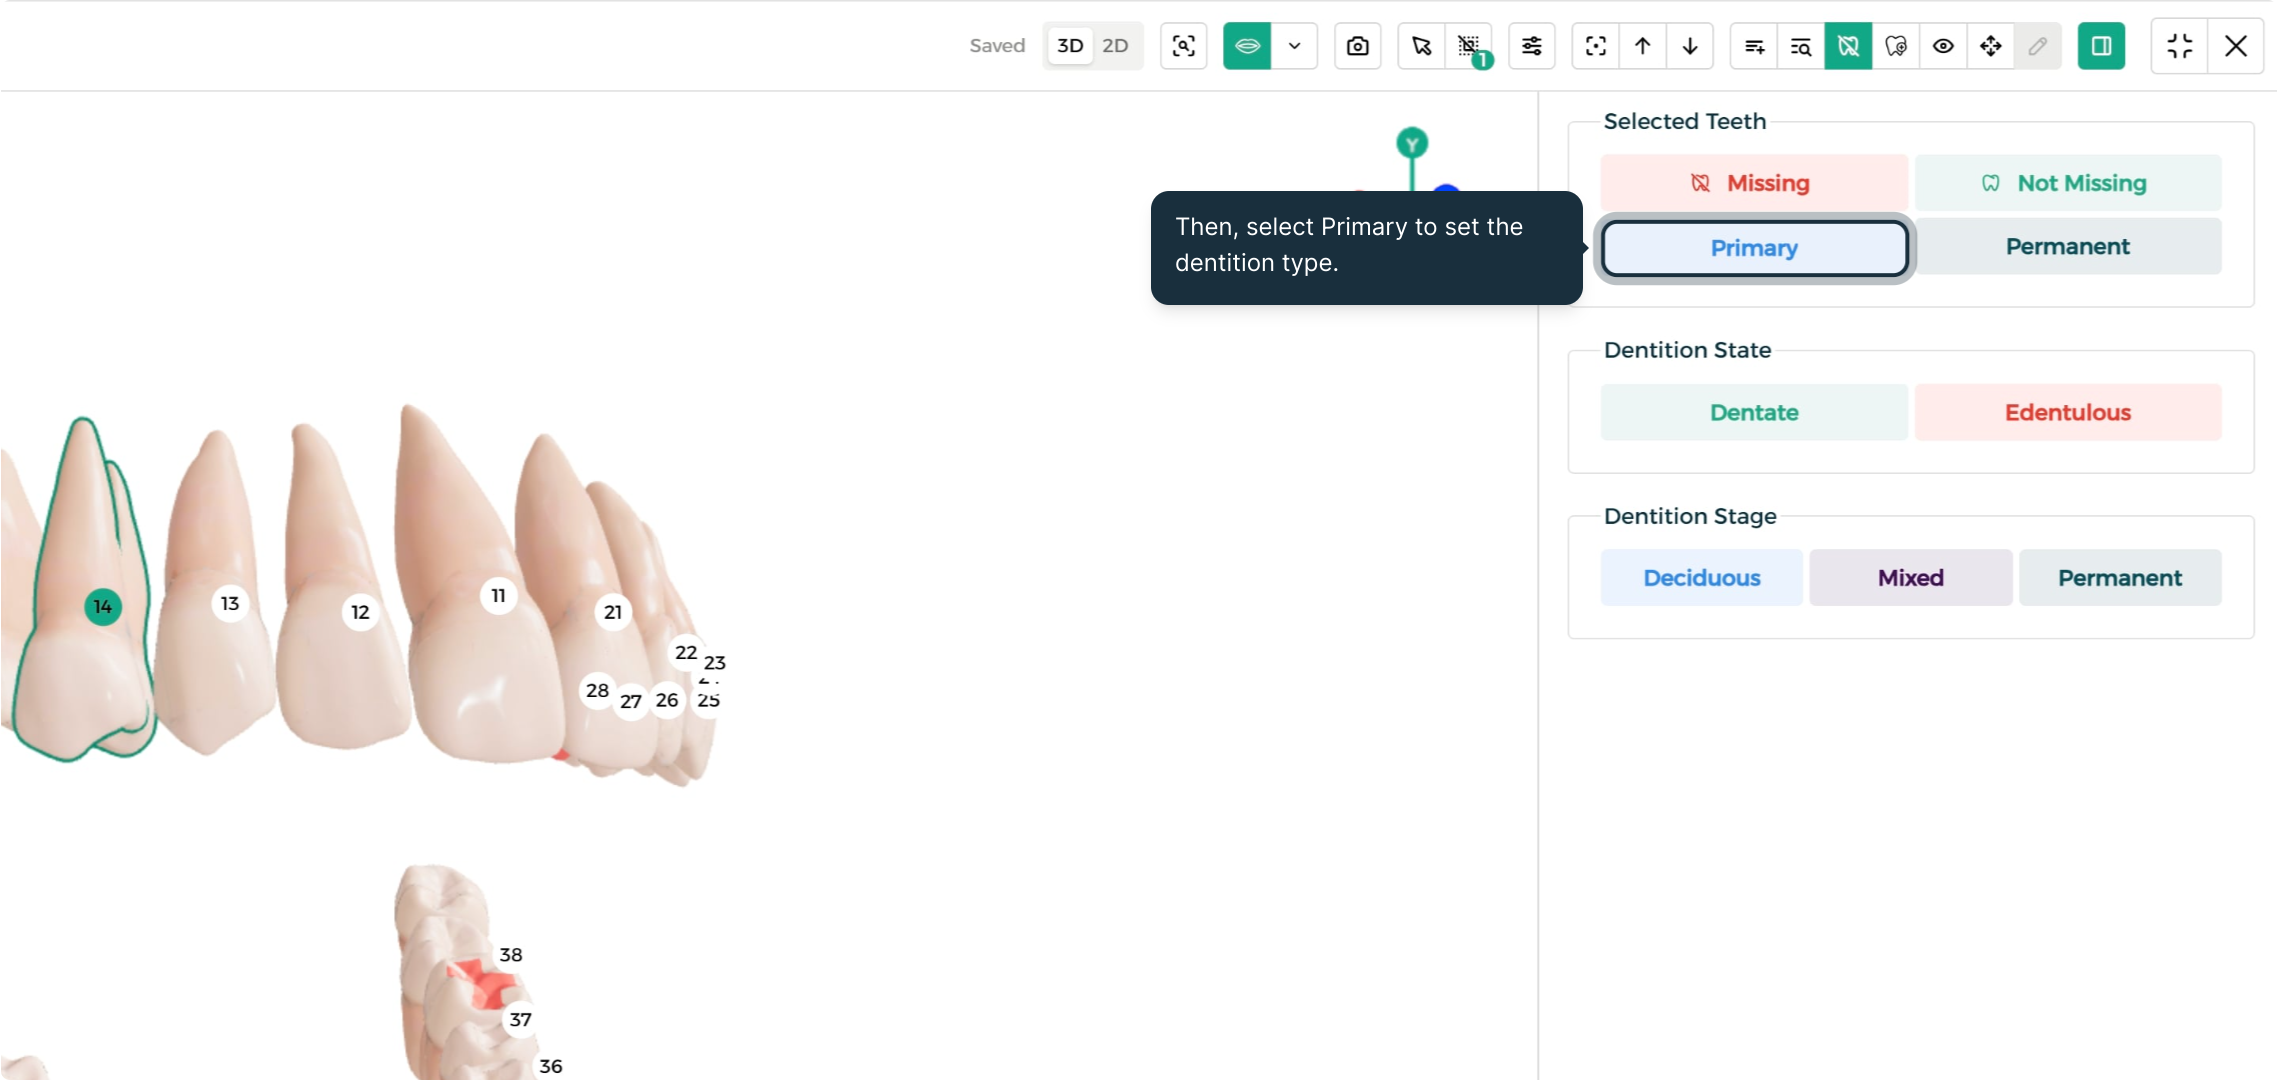
Step 3: Set a Tooth's Dentition Type
Select Primary to set the dentition type for the selected tooth — the chart updates immediately to reflect the change.
Adding a Supernumerary Tooth
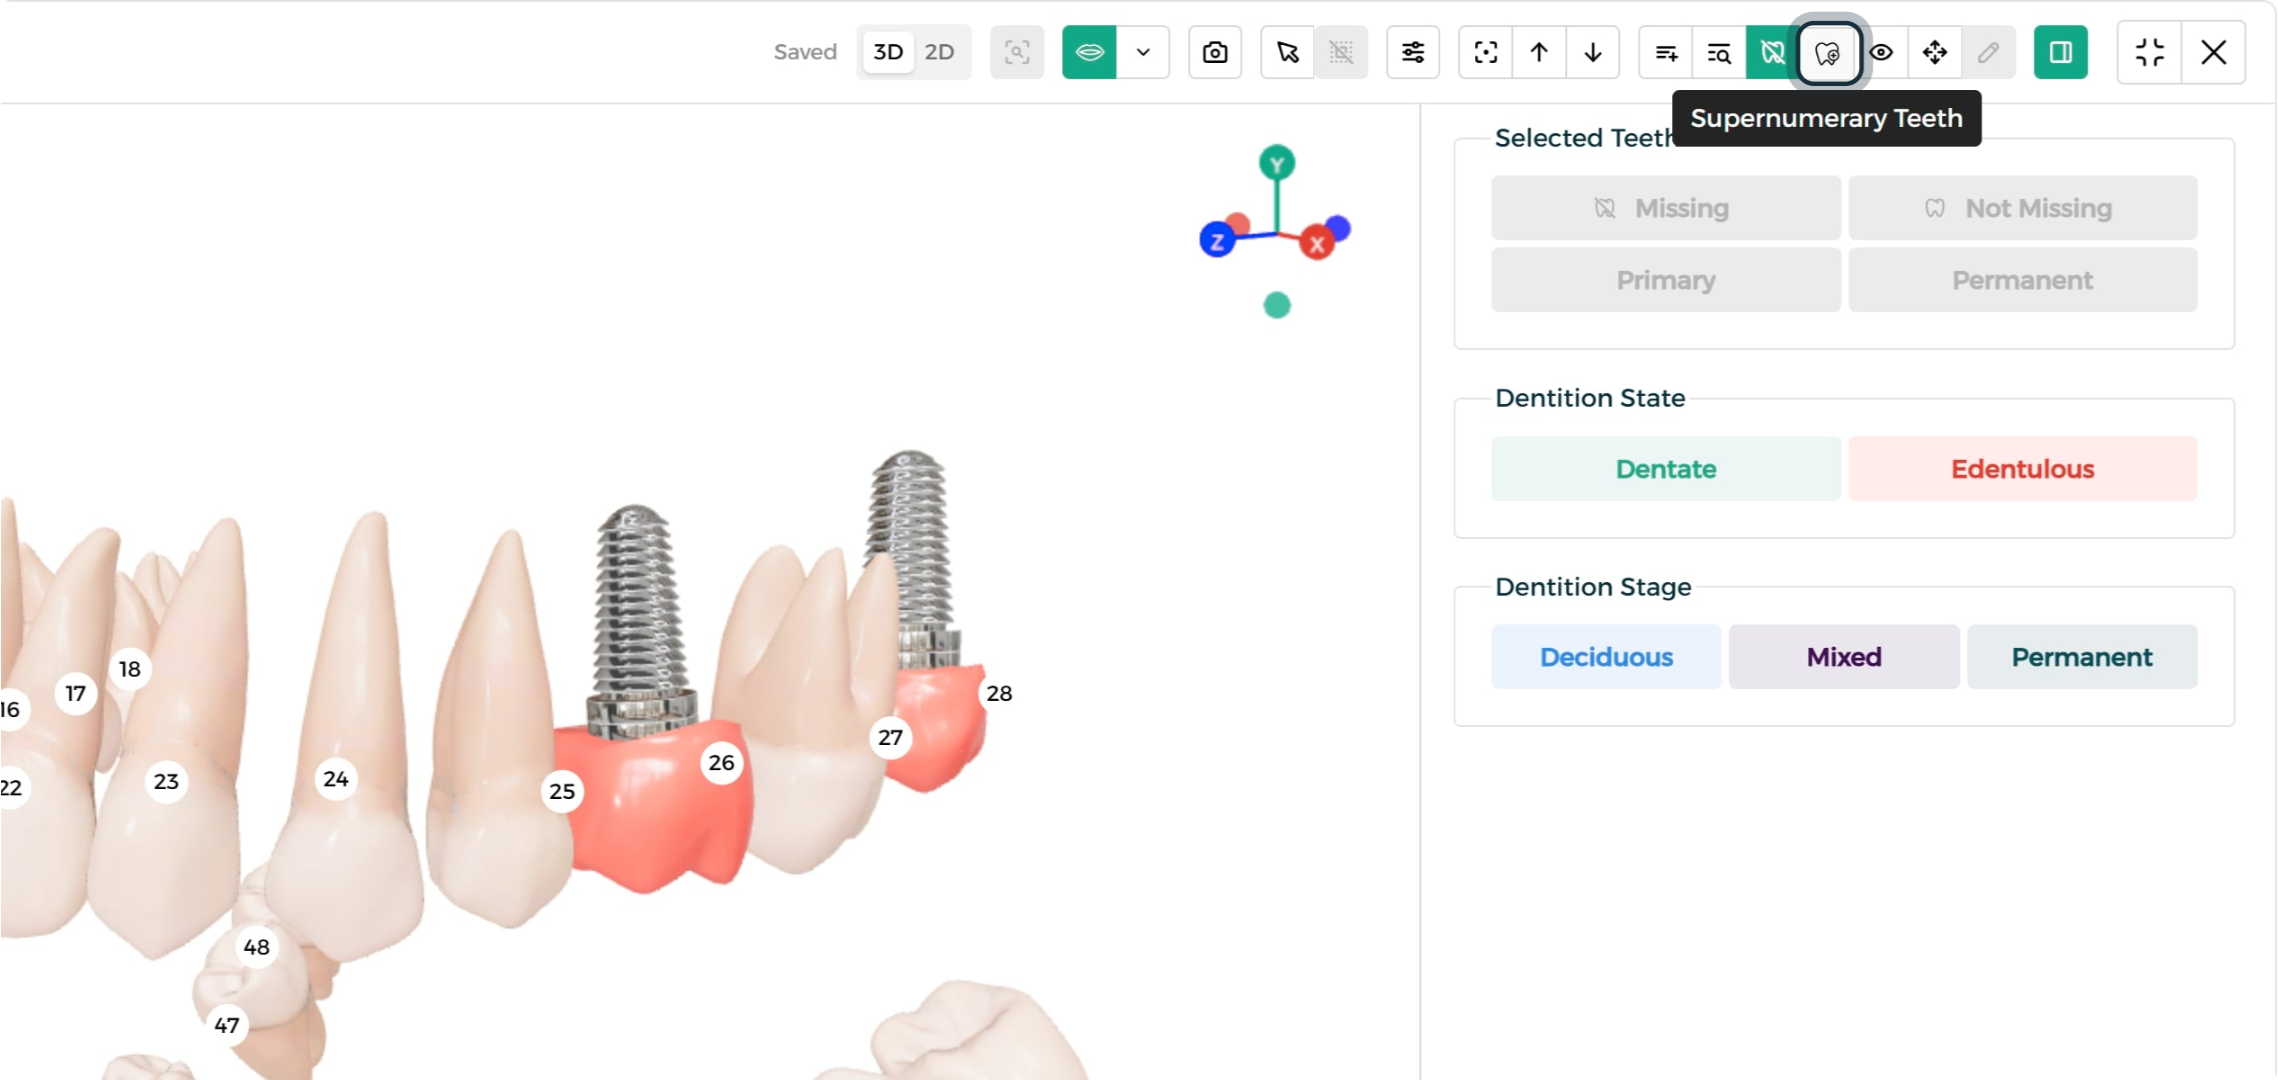
Step 1: Open the Supernumerary Tooth Tab
For extra teeth, open this tab directly from the Presence & Dentition panel.
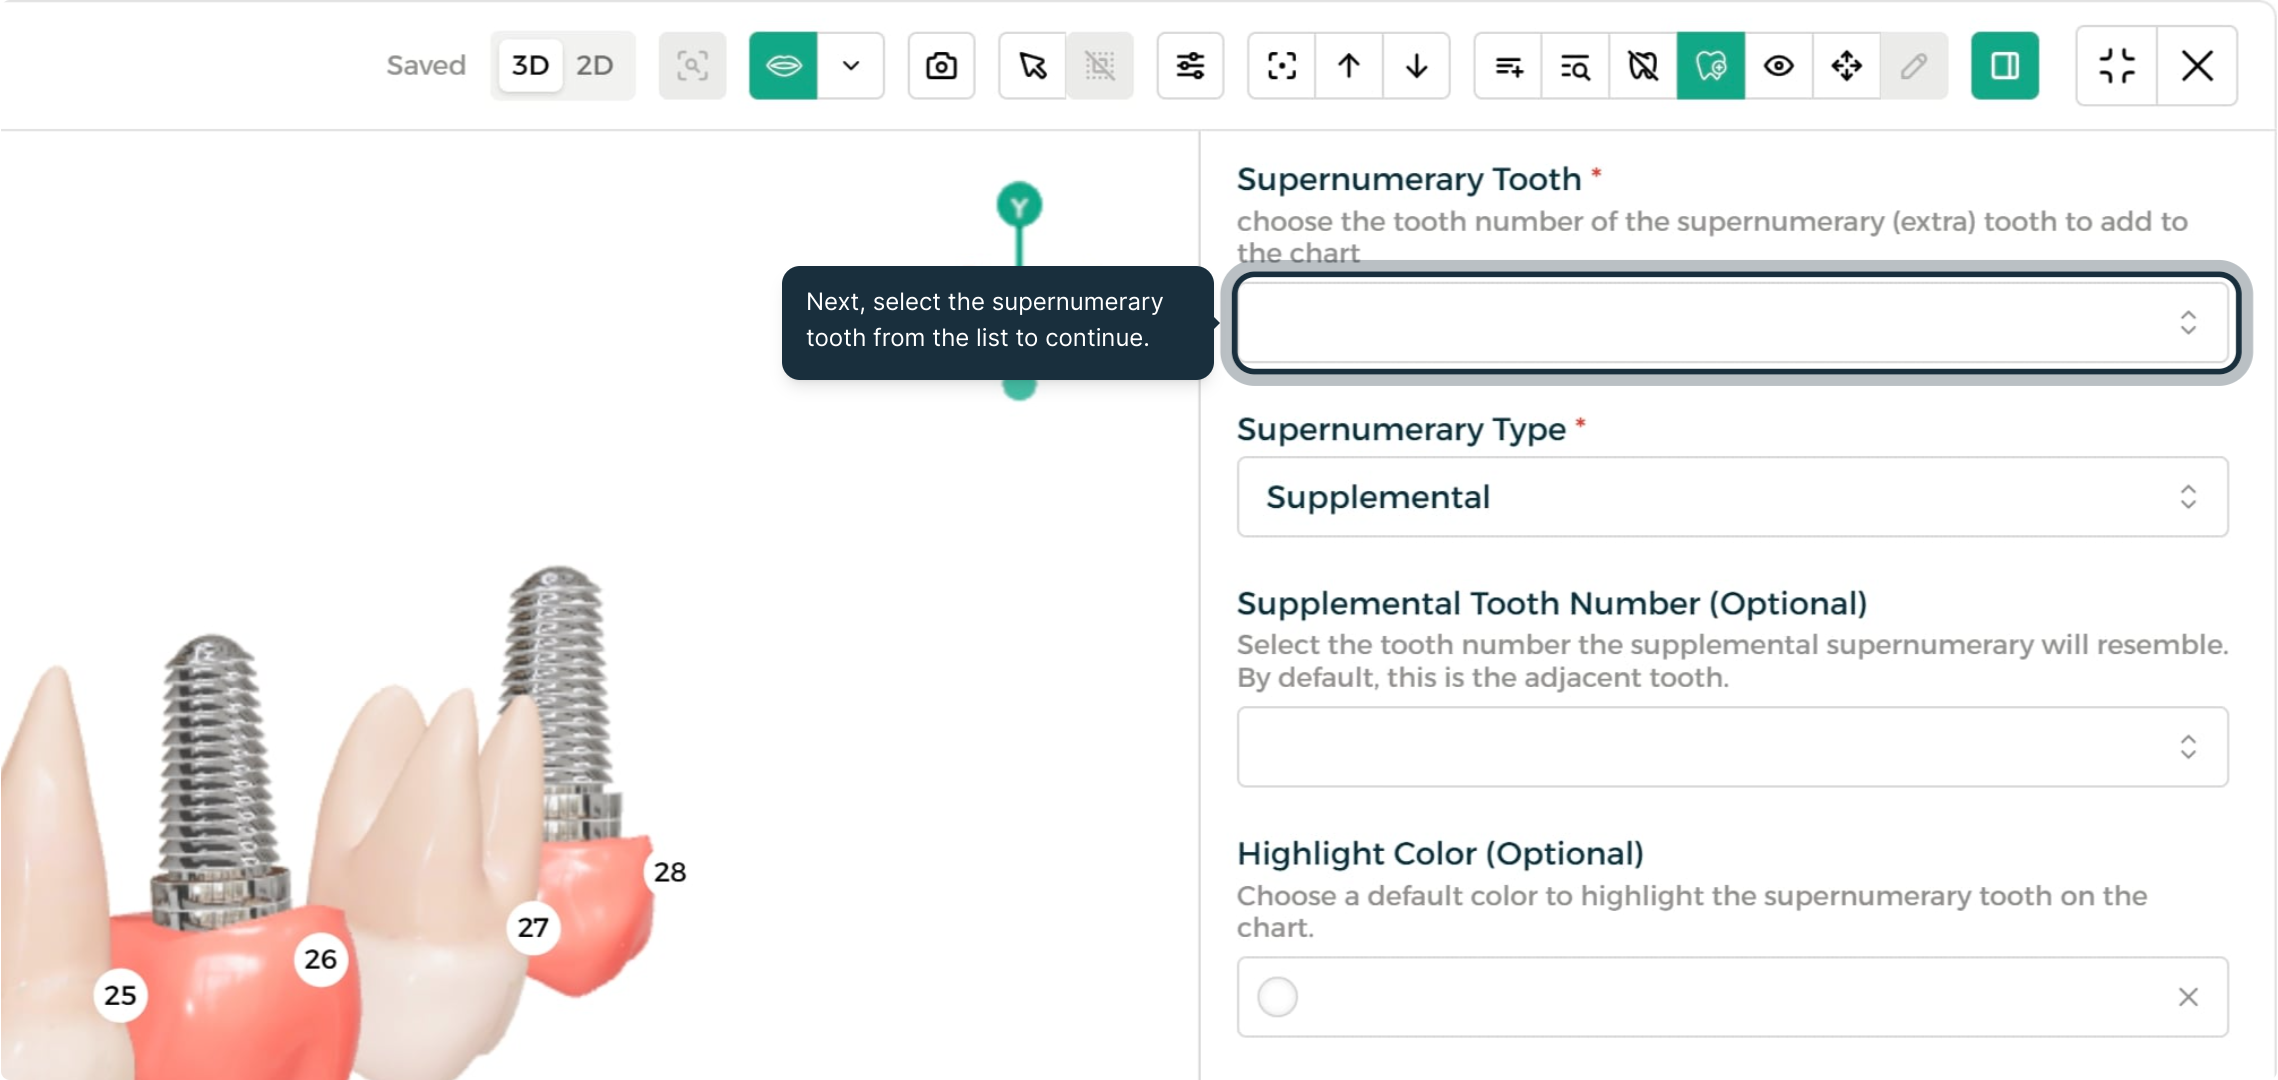
Step 2: Select the Nearest Tooth Position
Choose the tooth number closest to where the supernumerary tooth is located.
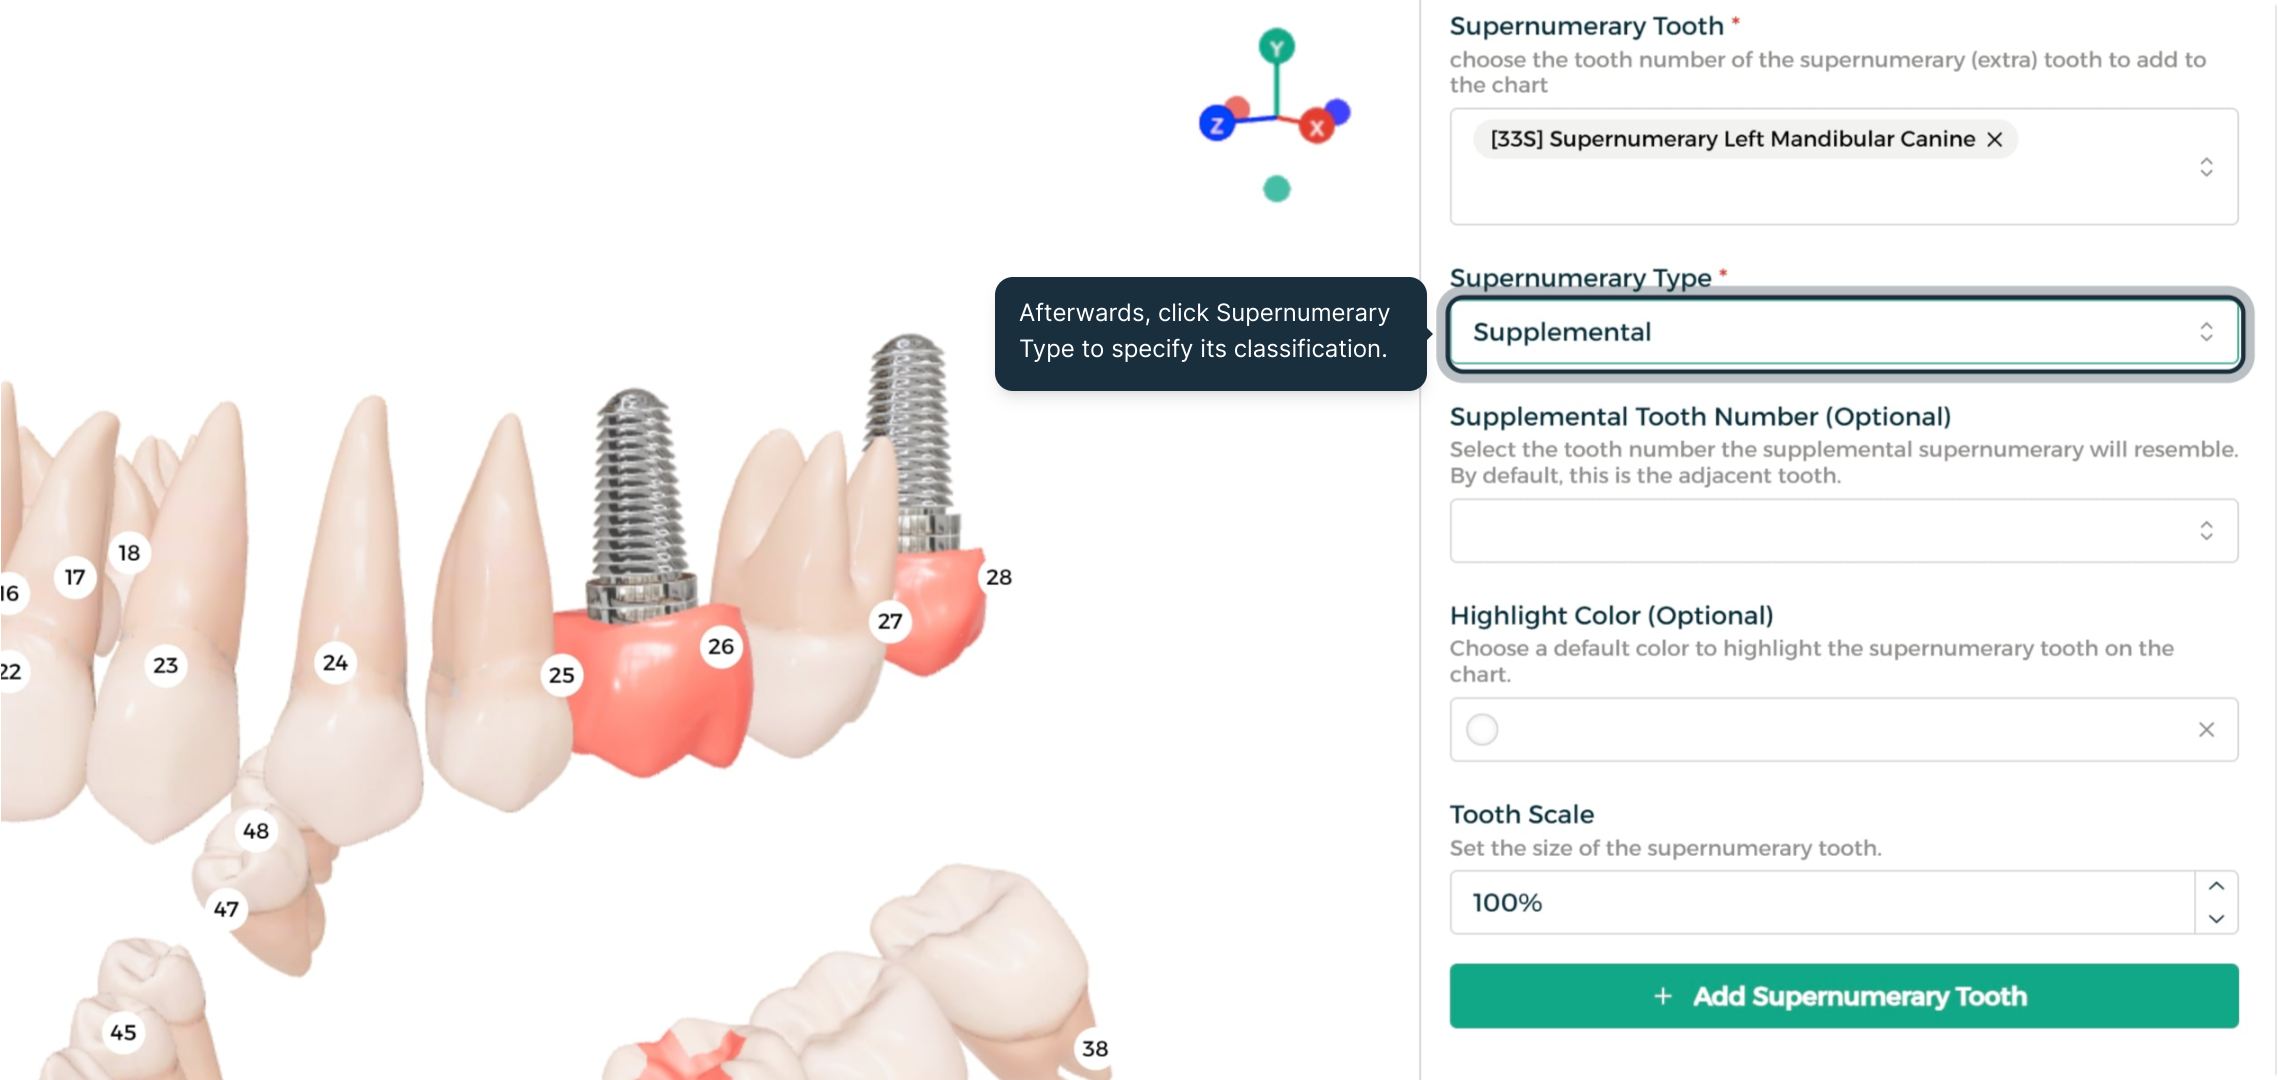
Step 3: Set the Supernumerary Type
Set the Supernumerary Type to specify exactly what kind of extra tooth it is.
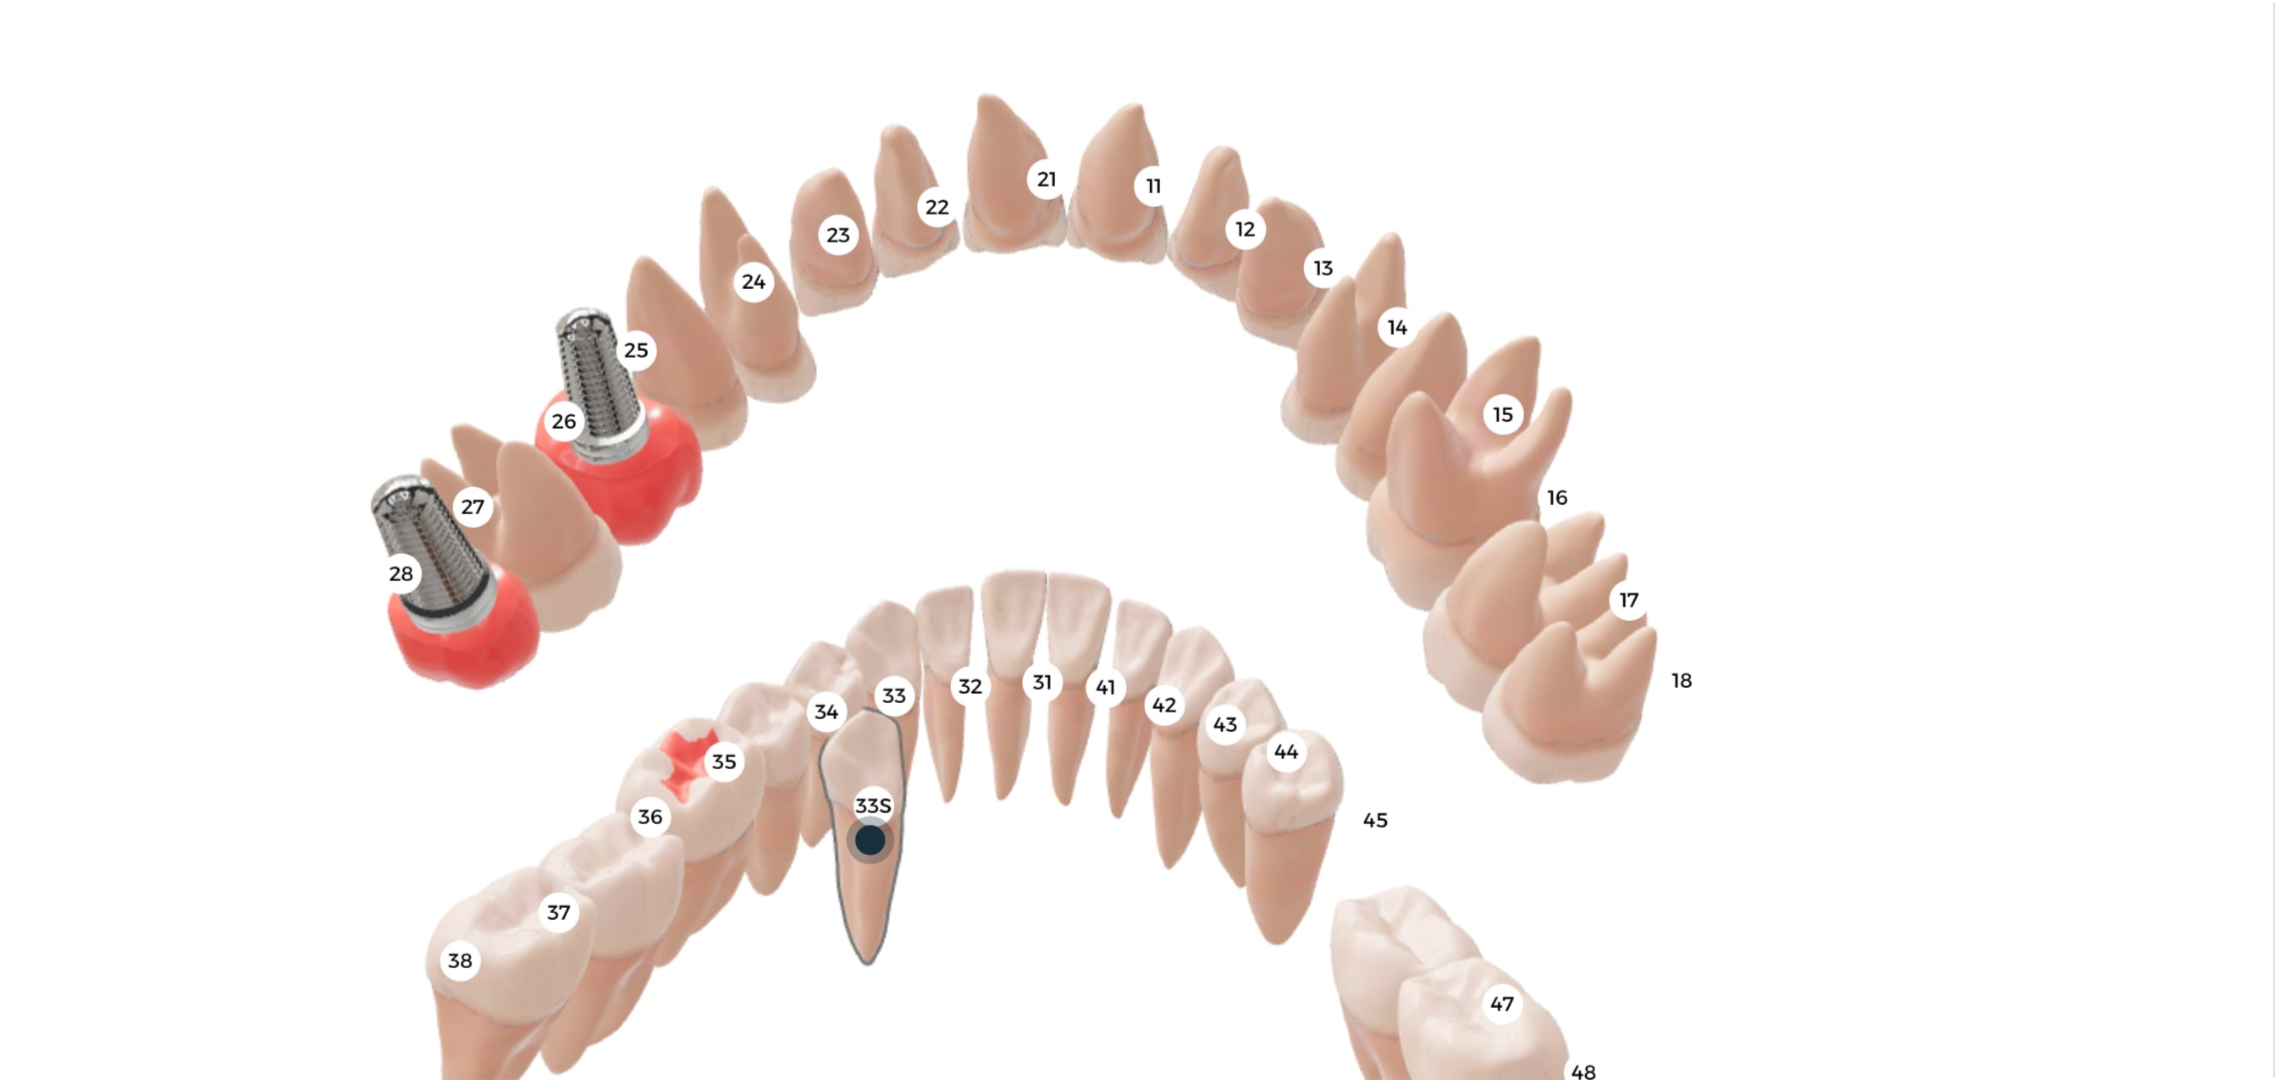
Step 4: Save the Supernumerary Tooth
Click Add Supernumerary Tooth to save it directly to the patient's chart — it appears on the model and can be selected for further edits.
Repositioning Teeth
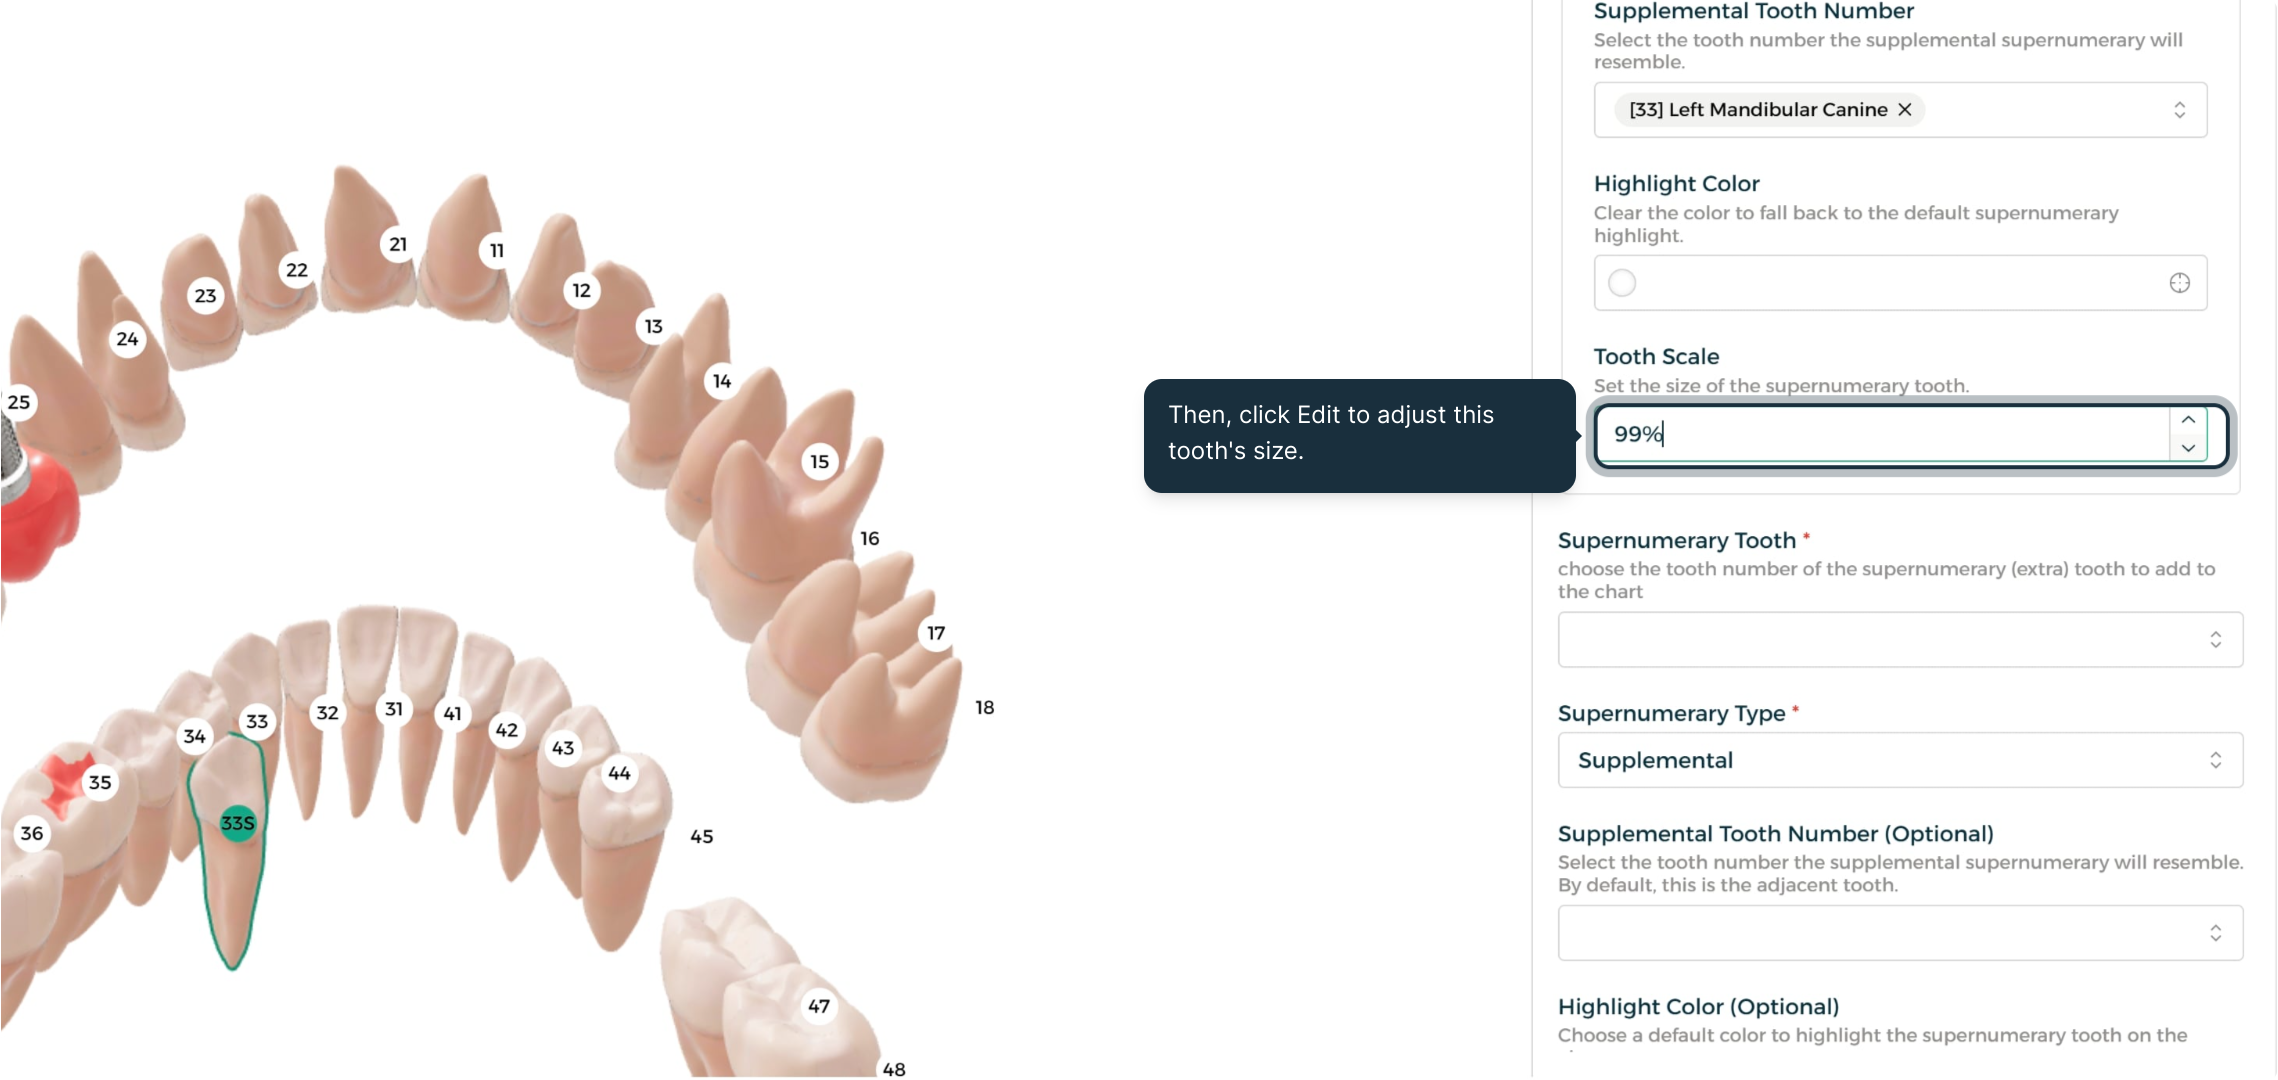
Step 1: Adjust a Tooth's Size
Use the size control to adjust how large a supernumerary or existing tooth appears on the chart.
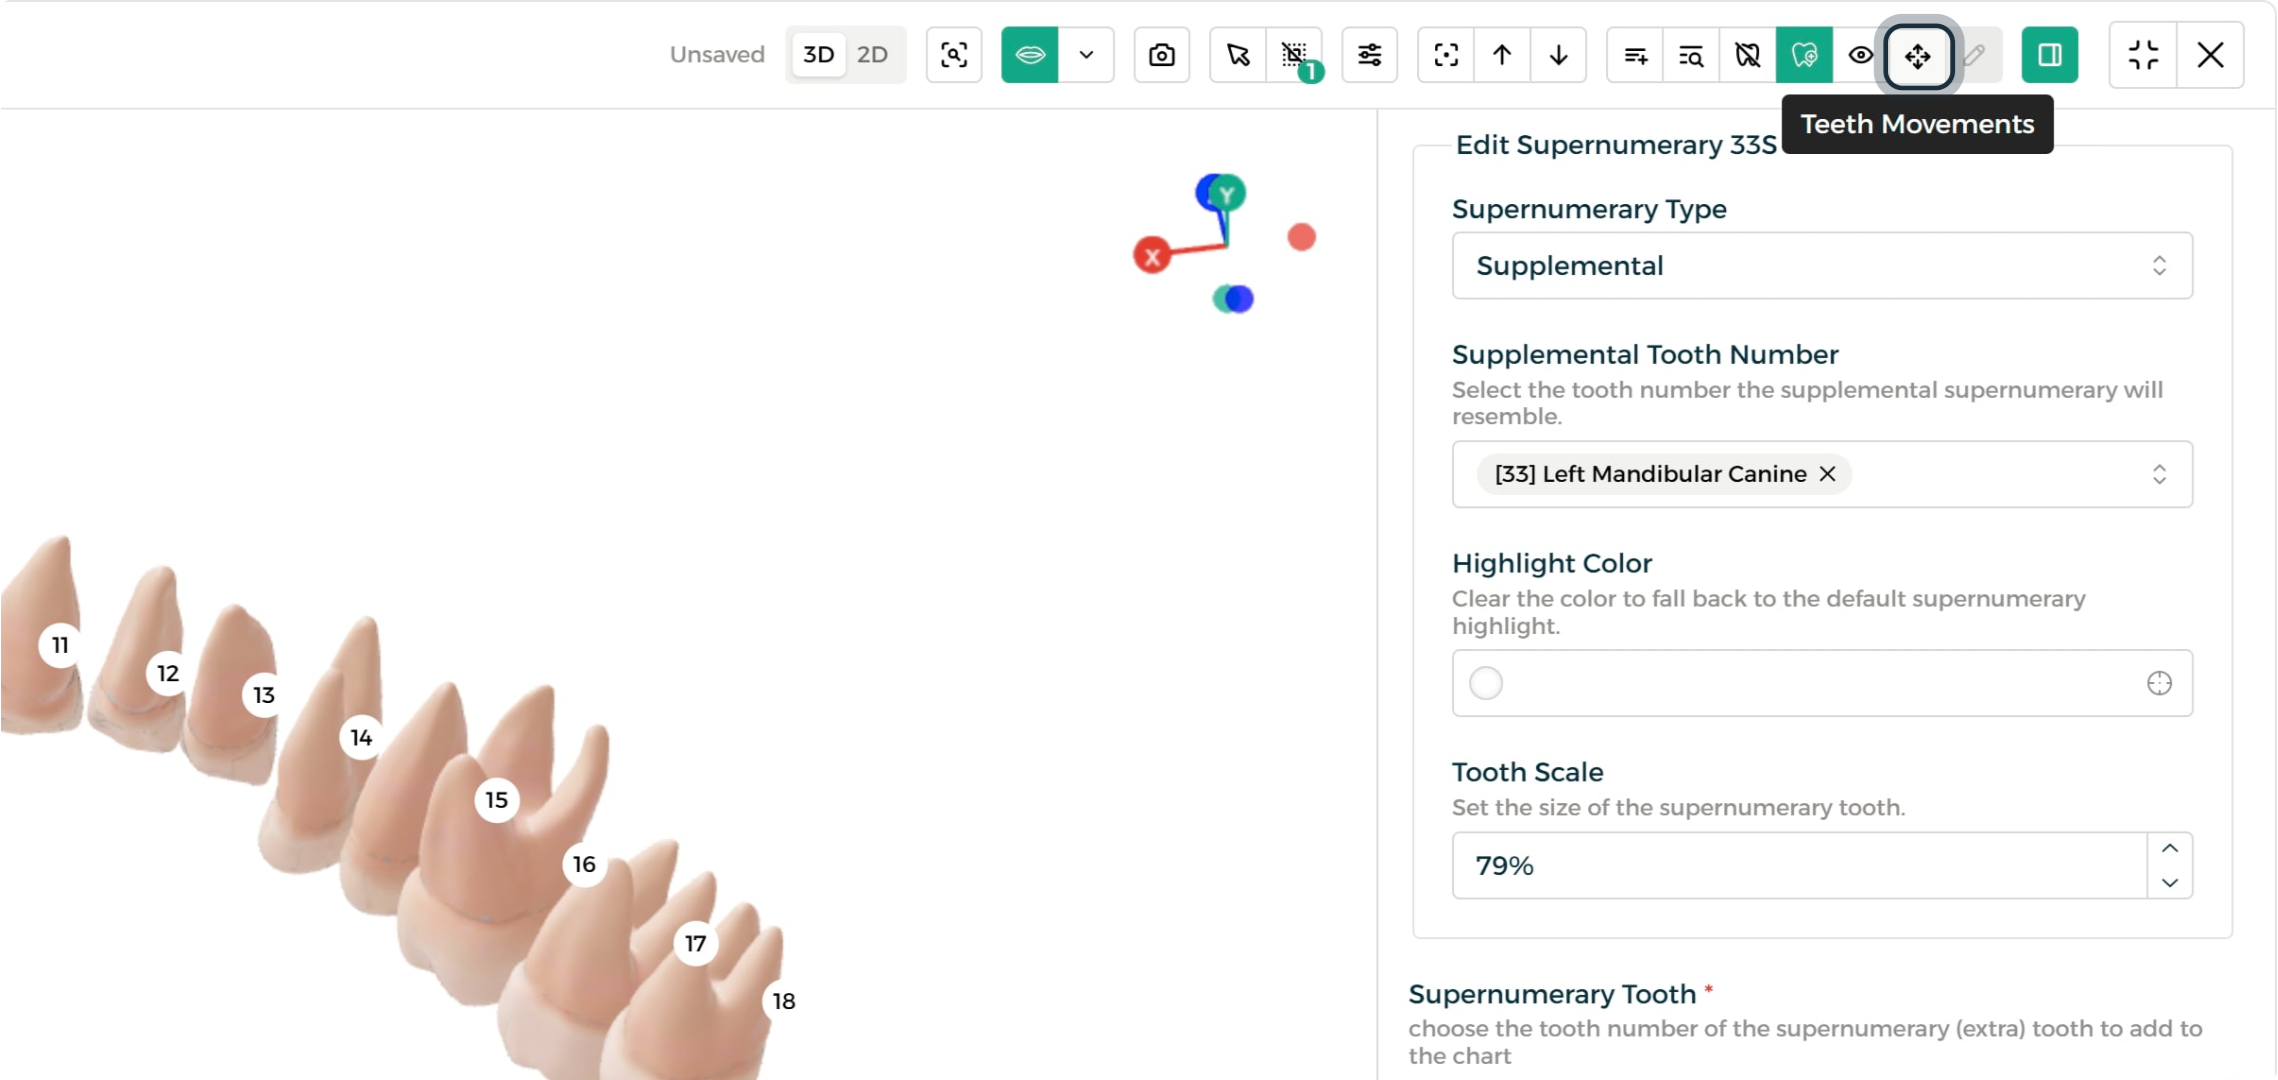
Step 2: Open Teeth Movements
Use this tab to fine-tune a tooth's exact position — shifting, rotating, or tilting it until it looks right.
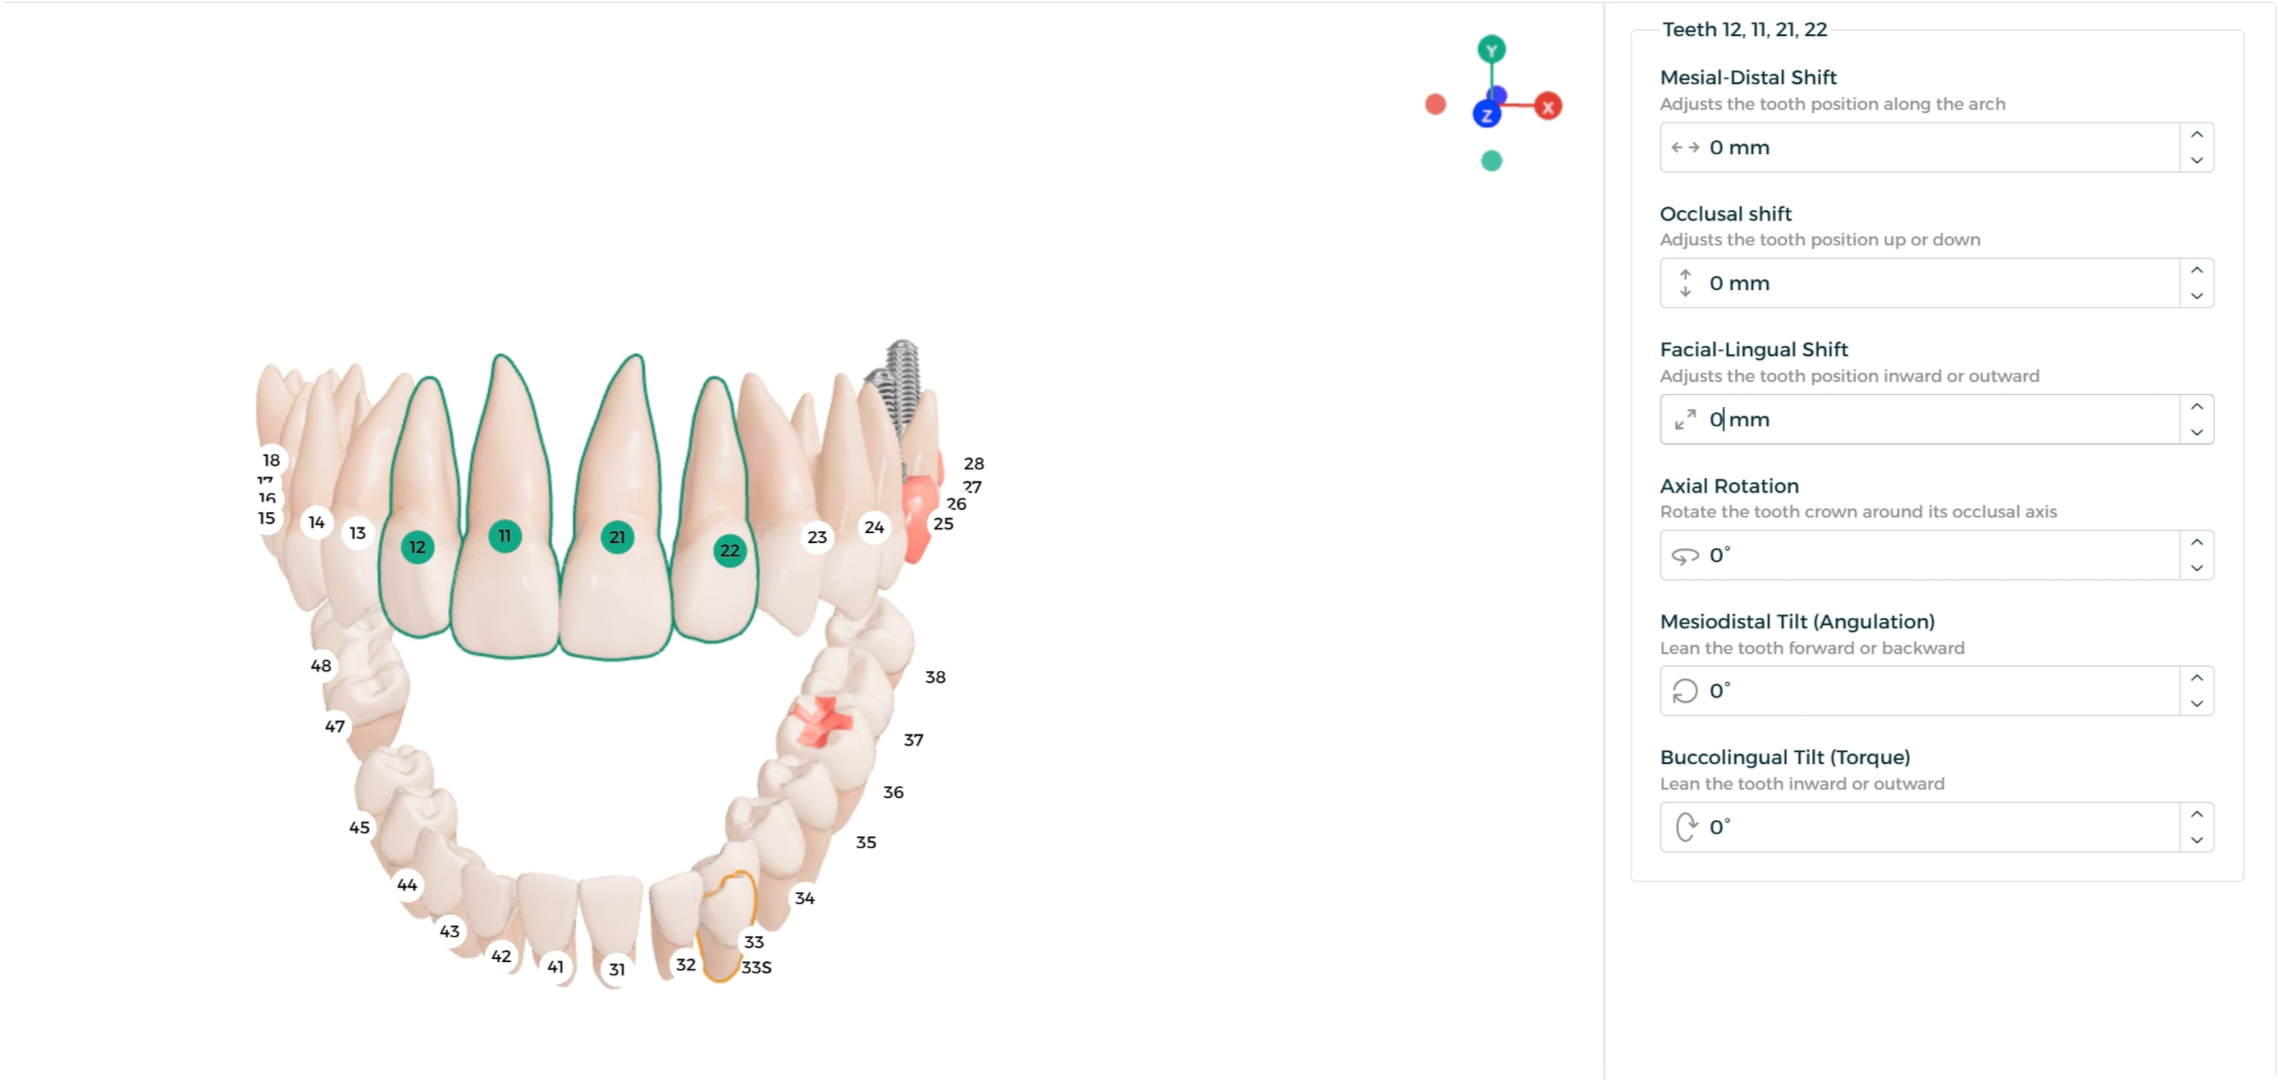
Step 3: Reposition Multiple Teeth Together
Select a group of teeth and adjust the shift value once — it moves every selected tooth together, useful for aligning several teeth in one motion.
Annotating the 2D Chart
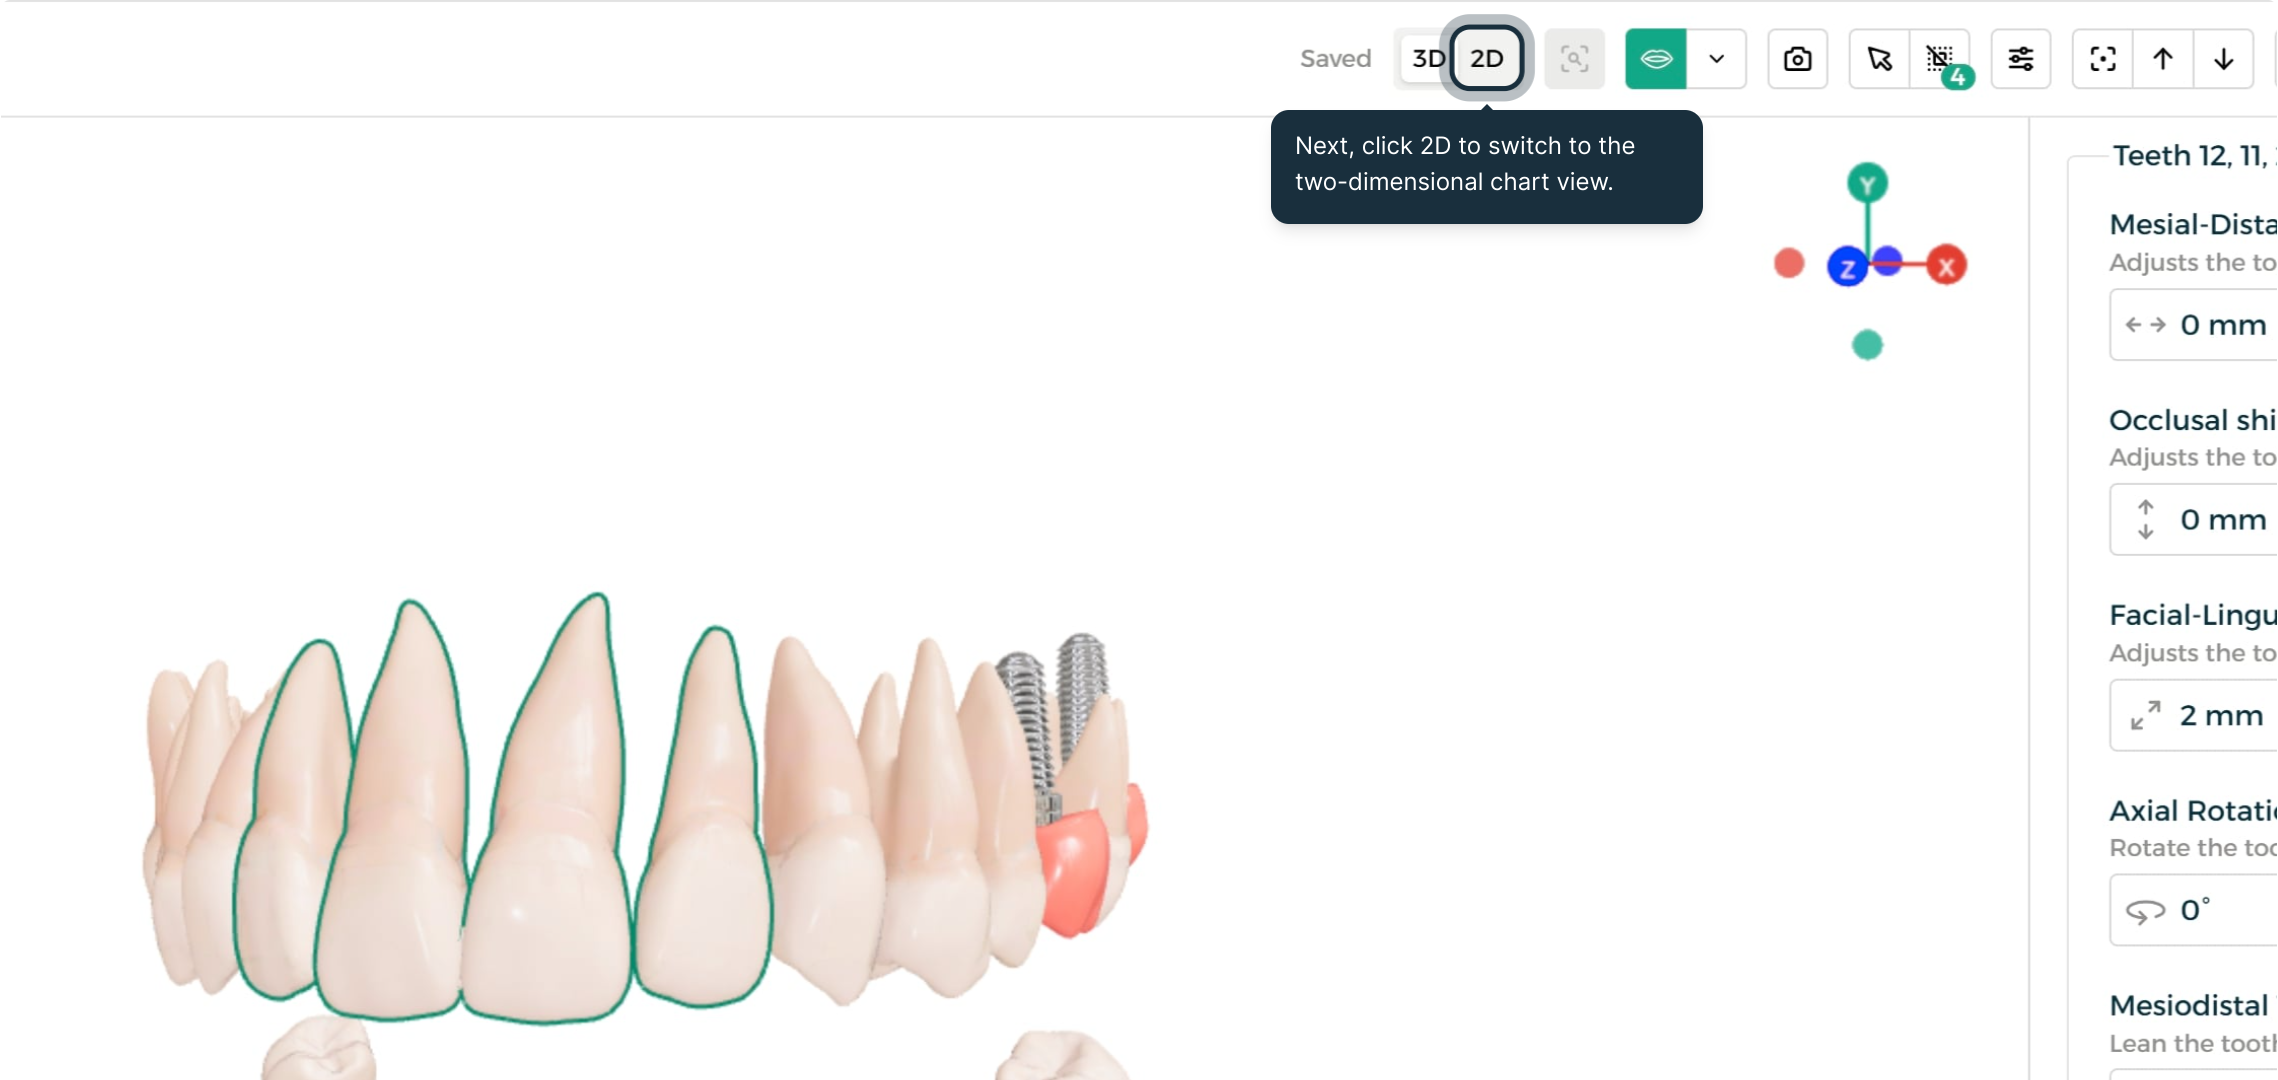
Step 1: Switch to the 2D View
Click 2D to switch the chart to a flat, two-dimensional view for annotation.
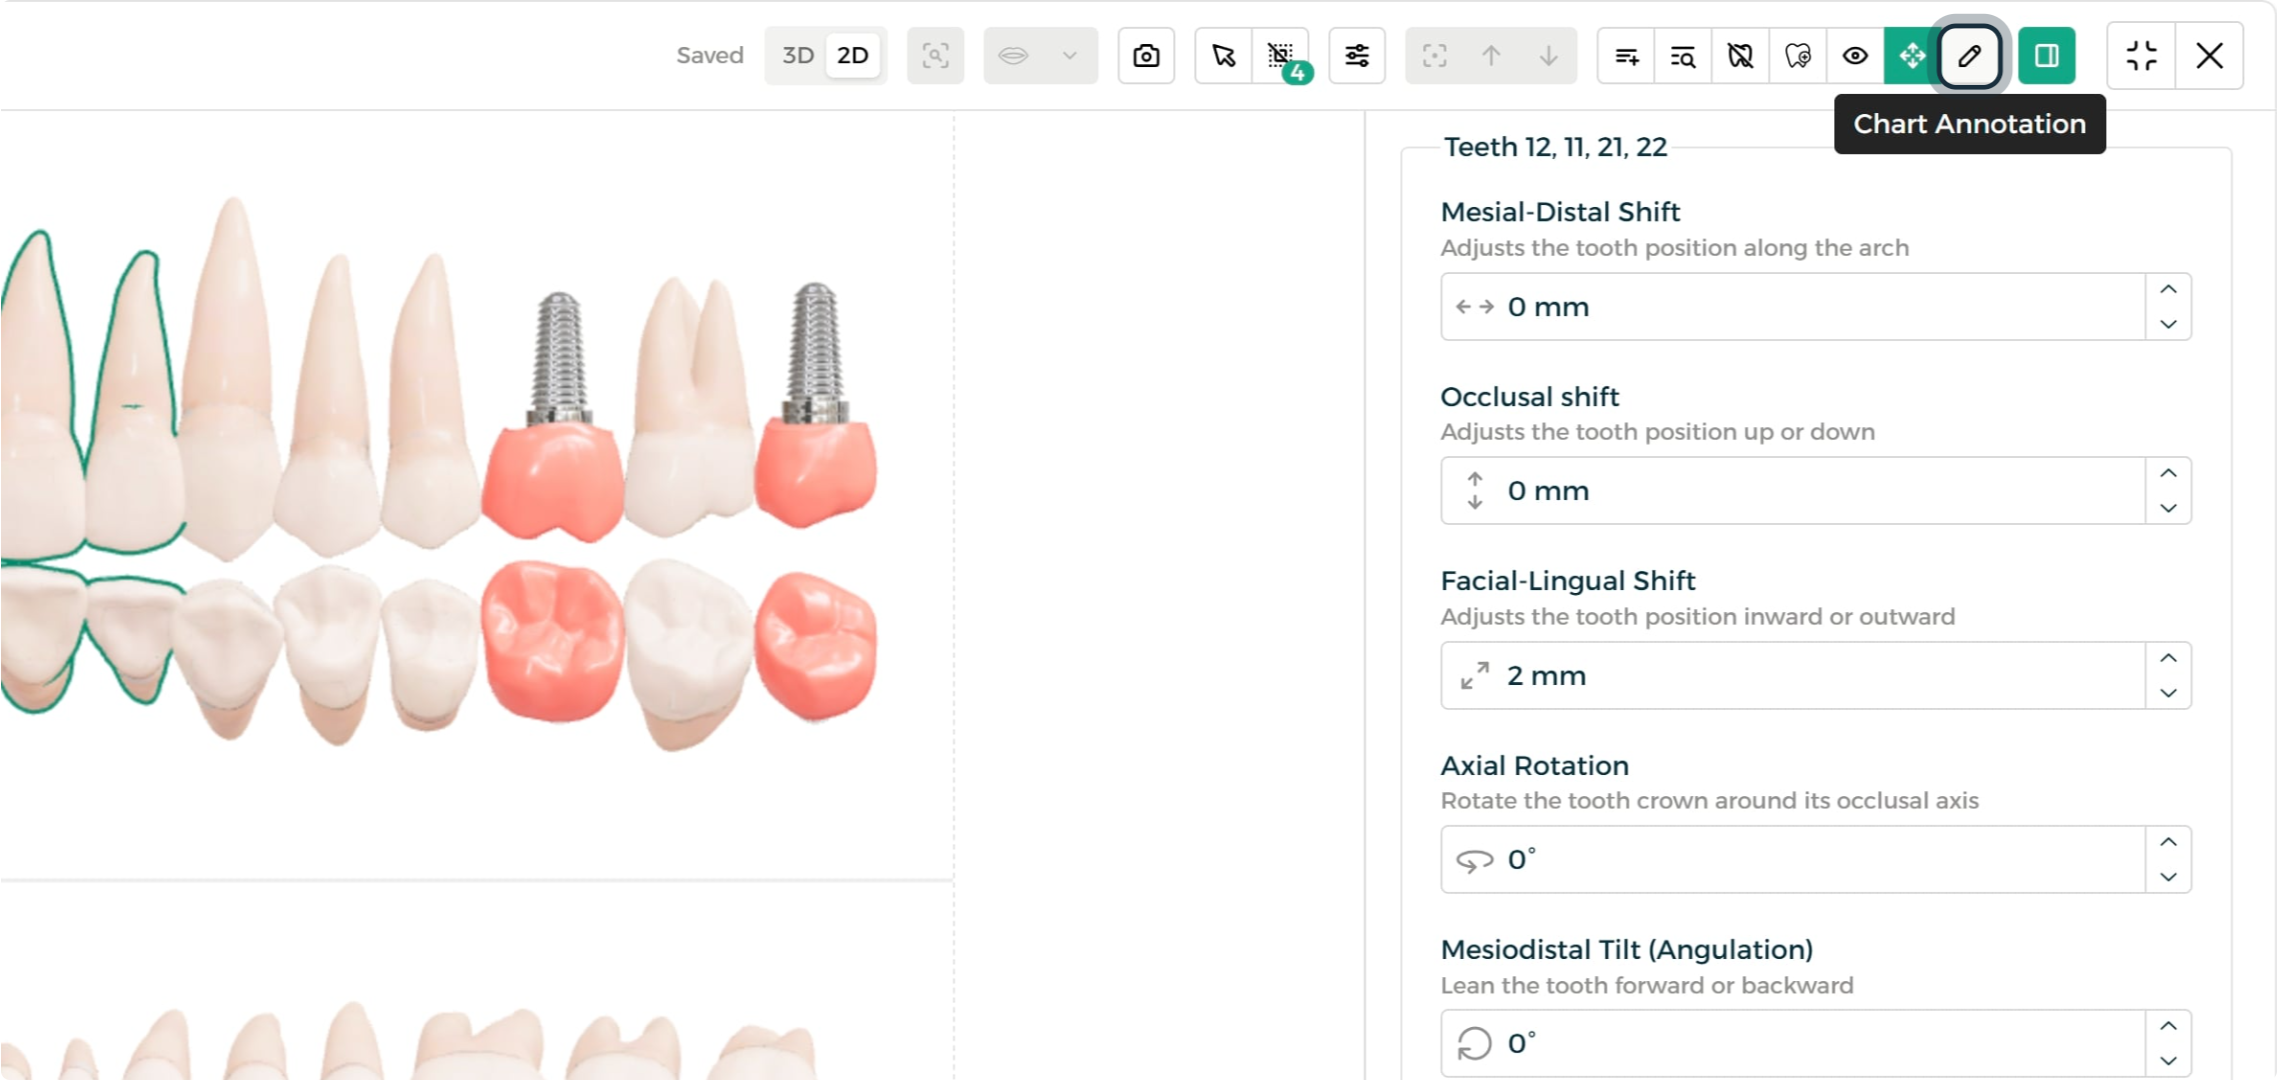
Step 2: Open Chart Annotation Tools
The Chart Annotation control opens tools for editing and annotating the teeth diagram.
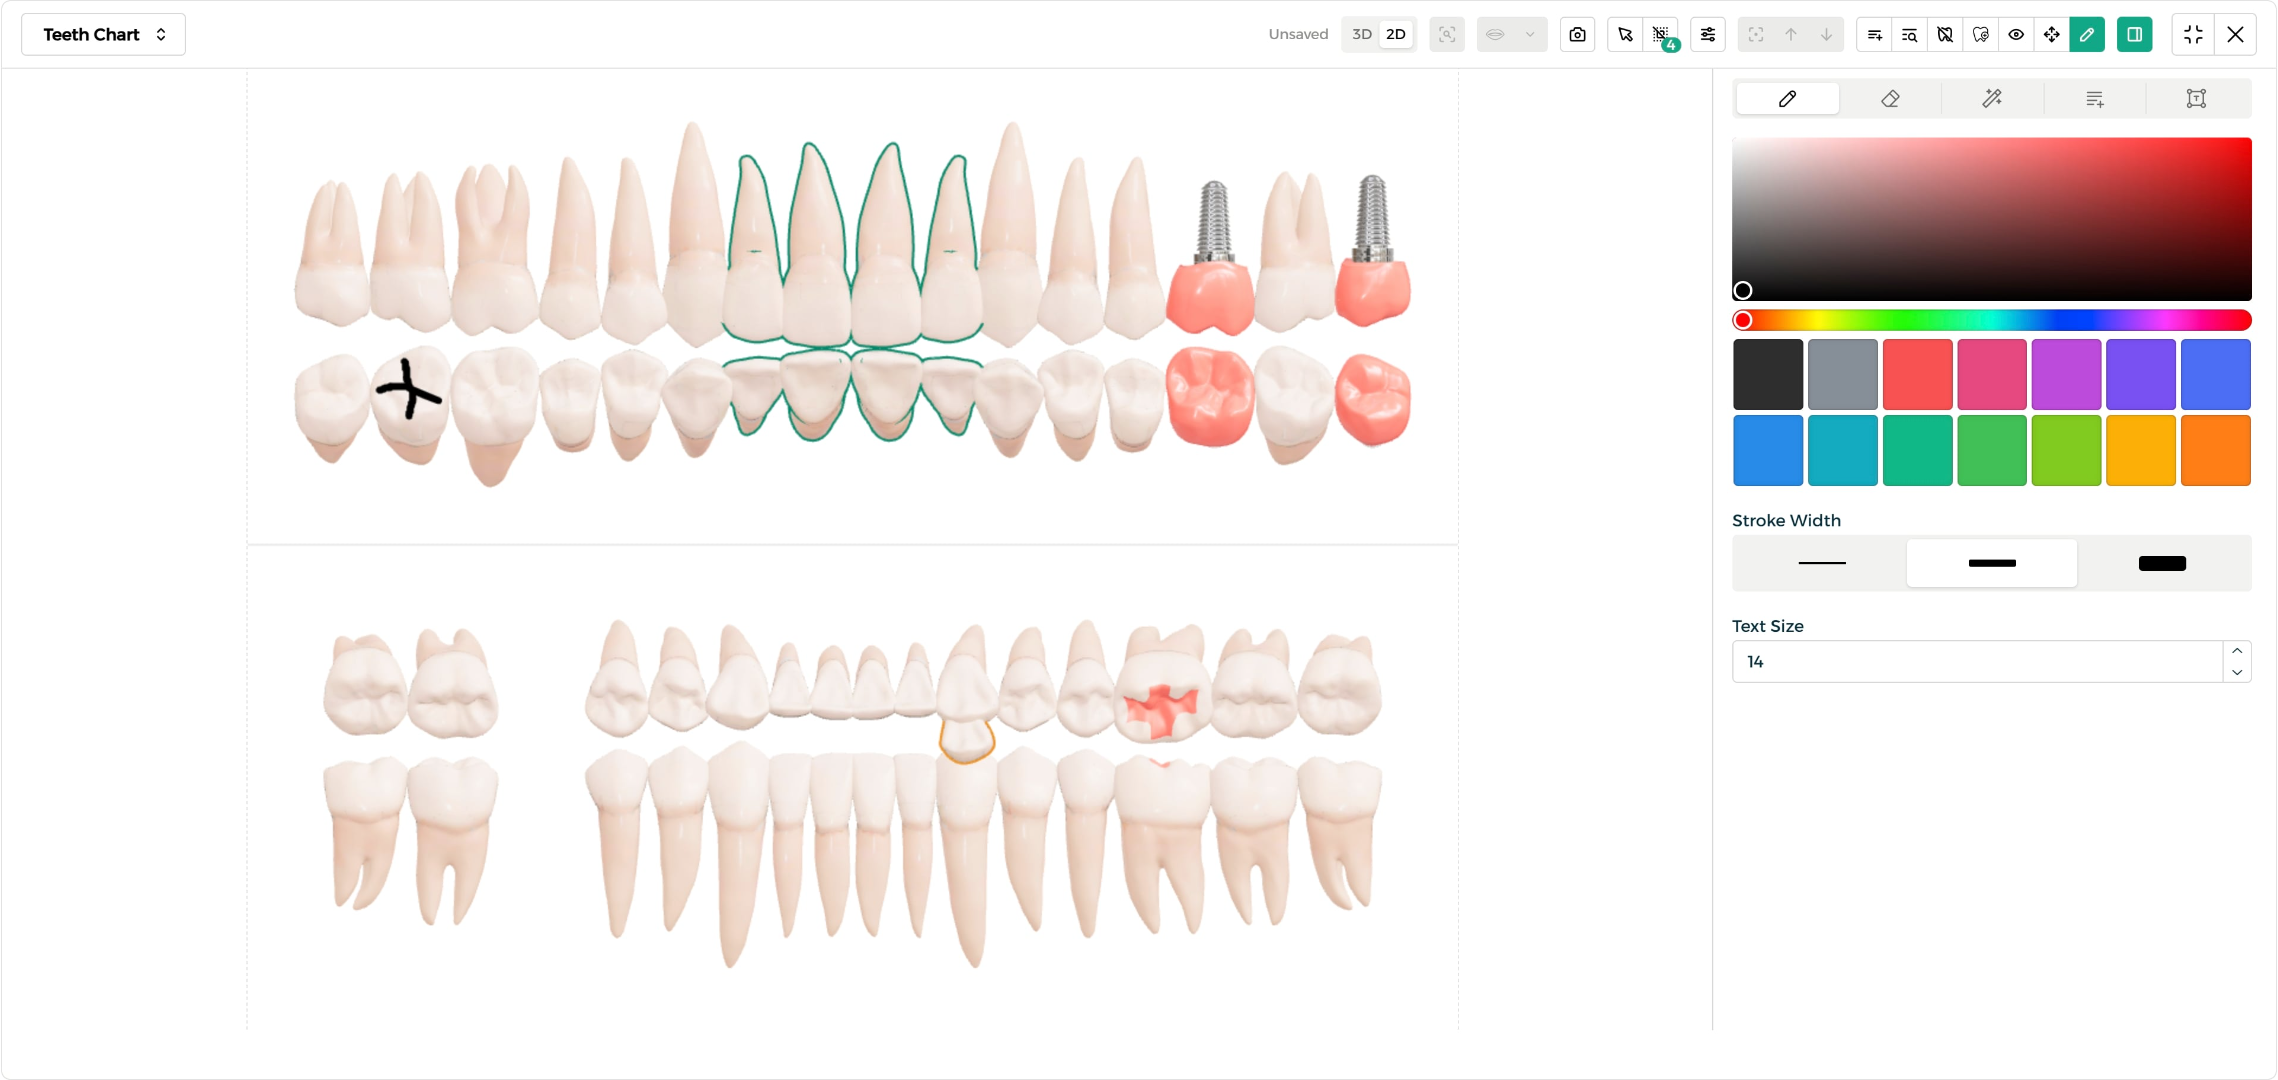
Step 3: Draw a Marker Directly on a Tooth
Click directly on a tooth to drop an annotation marker right where you need it.
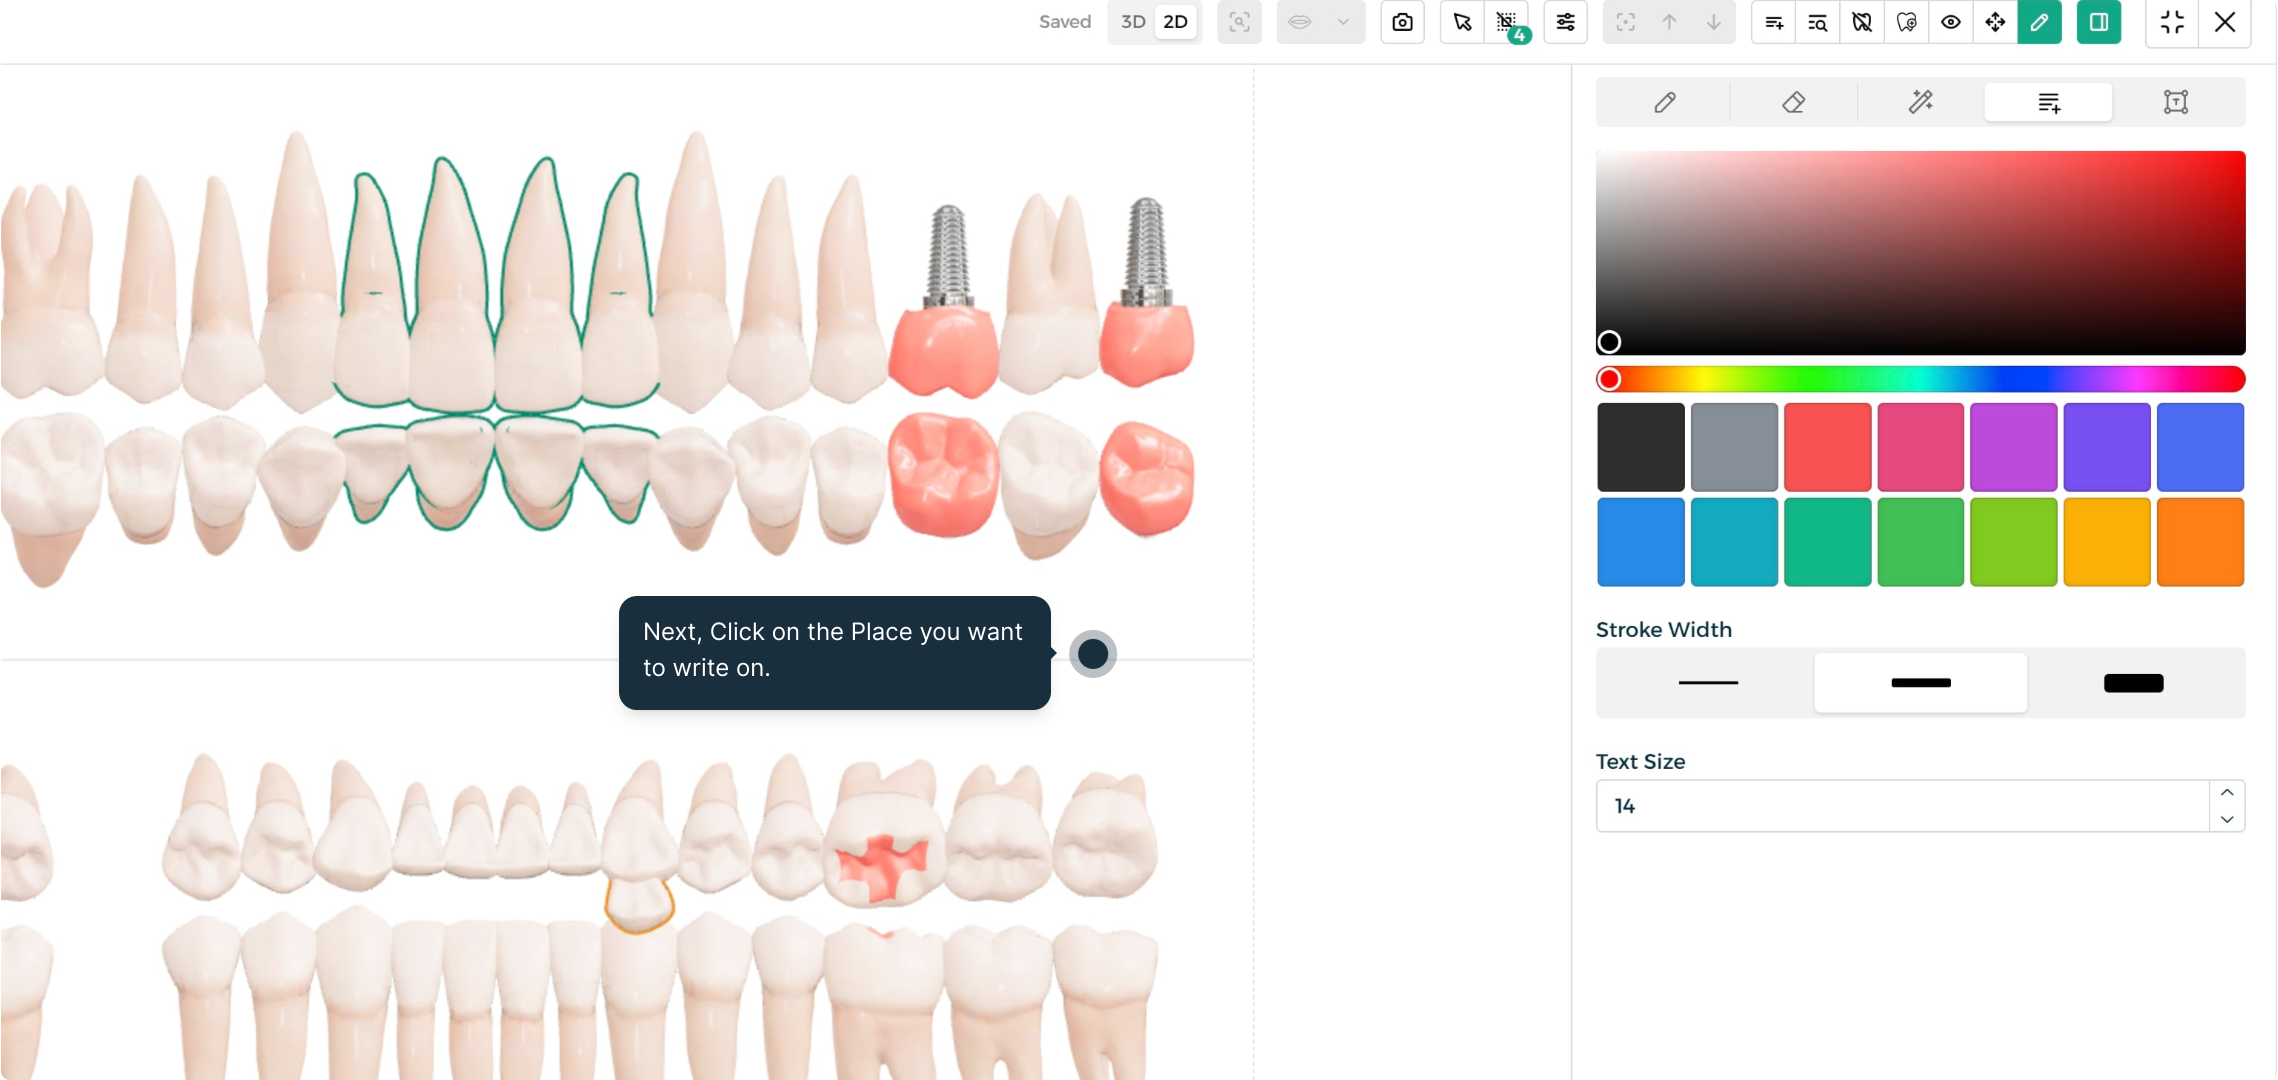
Step 4: Add a Text Note
Switch to the text tool and click the spot where you want to add a note.
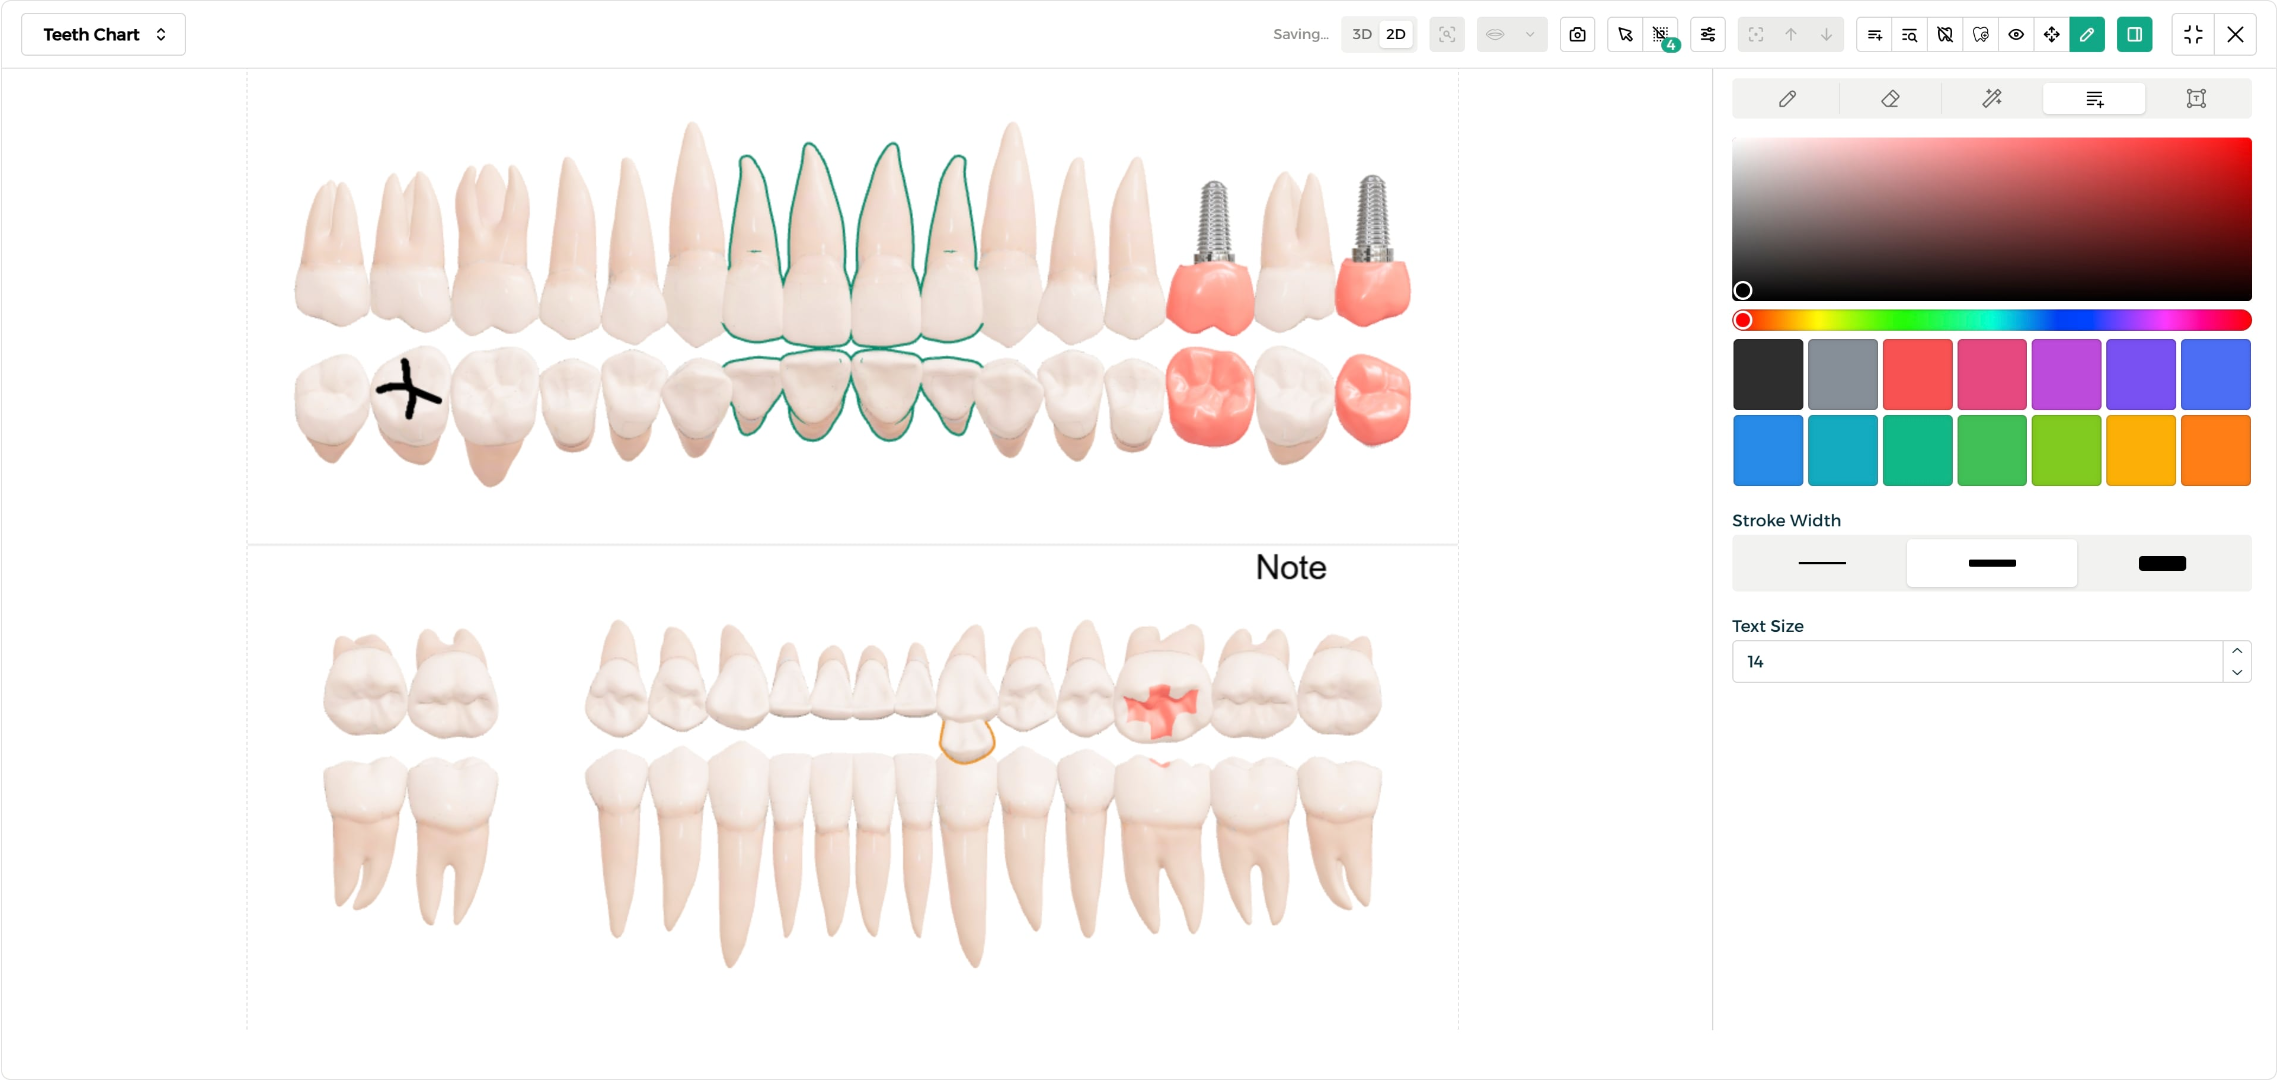
Step 5: View the Finished Annotation
The marker and text are added directly to the chart.
Saving the Chart
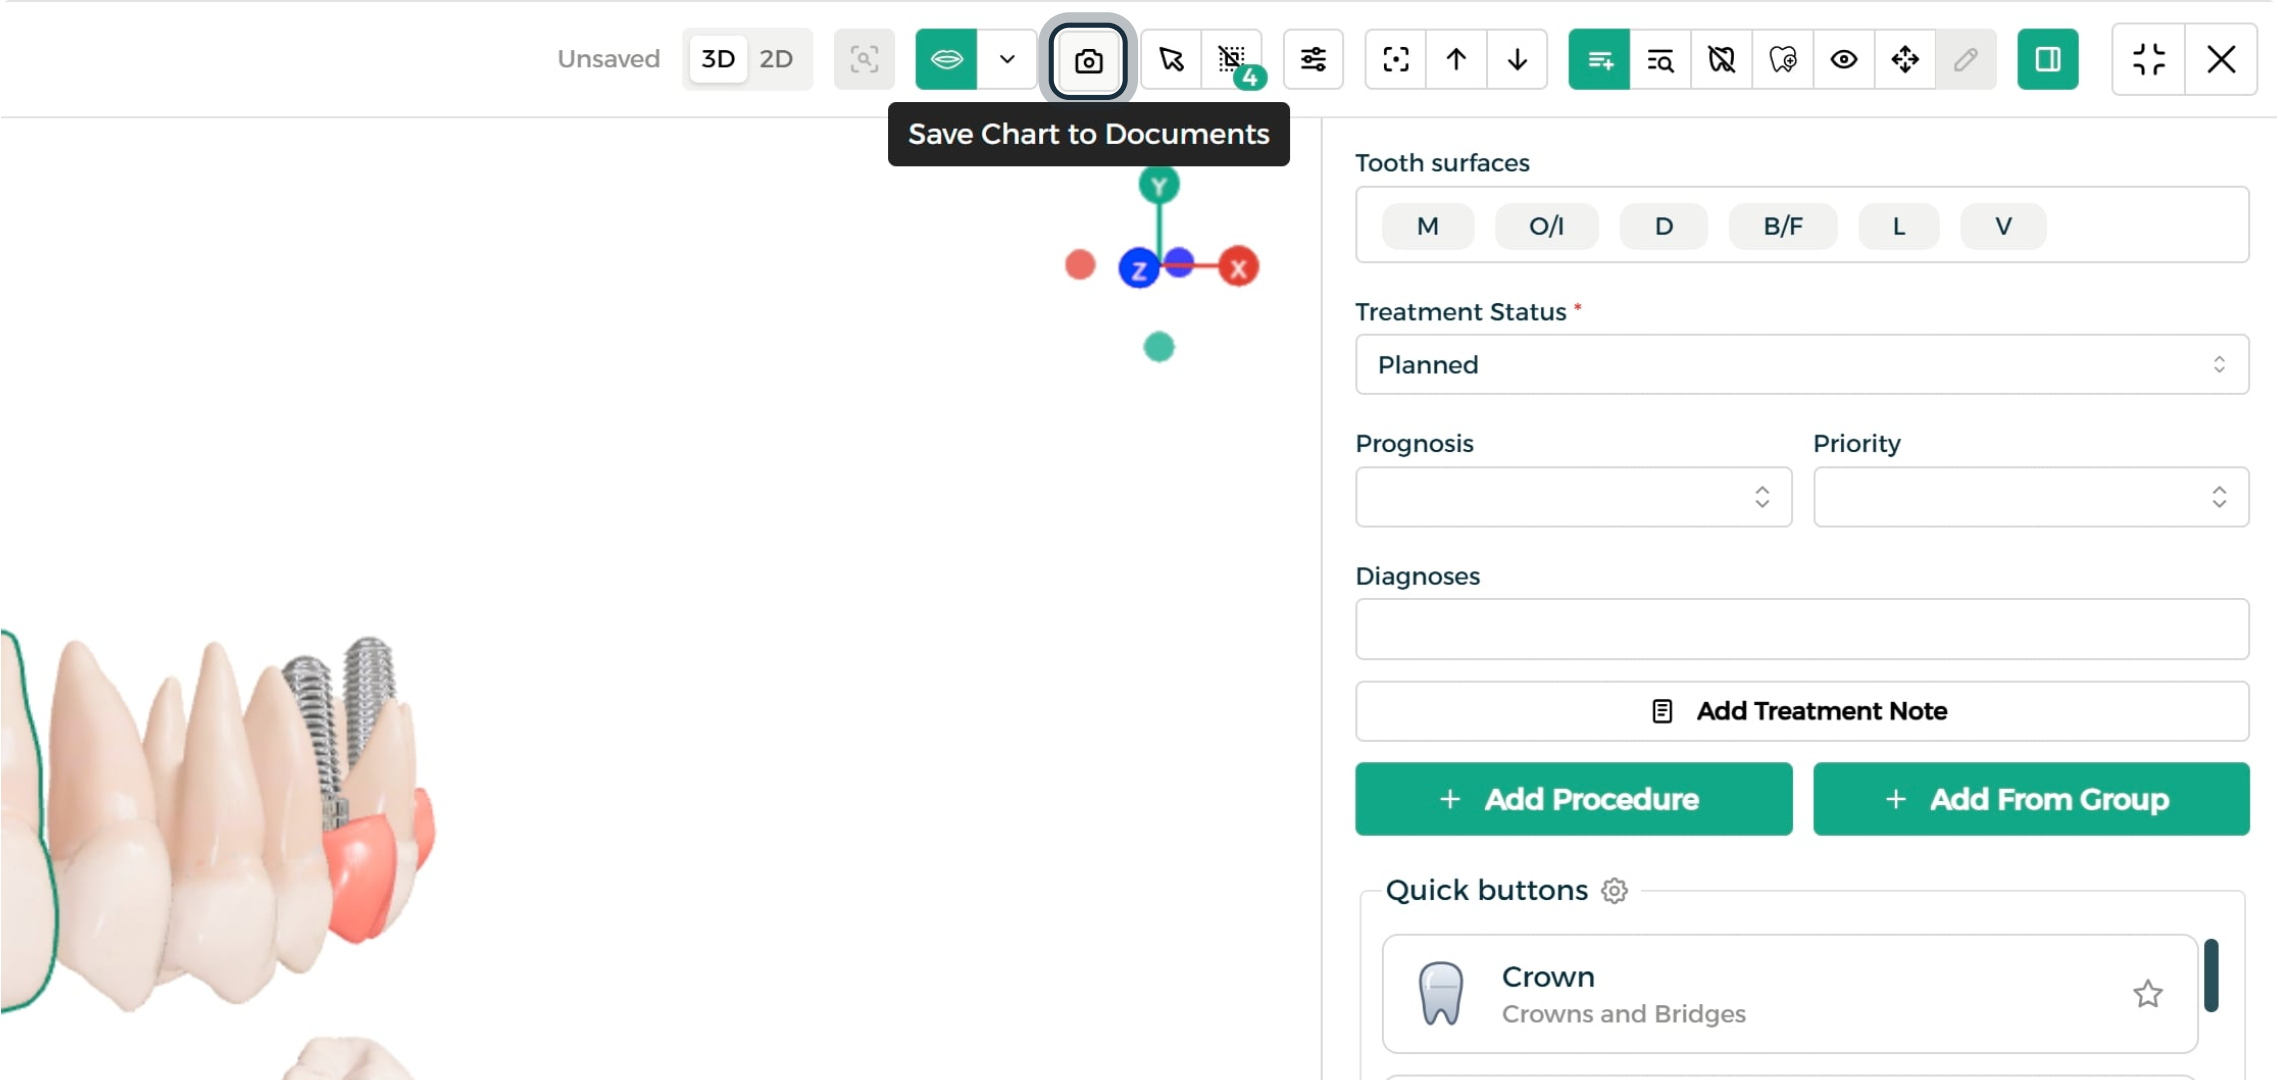
Save a Snapshot to Patient Documents
Switch back to 3D, then use the camera icon to save a snapshot of the chart to the patient's documents.
End-to-End Workflow
- Open the patient's profile and go to Charts, then select the Teeth Chart.
- Expand to fullscreen and rotate, open, or adjust the 3D model as needed.
- Choose a selection mode and select the tooth (or teeth) to treat.
- Add procedures to each tooth, using the quick-select list or manual entry.
- Review logged procedures for the whole chart or a single tooth.
- Document tooth presence, dentition stage, or supernumerary teeth as needed.
- Fine-tune tooth size and position using Teeth Movements.
- Switch to 2D to annotate the chart with markers or text.
- Save a snapshot of the finished chart to the patient's documents.
Best Practices
- Use selection modes deliberately. Switch between individual tooth, sextant, quadrant, and arch selection to match the scope of the procedure you're logging.
- Customize the quick-procedure list. Keeping frequently used procedures at the top speeds up charting for common treatments.
- Document tooth presence before adding procedures. Marking missing or supernumerary teeth first keeps the chart accurate as you log treatment.
- Use Teeth Movements for visual accuracy. Small position and size adjustments make the chart easier to read at a glance during patient consultations.
- Save a snapshot after every session. This keeps a dated visual record in the patient's documents alongside the live chart.
FAQ
Q: Can I switch between the 2D and 3D views at any time? Yes. Use the 2D/3D toggle at the top of the chart to move between the interactive 3D model and the flat 2D view used for annotation.
Q: How do I select more than one tooth at a time? Open Selection Mode and enable multiple selection, then choose sextant, quadrant, or arch mode depending on how many teeth you need to select together.
Q: What happens when I mark a tooth as missing? The tooth disappears from the chart to reflect its absence and is excluded from further charting on that tooth.
Q: Can I customize the list of quick-select procedures? Yes, the quick-procedure buttons can be customized to match your clinic's most common treatments.
Q: How do I add an extra (supernumerary) tooth to the chart? Open the Supernumerary Tooth tab, select the nearest tooth position and the supernumerary type, then click Add Supernumerary Tooth to save it.
Q: Where can I annotate the chart with notes or drawings? Switch to the 2D view and open Chart Annotation to access drawing and text tools directly on the diagram.
Q: How do I keep a record of the chart at a point in time? Use the camera icon to save a snapshot of the chart directly to the patient's documents.