How to Create Customer Credit Notes and Process Refund Adjustments
Learn how to issue credit notes, correct invoices, and manage customer refunds professionally.
Step-by-Step Process
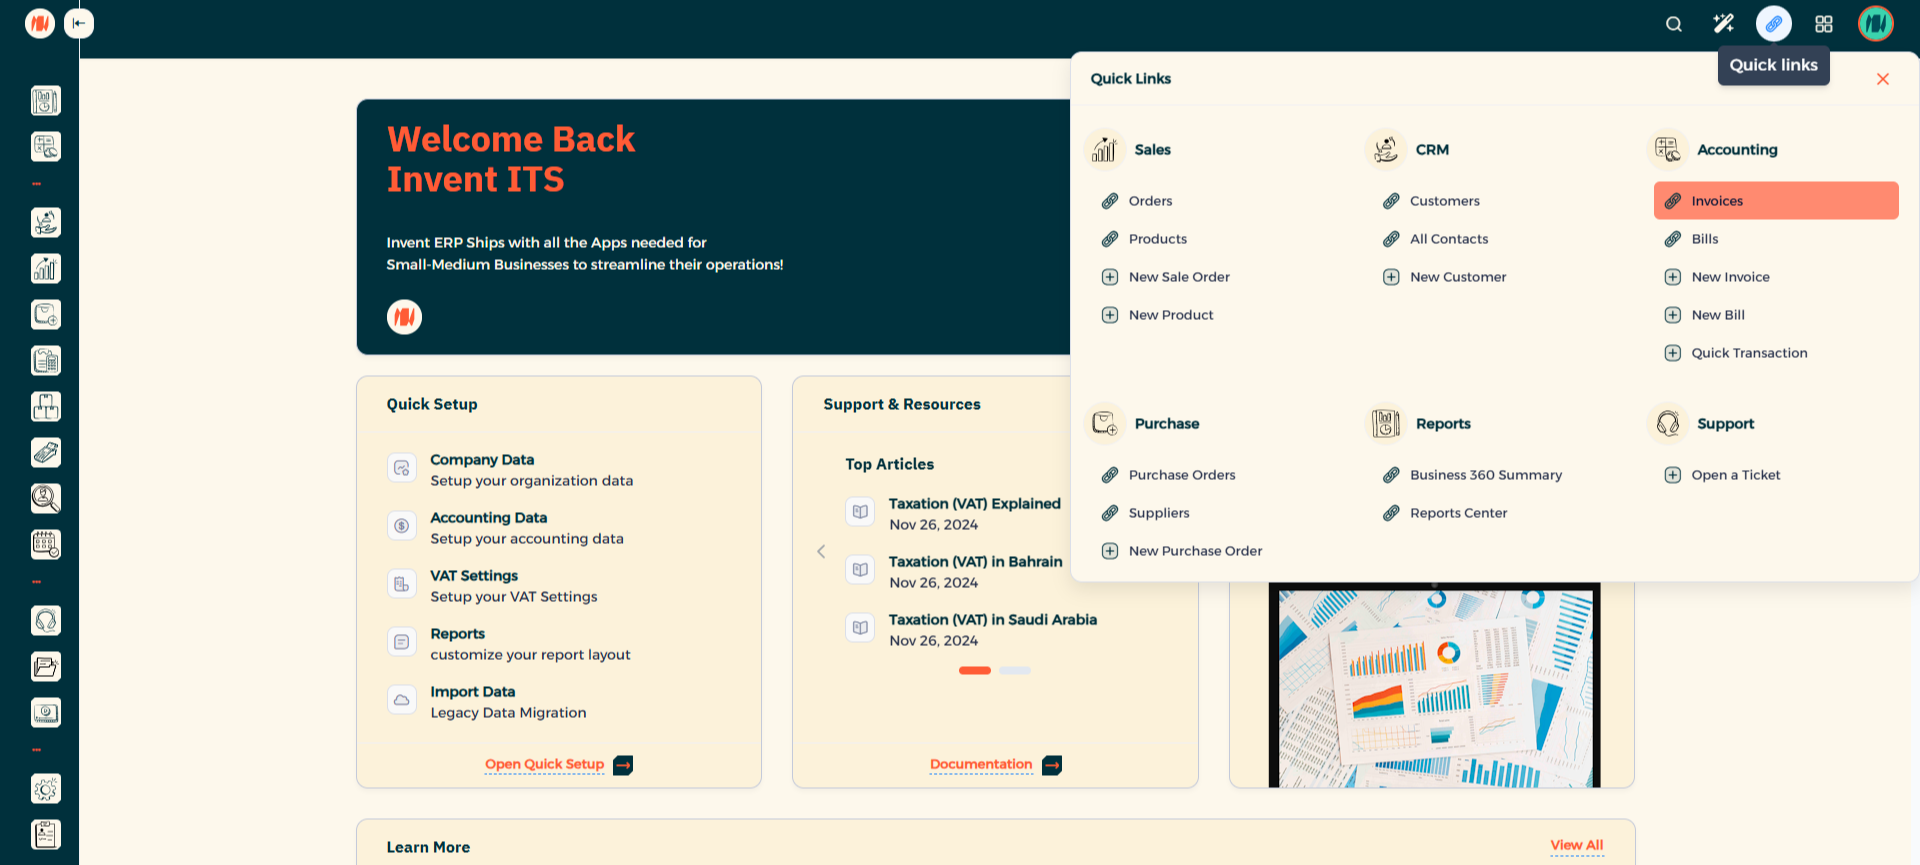
Step 1: Navigate to Invoices
Click on Quick Links then select invoices.
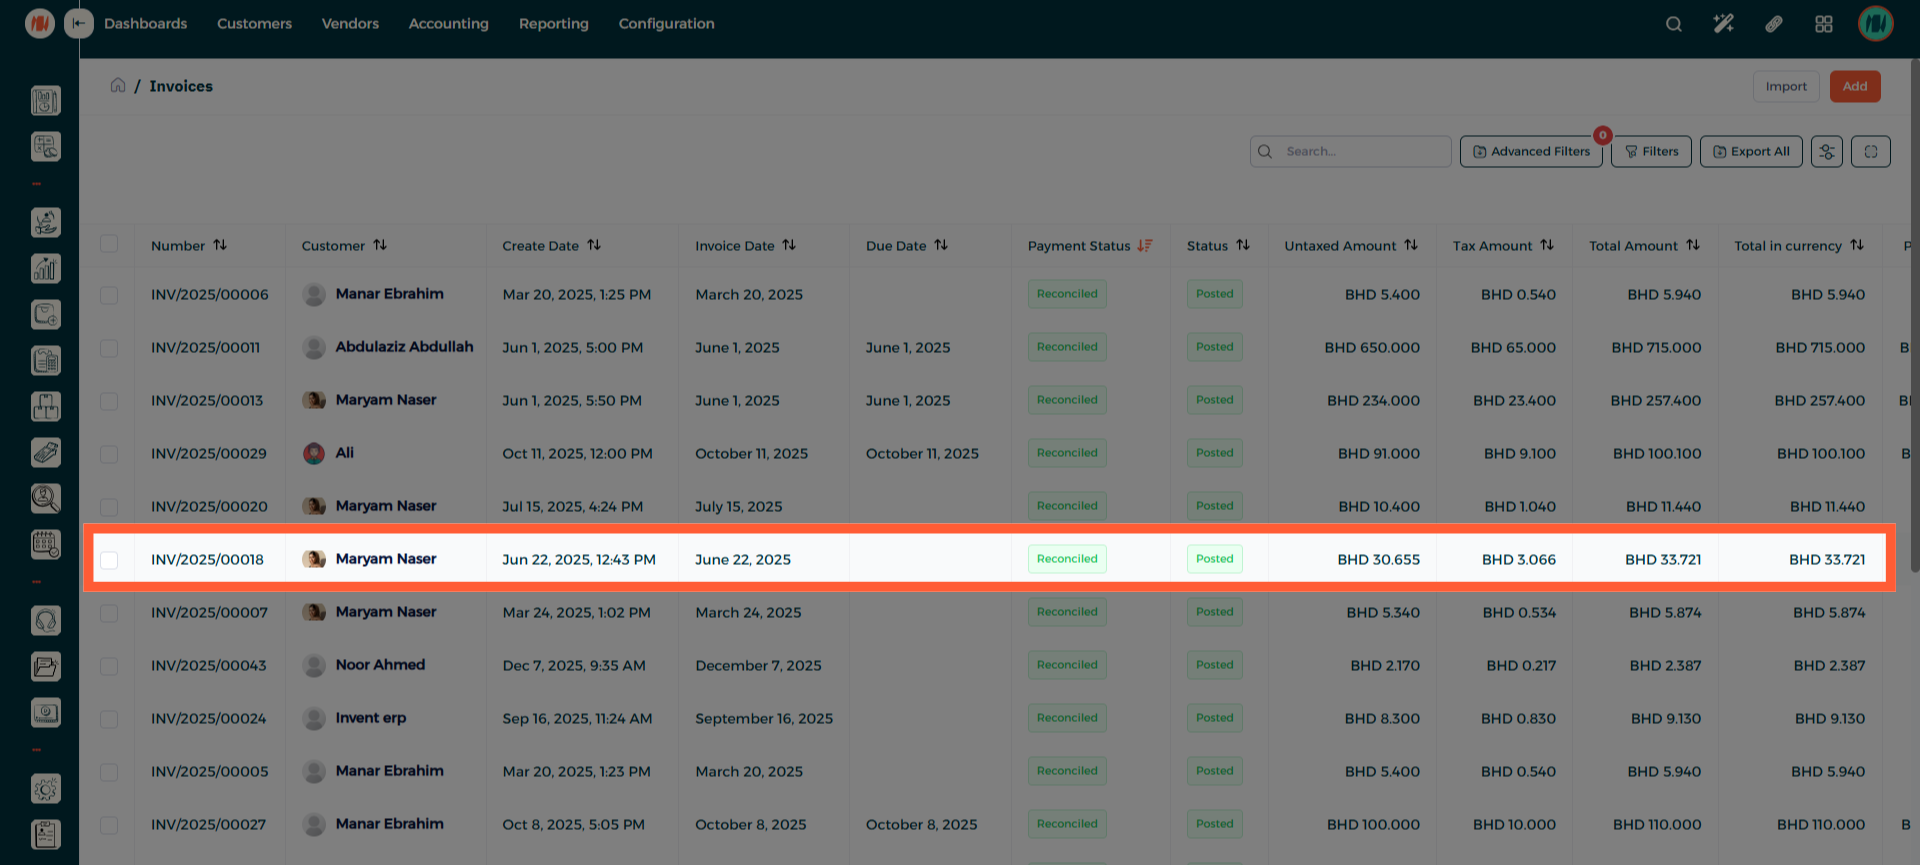
Step 2: Select Invoice
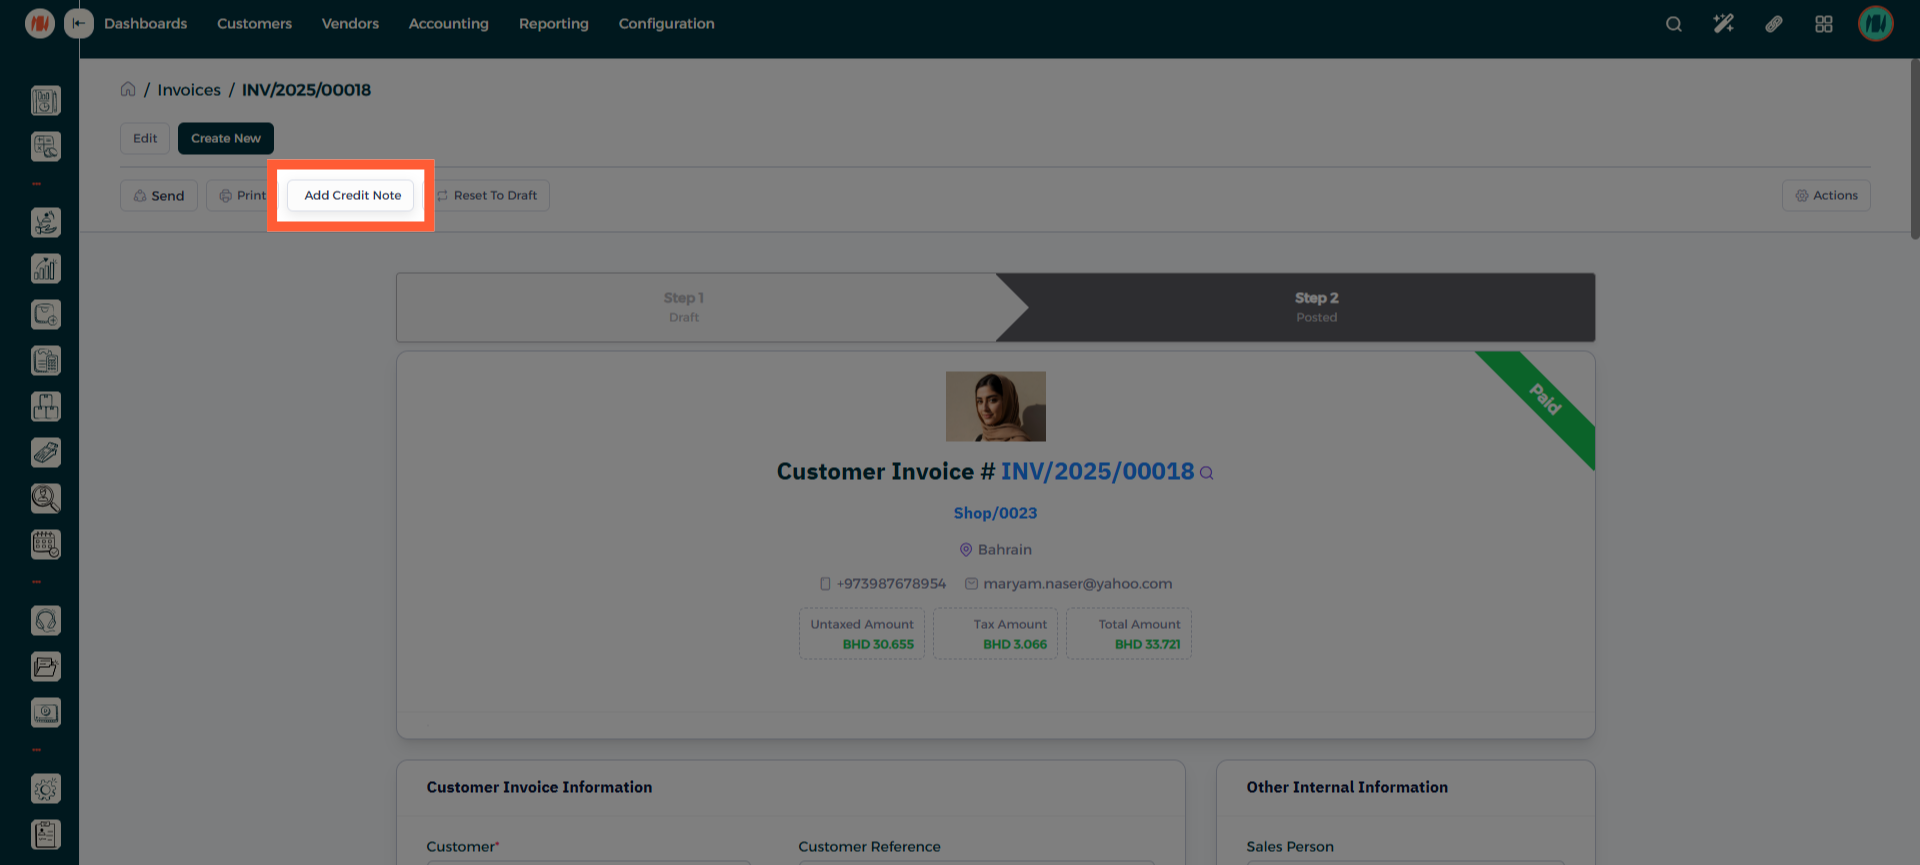
Step 3: Select Add a Credit Note
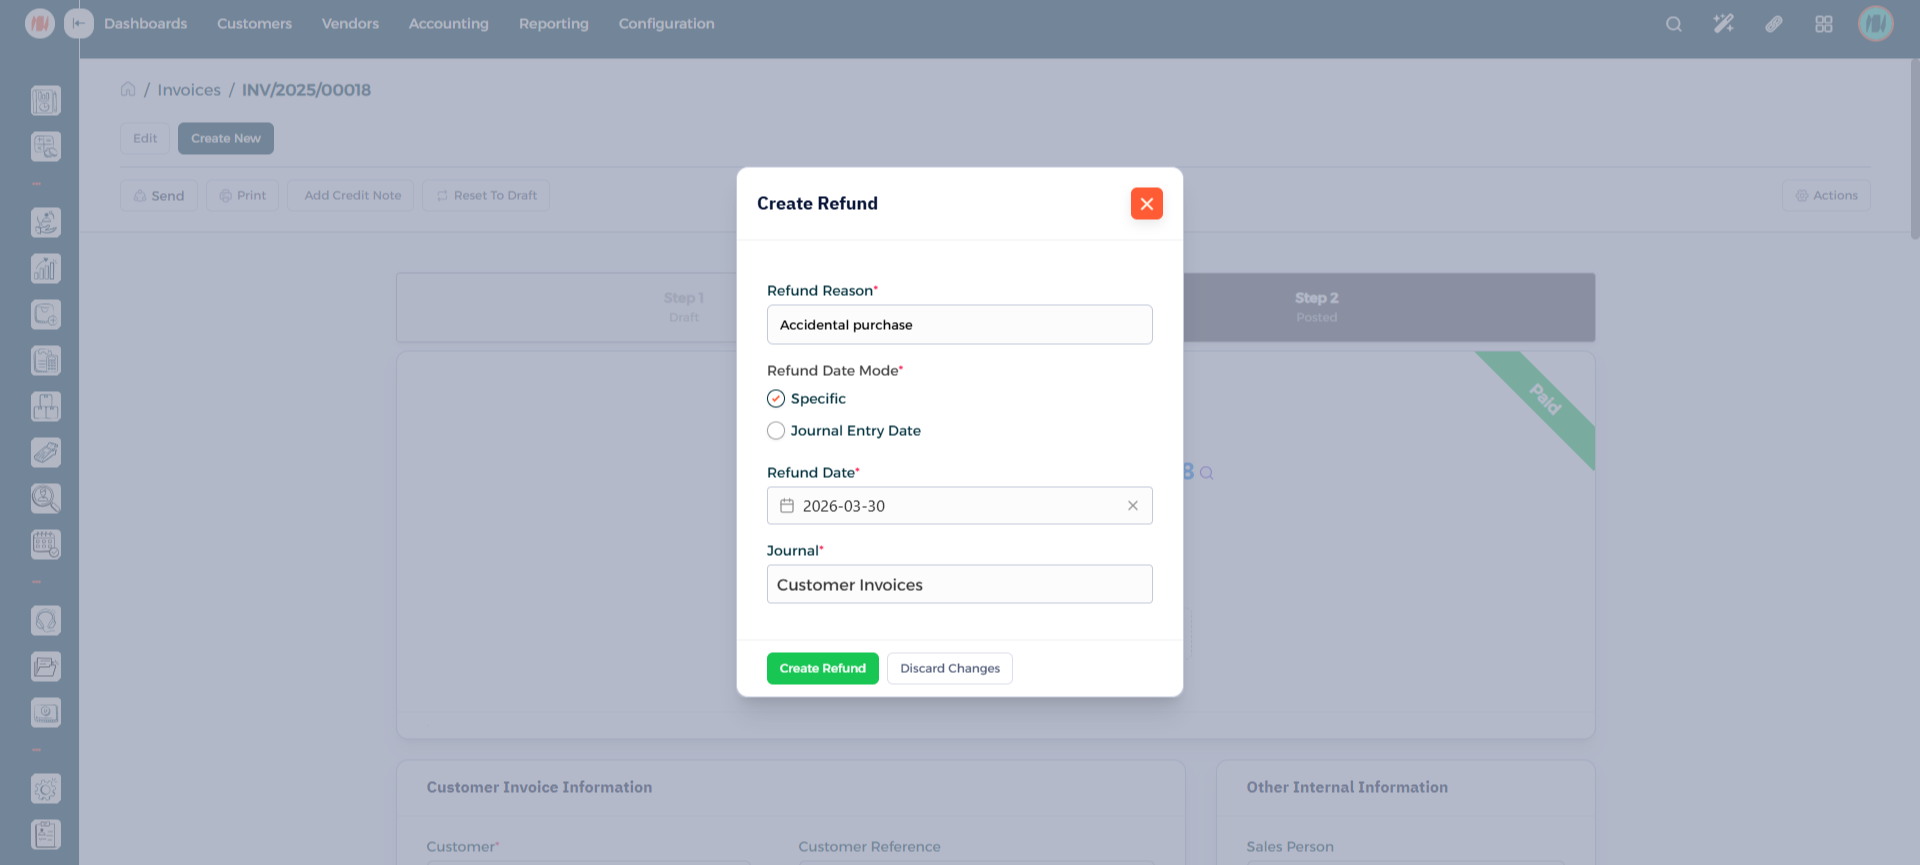
Step 4: Add Details
Add the refund reason, and date, specify the journal then press create.
Step 5: Confirm the Credit Note
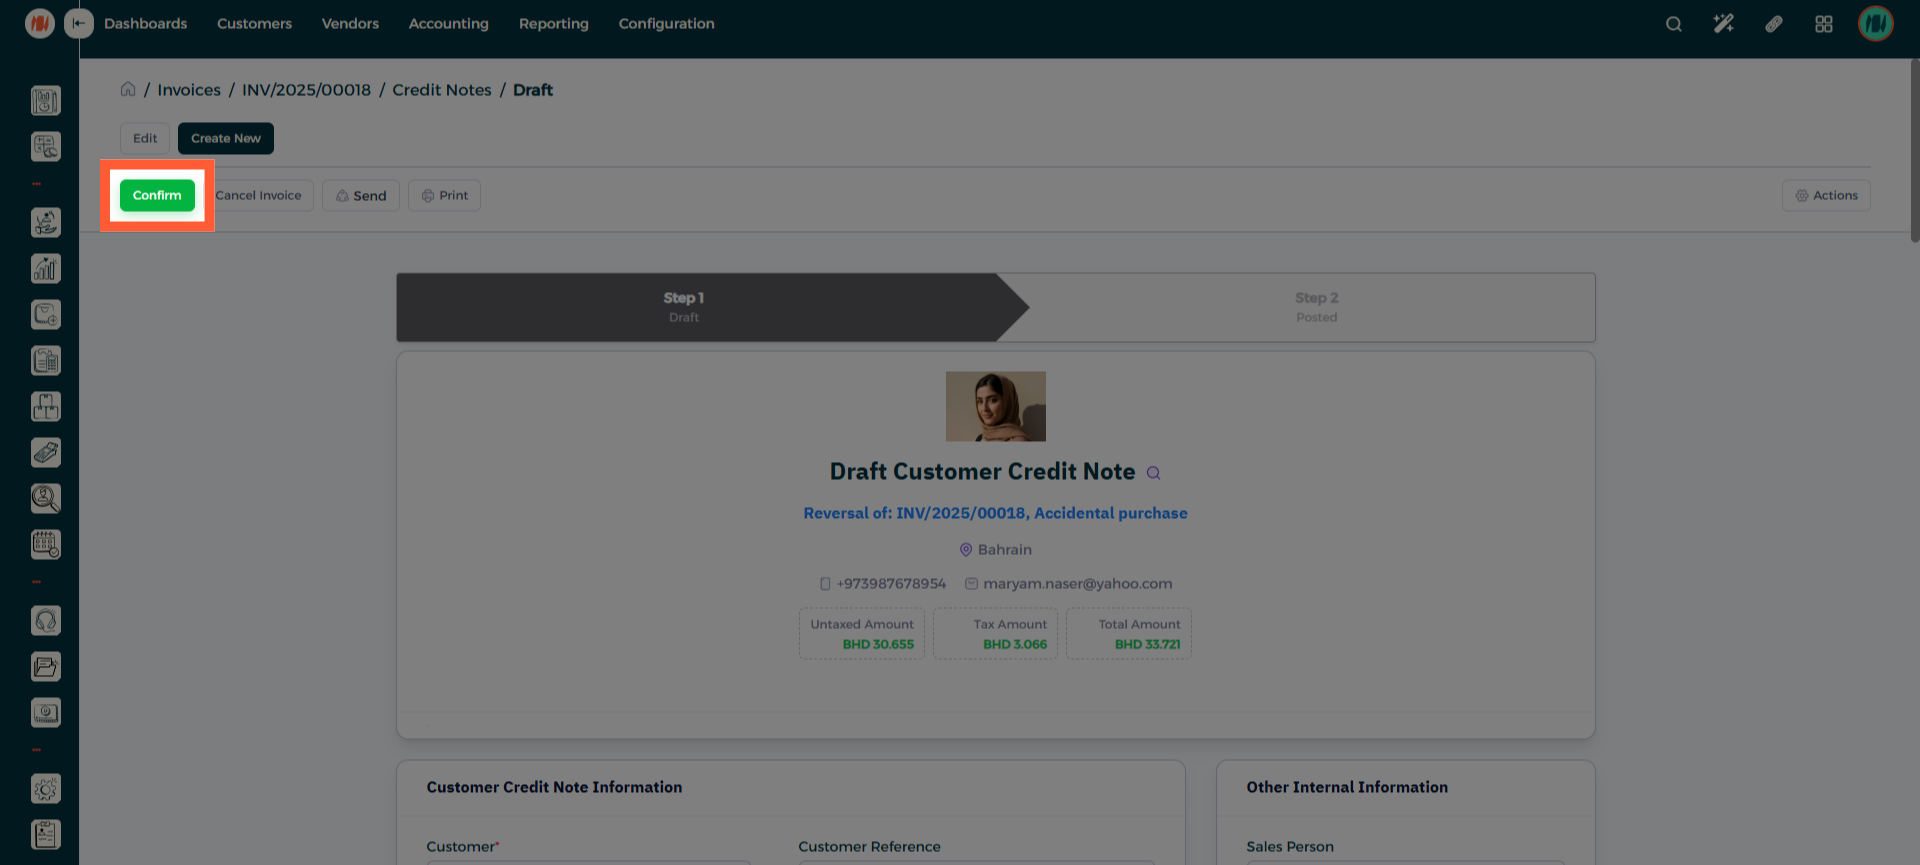
Step 6: Select Register Payment
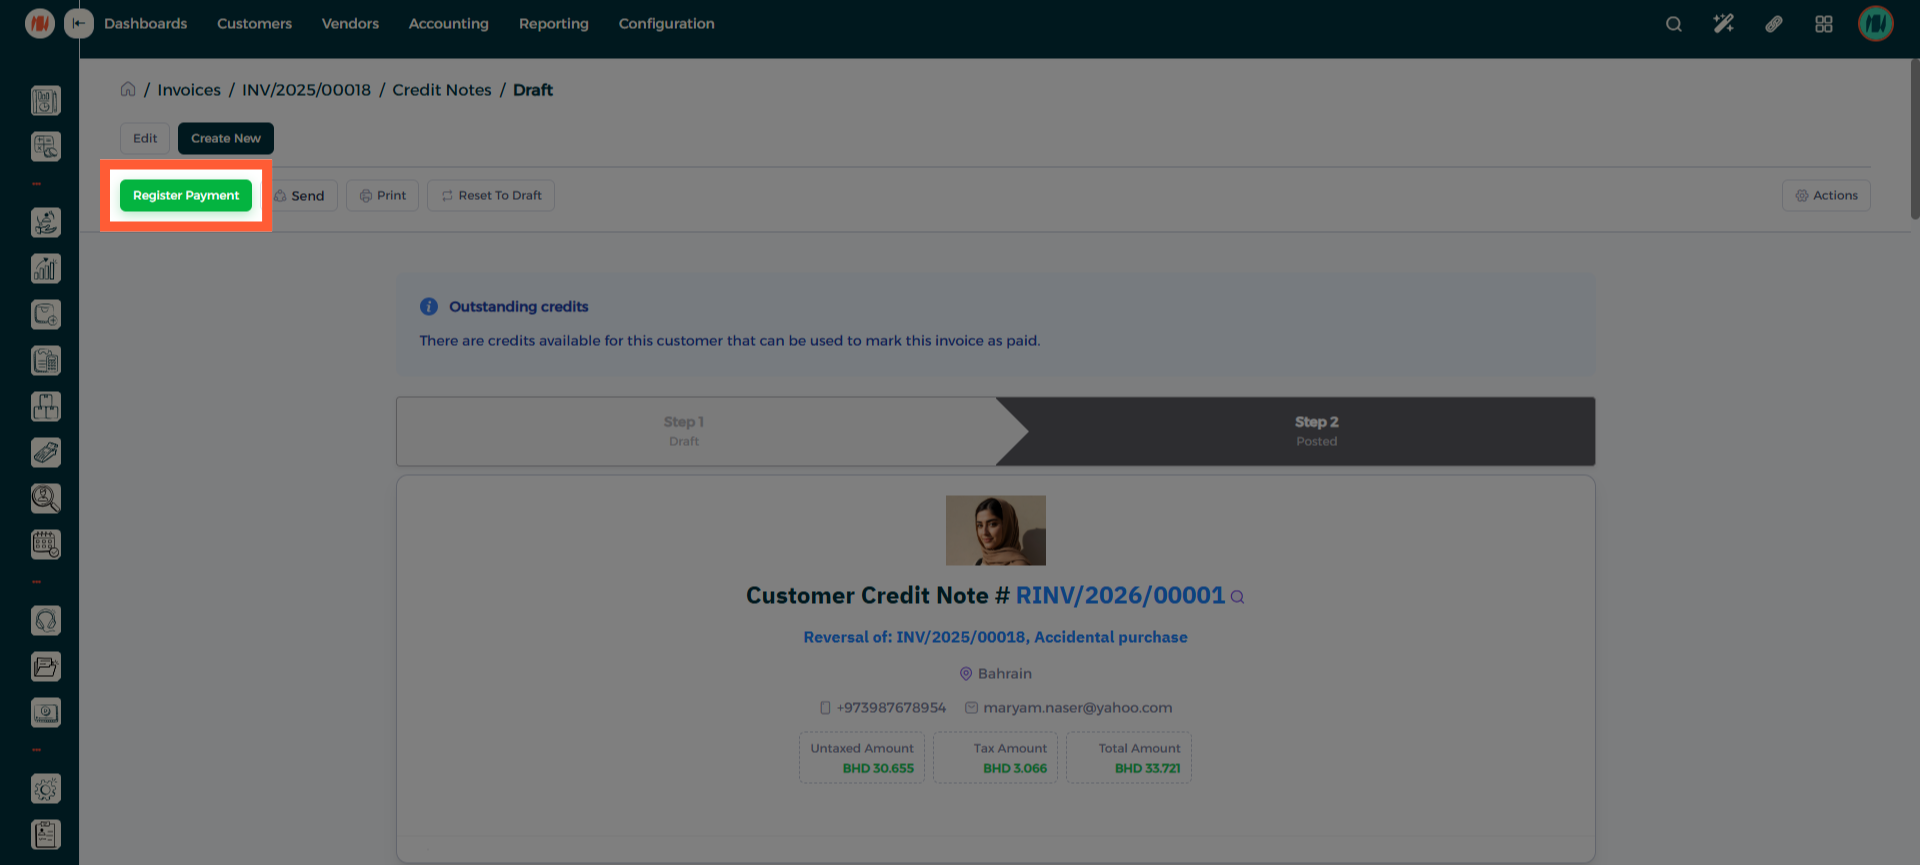
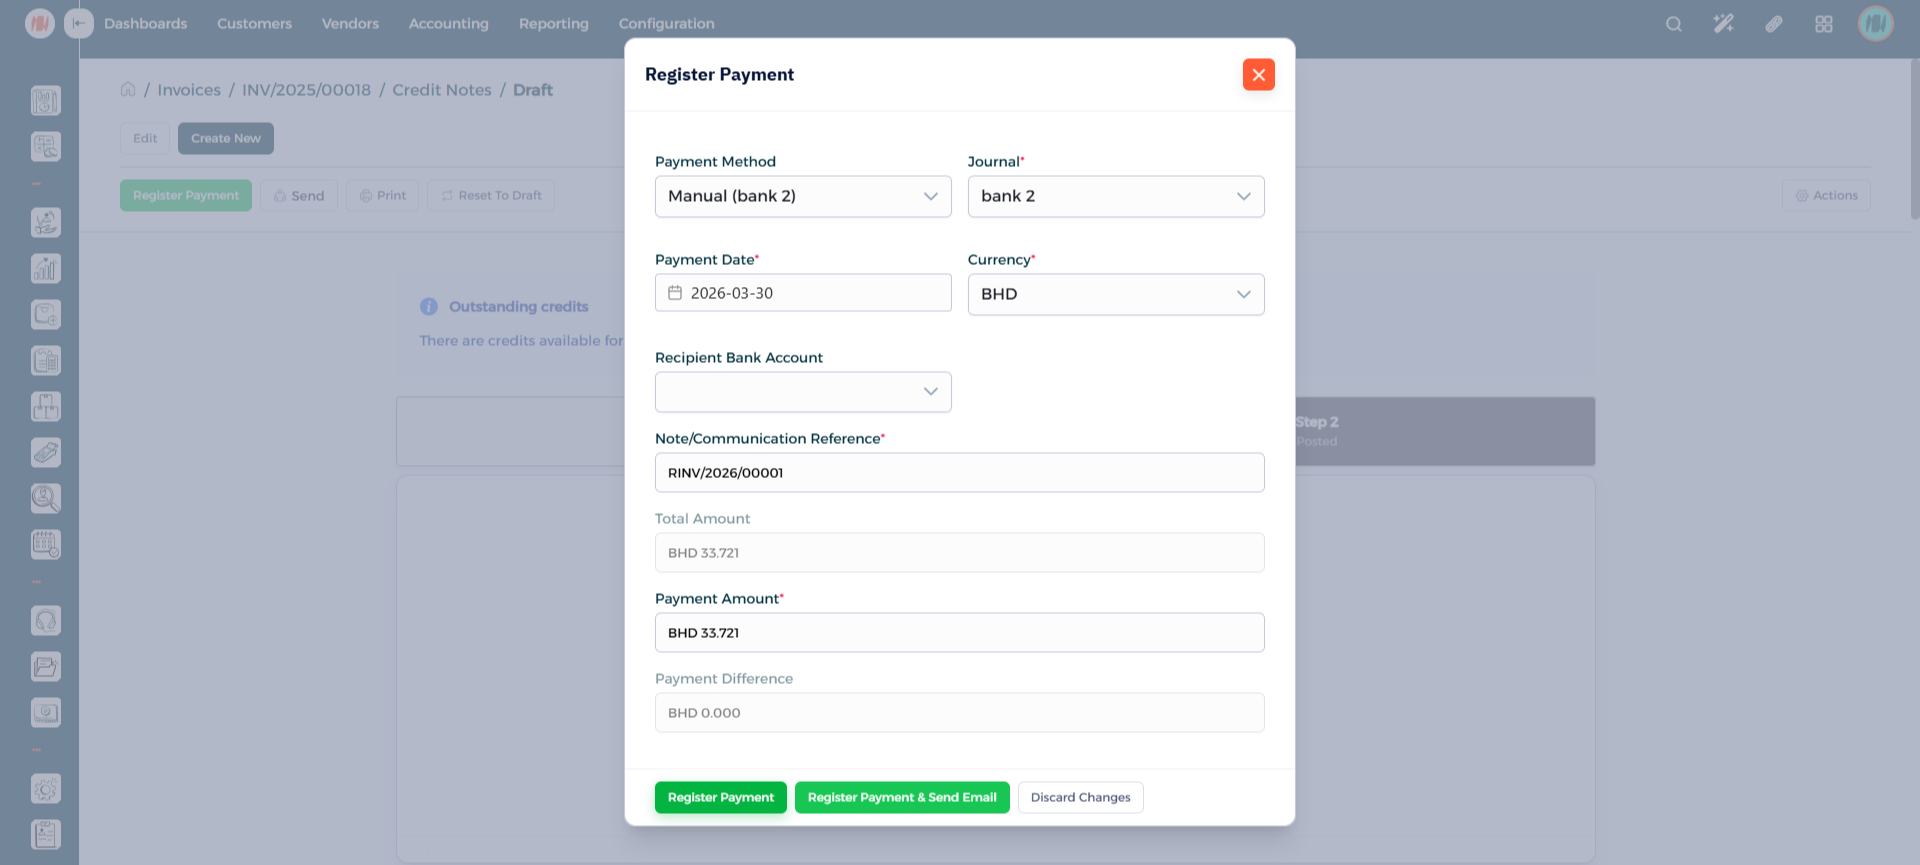
Step 7: Register the Payment
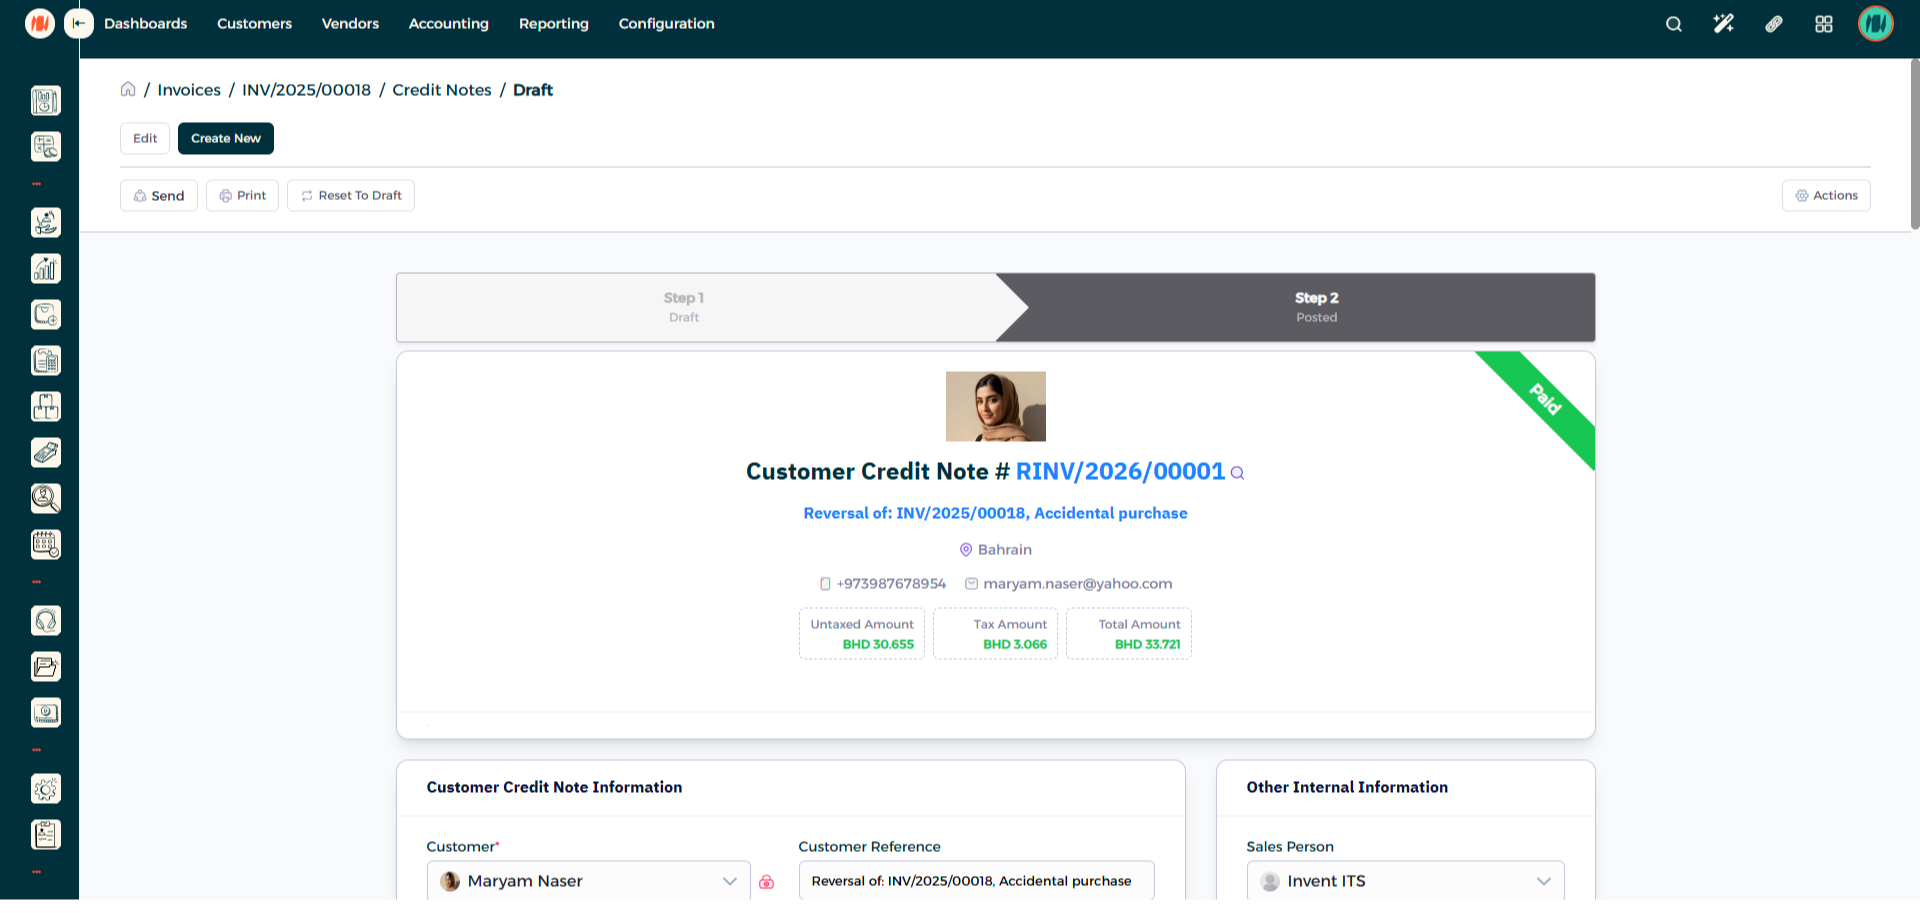
Step 8: Confirm Credit Note Completion
Notes & Tips
- Always double-check before creating a credit note: Verify invoice reference, amounts/quantities, tax codes, posting date, and whether it should be full or partial to avoid accounting errors and unnecessary reversals.
FAQ
Q: What is a credit note? A credit note is a document issued by a seller to reduce or cancel a previously issued invoice — recording a refund, return, or price adjustment and updating the buyer’s outstanding balance and the seller’s sales records.
Q: Does a credit note affect the customer balance immediately? No only after the credit note is Approved/Posted; drafts do not change balances.